
Spring Gardening Guide: Zinnias, the Perfect Summer Bloom
1. Introduction: The Vibrant Appeal of Zinnias
Zinnias are one of the most rewarding annual flowers a gardener can grow. Native to scrublands stretching from the Southwestern United States down through Mexico and South America, these members of the aster (Asteraceae) family are renowned for their vibrant colors, rapid growth, and long-lasting summer blooms. Zinnias grow from seed to flower in as little as 60 days, providing a continuous display of bright petals from early summer until the first frost in autumn. They are heat-tolerant, drought-resistant, and relatively easy to grow, making them ideal for beginners and experienced cut-flower growers alike.
1.1 The Ecological Role of Zinnias in the Garden
Zinnias do more than beautify the garden; they play a critical role in the local ecosystem. The bright, flat-topped blooms act as natural landing pads for a wide range of pollinators. Butterflies—such as Monarchs, Swallowtails, and Painted Ladies—are drawn to the nectar-rich flowers. Honeybees, bumblebees, and native solitary bees visit zinnias continuously, helping pollinate nearby vegetable crops. Additionally, planting zinnias attracts predatory insects like ladybugs, lacewings, and hoverflies, which prey on garden pests like aphids and thrips. This natural pest control improves the health and yield of your entire garden.
1.2 The Cut-Flower Economy for Small Growers
For small-scale market gardeners and flower farmers, zinnias are a staple crop. They are highly productive, featuring a "cut-and-come-again" growth habit—the more flowers you harvest, the more stems the plant produces. Zinnias have a long vase life (typically 7 to 10 days if harvested at the correct stage), making them ideal for fresh summer bouquets, market displays, and restaurant decorations. By selecting unique flower shapes (like dahlia-flowered or crested varieties) and a broad color palette, growers can create stunning displays that attract customers and generate steady summer sales.
1.3 The Evolutionary Resilience of the Zinnia Genus
Zinnias have evolved to thrive in hot, dry climates. Their native habitats are rocky, well-draining soils with low organic matter. This evolutionary history makes them highly drought-tolerant once established. They feature a strong taproot that grows deep to find moisture, along with tough, hairy stems that reduce water loss through evaporation. While they benefit from regular watering and fertile soil in the garden, they can tolerate neglect and dry spells that would kill other annual flowers, making them a resilient choice for hot summer gardens.
2. Botanical Profiles: Zinnia Species and Varieties
To choose the best zinnias for your garden, you must understand the different species and flower structures available.
2.1 Major Zinnia Species
- Zinnia elegans: The classic garden zinnia, featuring large blooms on tall, upright stems (2 to 4 feet). This species is the source of most cut-flower cultivars. They produce single, semi-double, or double blooms in a wide range of colors (except blue).
- Zinnia angustifolia: Known as the narrow-leafed or creeping zinnia. These are compact, bush-like plants (8 to 12 inches tall) covered in small, single flowers (usually orange, yellow, or white). They are highly resistant to powdery mildew and make excellent bedding or border plants.
- Zinnia haageana: Known as Mexican zinnias, featuring small, bicolor blooms in warm tones of red, orange, and yellow. They are highly heat-resistant.
2.2 Popular Cultivar Series
- Benary's Giant: The industry standard for cut-flower production. These plants grow 3 to 4 feet tall, producing large, double blooms (up to 4 inches across) on strong, thick stems. They have excellent resistance to heat and rain.
- Oklahoma: A high-yielding series producing medium-sized, double flowers (2 inches across). They are highly resistant to powdery mildew and have a long vase life.
- Profusion: A hybrid series (Z. elegans x Z. angustifolia) producing compact, disease-resistant plants that bloom continuously without deadheading.
- Queen Lime Series: Unique, double flowers featuring dusty, pastel colors (lime-green mixed with rose, orange, or red). They are highly popular with florists.
2.3 Dahlia-Flowered and Cactus Varieties
- Dahlia-Flowered Zinnias: These varieties feature large, densely packed petals that curve slightly backward, creating a full, rounded shape similar to a dahlia. They are highly valued for their showy appearance in garden borders and bouquets.
- Cactus-Flowered Zinnias: These cultivars have long, narrow petals that roll backward along their margins, creating a spiky, quill-like look. They add unique texture to bouquets and displays. Giant Cactus and Senorita are popular cactus series.
- Scabiosa-Flowered Zinnias: Also known as crested zinnias, these blooms feature a central crest of tiny, tubular disc florets surrounded by a collar of flat ray petals, resembling a scabiosa flower. They are highly attractive to bees and beneficial predators.
- Whirlygig: A popular open-pollinated variety that features double, bicolor blooms in contrasting shades of red, yellow, orange, and white. They are highly eye-catching and look excellent in summer borders.
2.3 Dahlia-Flowered and Cactus Varieties
- Dahlia-Flowered Zinnias: These varieties feature large, densely packed petals that curve slightly backward, creating a full, rounded shape similar to a dahlia. They are highly valued for their showy appearance in garden borders and bouquets.
- Cactus-Flowered Zinnias: These cultivars have long, narrow petals that roll backward along their margins, creating a spiky, quill-like look. They add unique texture to bouquets and displays. Giant Cactus and Senorita are popular cactus series.
- Scabiosa-Flowered Zinnias: Also known as crested zinnias, these blooms feature a central crest of tiny, tubular disc florets surrounded by a collar of flat ray petals, resembling a scabiosa flower. They are highly attractive to bees and beneficial predators.
2.3 Flower Shapes and Structures
Zinnia blooms are categorized by their shape and arrangement of petals:
- Single: Features a single row of petals surrounding a visible center disc.
- Semi-Double: Features multiple rows of petals with a partially visible center disc.
- Double: Features multiple rows of overlapping petals that completely cover the center disc, creating a full, dome-like bloom.
- Cactus: Features long, narrow petals that curl backward, creating a spiky appearance.
3. Propagation: Direct Sowing vs. Transplanting
Zinnias can be propagated by direct sowing or transplanting. Each method has its own benefits.
3.1 The Case for Direct Sowing
Direct sowing is the preferred method for zinnias. Because they grow rapidly, they do not benefit from a long indoor starter period. Direct sowing also avoids transplant shock, as zinnia roots are sensitive to disturbance. Plant seeds outdoors after the danger of frost has passed and soil temperatures reach 70°F (21°C). Sow seeds 1/4 inch deep in rows spaced 12 inches apart. Keep the soil moist until the seeds germinate (usually 4 to 7 days).
3.2 Sowing Indoors for Early Blooms
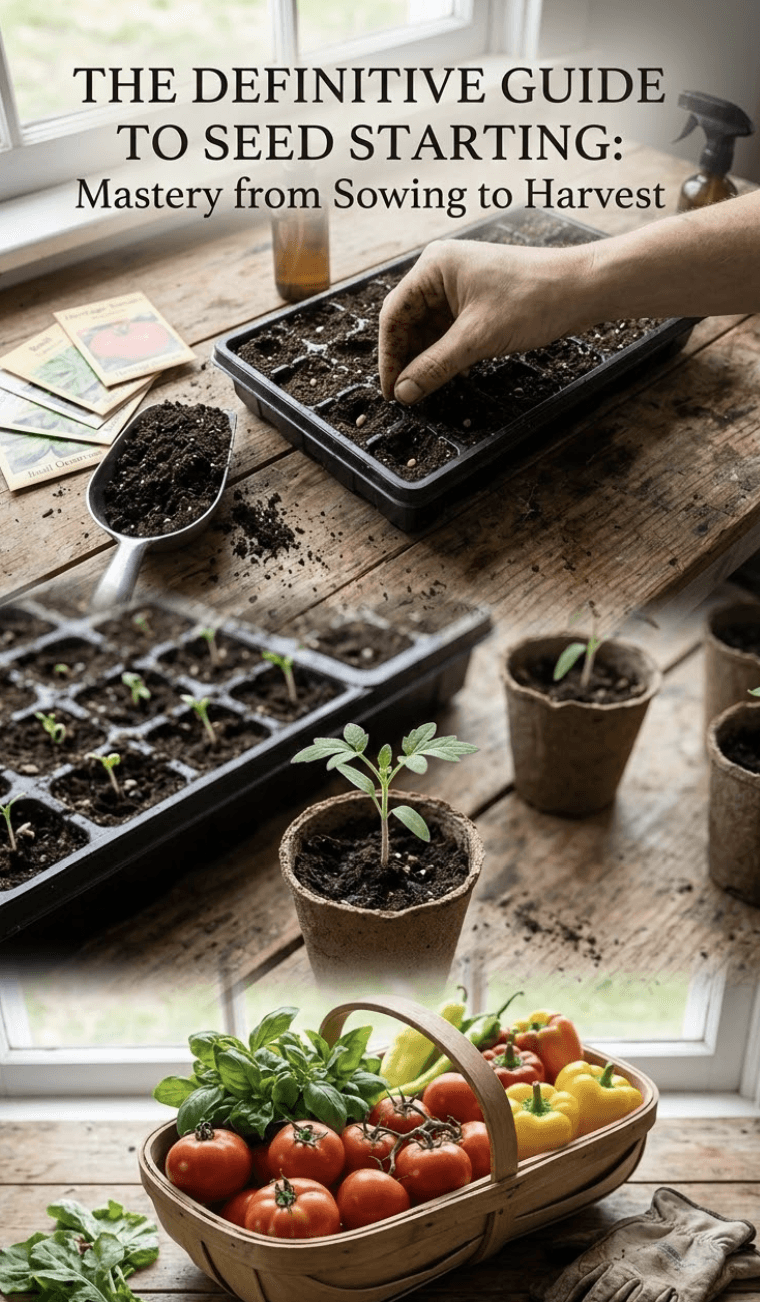
If you want early blooms in late spring, start seeds indoors 3 to 4 weeks before your last frost date. Sow seeds in large biodegradable peat pots or paper pots to minimize root disturbance during transplanting. Place trays under bright grow lights and keep temperatures between 70°F and 75°F (21°C to 24°C). Once the danger of frost has passed, transplant the seedlings into the garden beds, placing the entire biodegradable pot into the soil to protect the root systems.
3.3 Hardening Off and Acclimation
Acclimate indoor-grown seedlings to outdoor sun and wind through a 7-day hardening off process. Move them outdoors into a sheltered, shady spot for a few hours on the first day, gradually increasing their exposure to direct sunlight. Water them thoroughly before transplanting, and plant them on a cloudy day or in the late afternoon to reduce water stress.
4. Soil Requirements, pH, and Nutrients
Zinnias are adaptable, but they perform best in rich, well-draining soil with a pH of 5.5 to 7.5.
4.1 Preparing the Bed
Before planting, apply a 1-inch layer of organic compost to the surface of the bed. Compost adds organic matter, feeds beneficial soil microbes, and improves aggregate structure. Work the compost into the top 2 to 3 inches of soil using a broadfork or rake, keeping the bed loose and aerated. Excellent drainage is critical; if the soil remains saturated, zinnia roots will suffocate and rot.
4.2 Nutrient Management
Zinnias are moderate feeders. Avoid applying excessive nitrogen fertilizers, as too much nitrogen will stimulate lush leaf growth and soft stems, but reduce flower production and attract pests like aphids. Focus early fertilizer applications on phosphorus and potassium to support root and flower development. Apply a slow-release organic fertilizer (such as bone meal or kelp meal) during bed preparation, and supplement with a diluted liquid fish-and-kelp emulsion once the plants start producing flower buds.
4.3 Micronutrient Requirements: Zinc and Boron
Like most flowering annuals, zinnias require trace minerals to support their metabolic processes:
- Zinc: Essential for hormone production (auxins) and enzyme activity. A lack of zinc causes small, distorted leaves and shortened internodes, leading to a stunted appearance.
- Boron: Critical for cell wall synthesis, sugar transport, and pollen tube development. A boron deficiency can lead to deformed flower heads and weak stems that snap easily under wind loads. Apply compost and volcanic rock dust to maintain trace mineral levels.
- Copper: Plays a critical role in photosynthesis, cell wall strength, and protein synthesis. A copper deficiency causes young leaf margins to curl and leaf tips to turn white. Maintain balanced trace minerals by applying kelp meal and rock dust, which slowly release these elements to the root zone.
4.3 Micronutrient Requirements: Zinc and Boron
Like most flowering annuals, zinnias require trace minerals to support their metabolic processes:
- Zinc: Essential for hormone production (auxins) and enzyme activity. A lack of zinc causes small, distorted leaves and shortened internodes, leading to a stunted appearance.
- Boron: Critical for cell wall synthesis, sugar transport, and pollen tube development. A boron deficiency can lead to deformed flower heads and weak stems that snap easily under wind loads. Apply compost and volcanic rock dust to maintain trace mineral levels.
5. The Art of Pinching and Pruning for Bushy Growth
To maximize flower production and grow strong, usable stems, you must pinch your zinnia plants when they are young.
5.1 The Physiology of Pinching
Pinching is the removal of the plant's main growing tip (apical meristem). In a young, unpinched plant, the apical meristem produces the hormone auxin, which moves downward through the stem and suppresses the growth of lateral buds (apical dominance). This results in a single, tall main stem with one flower. By pinching off the growing tip, you stop the supply of auxin. This allows the lateral buds in the leaf axils to grow, producing multiple side branches and increasing the total number of flowers.
5.2 Step-by-Step Pinching Technique
- Timing: Wait until the young zinnia plant is 8 to 12 inches tall and has developed 3 to 4 sets of true leaves.
- The Cut: Locate the central growing tip. Use clean, sharp pruning shears or your fingers to pinch off the stem just above the top set of leaves.
- Result: The plant will quickly grow new side branches from the leaf axils, creating a bushy, productive plant with multiple flowering stems.
5.3 Pruning and Deadheading
Throughout the summer, harvest flowers regularly or remove old, faded blooms (deadheading). Deadheading stops the plant from producing seeds, encouraging it to channel its energy into growing new buds and stems. Cut the faded flower stems back to a leaf node to keep the plant neat and stimulate lateral growth.
6. Disease Management: Powdery Mildew and Leaf Spot Prevention
Zinnias are susceptible to several diseases, particularly fungal infections that thrive in warm, humid weather.
6.1 Powdery Mildew (Erysiphe cichoracearum)
Powdery mildew appears as a white, powdery coating on leaf surfaces, slowly spreading to stems and flower buds. It stunts growth, distorts leaves, and reduces flower quality. The fungus thrives in warm, humid conditions with poor airflow.
- Prevention: Space your plants at least 12 inches apart to ensure good airflow. Water at the base of the plant using drip irrigation to keep the leaves dry. Apply a biological fungicide containing Bacillus subtilis to the foliage to outcompete fungal spores.
- Treatment: If powdery mildew strikes, spray the leaves with a potassium bicarbonate or horticultural oil solution to kill the fungus.
6.2 Biological and Home Remedies for Powdery Mildew
In addition to commercial biological fungicides, you can use simple home remedies to prevent powdery mildew:
- Baking Soda (Sodium Bicarbonate): Mix 1 tablespoon of baking soda and 1 teaspoon of liquid soap in 1 gallon of water. Spray onto leaves weekly. The baking soda raises the leaf surface pH, making it too alkaline for fungal spores to germinate.
- Milk Spray: Mix 1 part milk with 9 parts water (10% milk solution) and spray onto foliage during direct sunlight. The proteins in the milk react with sunlight to produce free radicals that are toxic to the fungus, helping to keep leaves clean organically.
6.2 Biological and Home Remedies for Powdery Mildew
In addition to commercial biological fungicides, you can use simple home remedies to prevent powdery mildew:
- Baking Soda (Sodium Bicarbonate): Mix 1 tablespoon of baking soda and 1 teaspoon of liquid soap in 1 gallon of water. Spray onto leaves weekly. The baking soda raises the leaf surface pH, making it too alkaline for fungal spores to germinate.
- Milk Spray: Mix 1 part milk with 9 parts water (10% milk solution) and spray onto foliage during direct sunlight. The proteins in the milk react with sunlight to produce free radicals that are toxic to the fungus, helping to keep leaves clean organically.
6.2 Alternaria Leaf Spot
Alternaria leaf spot appears as small, reddish-brown spots with purplish borders on the leaves. The spots enlarge, develop grey centers, and cause the leaves to dry up and drop. Prevent by mulching the beds to keep soil-borne spores from splashing onto the leaves, and remove any infected foliage immediately.
7. Pollinators and Ecology: Beneficial Insect Attraction
Zinnias are an ecological asset, attracting a wide range of beneficial insects that support your entire garden.
7.1 Attracting Pollinators
The flat, open blooms of single and semi-double zinnias allow pollinators to access the pollen and nectar easily. Plant a mix of colors (yellow, pink, red, orange) to attract different bee and butterfly species. By providing a constant food source, you support local pollinator health and increase fruit set on nearby vegetable crops like cucumbers, squash, and tomatoes.
7.2 Attracting Beneficial Predators
Zinnias provide shelter and food for beneficial predatory insects like ladybugs, hoverflies, and lacewings. These insects prey on garden pests like aphids, thrips, and spider mites. Fostering these beneficial predators creates a natural system of pest control, reducing the need for chemical insecticides.
8. Harvesting Cut Flowers and Seed Saving
Proper harvesting preserves flower quality, while seed saving allows you to grow the same varieties next season.
8.1 The Wiggle Test for Harvesting
Harvest zinnias when they are fully open but before they produce pollen. To check if a flower is ready, perform the wiggle test: grasp the stem 8 inches below the flower and wiggle it gently. If the stem is soft and the flower droops, it is too young. If the stem is stiff and the flower remains upright, it is ready to harvest. Cut the stems in the early morning, placing them immediately into clean water.
8.2 Stem Hydration Mechanics and Post-Harvest Handling
Zinnias have hollow stems with high water conduction capacity. However, they are highly sensitive to bacterial blockage in the xylem channels. If the harvest buckets contain bacteria, they will quickly colonize the stem cuts, clogging the xylem and preventing the flower from absorbing water. This causes the flower head to droop prematurely (known as bent neck). Prevent this by using strictly clean buckets, adding a few drops of bleach or commercial flower preservative to the water, and stripping all lower foliage to keep leaves out of the water.
8.2 Stem Hydration Mechanics and Post-Harvest Handling
Zinnias have hollow stems with high water conduction capacity. However, they are highly sensitive to bacterial blockage in the xylem channels. If the harvest buckets contain bacteria, they will quickly colonize the stem cuts, clogging the xylem and preventing the flower from absorbing water. This causes the flower head to droop prematurely (known as bent neck). Prevent this by using strictly clean buckets, adding a few drops of bleach or commercial flower preservative to the water, and stripping all lower foliage to keep leaves out of the water.
8.2 Saving Zinnia Seeds
To save seeds, let the flowers mature on the plant until the petals fade and the seed head turns brown and dry. Cut the dry seed head, crush it, and separate the flat, shield-shaped seeds. Store the seeds in a paper envelope in a cool, dark place.
9. Frequently Asked Questions
1. What is the best way to propagate zinnias?
Direct sowing is the preferred method. Zinnia seeds germinate rapidly in warm soil (70°F) and develop strong taproots that are sensitive to transplant shock. Sowing directly in the garden bed avoids root disturbance and produces strong, healthy plants.
2. What is the "wiggle test" and how does it help when harvesting?
The wiggle test is a physical check to determine if a zinnia is mature enough to harvest. Grasp the stem 8 inches below the bloom and wiggle it gently; if the stem is stiff and the flower remains upright, it is ready to harvest. If it bends, it is too young.
3. Why should I pinch young zinnia plants?
Pinching removes the apical meristem, stopping the production of auxin and breaking apical dominance. This encourages the lateral buds in the leaf axils to grow, producing multiple side branches and increasing the total number of flowers.
4. What causes powdery mildew on zinnias and how can I prevent it?
Powdery mildew is a fungal disease that thrives in warm, humid conditions with poor airflow, appearing as a white coating on leaves. Prevent it by spacing plants at least 12 inches apart, watering at the base using drip irrigation, and applying biological fungicides.
5. Can I save seeds from my garden zinnias?
Yes, as long as they are open-pollinated varieties. Let the seed head dry completely on the vine, crush the dried head to extract the shield-shaped seeds, and store them in a cool, dry place. Seeds will remain viable for 3 to 5 years.
6. What are the best companion plants for zinnias?
Zinnias pair well with vegetable crops like tomatoes, squash, and peppers because they attract bees and beneficial predators (ladybugs, hoverflies) that pollinate crops and eat pests like aphids.
7. How deep should I plant zinnia seeds and how long do they take to germinate?
Sow seeds 1/4 inch deep in warm, moist soil. They typically germinate in 4 to 7 days, and the plants will start producing flowers in 60 to 75 days from sowing.
8. How do I extend the vase life of harvested zinnias?
Harvest flowers in the early morning using the wiggle test. Strip the lower leaves from the stem, place them immediately into clean water with flower food, and change the water daily to prevent bacterial buildup.
Expert Insights & FAQs
What is the best way to propagate zinnias?
Direct sowing is the preferred method. Zinnia seeds germinate rapidly in warm soil (70°F) and develop strong taproots that are sensitive to transplant shock. Sowing directly in the garden bed avoids root disturbance and produces strong, healthy plants.
What is the "wiggle test" and how does it help when harvesting?
The wiggle test is a physical check to determine if a zinnia is mature enough to harvest. Grasp the stem 8 inches below the bloom and wiggle it gently; if the stem is stiff and the flower remains upright, it is ready to harvest. If it bends, it is too young.
Why should I pinch young zinnia plants?
Pinching removes the apical meristem, stopping the production of auxin and breaking apical dominance. This encourages the lateral buds in the leaf axils to grow, producing multiple side branches and increasing the total number of flowers.
What causes powdery mildew on zinnias and how can I prevent it?
Powdery mildew is a fungal disease that thrives in warm, humid conditions with poor airflow, appearing as a white coating on leaves. Prevent it by spacing plants at least 12 inches apart, watering at the base using drip irrigation, and applying biological fungicides.
Can I save seeds from my garden zinnias?
Yes, as long as they are open-pollinated varieties. Let the seed head dry completely on the vine, crush the dried head to extract the shield-shaped seeds, and store them in a cool, dry place. Seeds will remain viable for 3 to 5 years.
What are the best companion plants for zinnias?
Zinnias pair well with vegetable crops like tomatoes, squash, and peppers because they attract bees and beneficial predators (ladybugs, hoverflies) that pollinate crops and eat pests like aphids.
How deep should I plant zinnia seeds and how long do they take to germinate?
Sow seeds 1/4 inch deep in warm, moist soil. They typically germinate in 4 to 7 days, and the plants will start producing flowers in 60 to 75 days from sowing.
How do I extend the vase life of harvested zinnias?
Harvest flowers in the early morning using the wiggle test. Strip the lower leaves from the stem, place them immediately into clean water with flower food, and change the water daily to prevent bacterial buildup.
Johnnie McCormick
Zone 7b/8a - North Central Alabama
Johnnie McCormick is a gardening hobbyist and the founder of My Garden Spot. Raised in north-central Alabama, his passion for gardening began in his youth. In 2008, he established a large market garden, teaching himself high-yield growing methods. In the years since, he has operated seasonal seedling sales for transplants, specializing in heirloom tomatoes, peppers, eggplants, decorative ground covers like Ajuga (Bugleweed), marigolds, nasturtiums, and fresh kitchen-window herb arrangements (basil, cilantro). Today, he gardens in the hills between Birmingham and Jasper, Alabama (Zone 7b/8a), sharing practical, community-focused gardening resources.
Verified Authoritative Citations & References
In alignment with our strict E-E-A-T research and verification guidelines, this guide cross-references data from the United States Department of Agriculture (USDA) and Cooperative Extension Service programs.
- Cornell Cooperative Extension: Home Vegetable Gardening Guide and vegetable variety recommendations. gardening.cals.cornell.edu
- Penn State Extension: Master Gardener Manual and companion planting matrices. extension.psu.edu
- Alabama Cooperative Extension System (ACES): Raised bed construction plans and regional seed planting calendars. aces.edu
- USDA NRCS: Cover crops and biological soil health guidelines. nrcs.usda.gov
Please log in to view comments.