Maximizing Yields: The Complete Guide to Biointensive Garden Space and Successional Planning
1. Introduction: The Vision of Biointensive Production
For the small-scale grower, urban farmer, or backyard homesteader, space is the ultimate limiting factor. The traditional agricultural paradigm, which relies on expansive monoculture rows separated by wide tractor pathways, is highly inefficient on a localized scale. To thrive in limited spaces, growers must look to biointensive agriculture—a holistic, sustainable system designed to maximize caloric and nutrient yields per square foot while simultaneously building soil fertility. By using intensive spacing, vertical cultivation, companion planting, and meticulous succession planning, a grower can produce up to four times the yield of conventional row gardening on the same footprint.
At the core of biointensive production is the recognition that soil is not merely a medium to hold plants upright, but a living, dynamic ecosystem. The biointensive method, popularized by figures like Alan Chadwick and John Jeavons, treats the garden as a three-dimensional living system. Instead of focusing solely on the horizontal plane, we must optimize the vertical space, the sub-surface rhizosphere, and the temporal dimension of the garden. In this comprehensive guide, we will dissect the advanced horticultural techniques required to extract the absolute maximum yield from your garden beds, ensuring every square inch of your property is productive, healthy, and resilient.
1.1 The Roots of Biointensive Agriculture
The biointensive method did not emerge overnight. It represents a synthesis of centuries of European intensive market gardening, traditional Asian agriculture, and modern biological sciences. In the late 1960s, Alan Chadwick combined French Intensive gardening techniques with Biodynamic concepts at the University of California, Santa Cruz. Chadwick demonstrated that by combining double-dug raised beds with close, staggered plant spacing, he could grow an astonishing amount of high-quality produce with minimal water and external inputs. John Jeavons later codified these techniques, conducting extensive research to show how biointensive farming could address global food security issues on tiny plots of land. By focusing on soil health and biodiversity, the biointensive approach bypasses the energy-intensive inputs of industrial farming, replacing chemical fertilizers with biological activity.
1.2 The Spatial Constraints of Modern Homesteading
In urban and suburban environments, gardeners are often confined to small backyard plots, side yards, or community garden plots. A standard 10x10 foot garden, if managed using conventional row methods, would yield very little due to the space wasted on pathways. Biointensive gardening reclaims this lost space. By establishing permanent growing beds and dedicated walking paths, we ensure that the soil where the crops grow is never compacted. Compaction is the enemy of root growth; when soil is stepped on, the macro-pores that hold air and water collapse, forcing roots to work harder to seek nutrients. By organizing the garden into narrow, reachable beds—typically 3 to 4 feet wide—growers can manage their crops entirely from the pathways, leaving the bed soil loose, porous, and highly productive.
1.3 The Ecological Philosophy of Small-Scale Agriculture
Biointensive farming is built on the philosophy of working with nature rather than attempting to dominate it. It views the garden as a micro-ecosystem where every plant, insect, microbe, and soil particle has a role to play. In an industrial farming setup, pests are sprayed with synthetic pesticides, and nutrient deficiencies are corrected with synthetic fertilizers. This creates a cycle of dependency, as chemicals kill beneficial insects and disrupt soil life, leaving crops vulnerable to the next wave of pests. A biointensive garden breaks this cycle by fostering a diverse and balanced ecosystem. Healthy soil grows strong plants with thick cell walls and robust immune systems, making them less attractive to pests. The high density of plants attracts beneficial predatory insects, creating a natural system of pest control. This ecological balance is not just good for the environment; it is the key to achieving high, stable yields year after year.
 (A series of biointensive raised beds showcasing dense, multi-tiered plantings and close spacing for maximum yield)
2. Soil Foundations: Deep Bed Preparation and Rhizosphere Optimization
Before exploring planting layouts, we must establish a growing medium capable of supporting dense root systems and heavy crop yields. High-density planting means more root systems compete for the same volume of soil. If the soil is compacted, nutrient-poor, or dry, the plants will stunt and succumb to pest and disease pressure. To prevent this, we must build deep, fertile soil that allows roots to grow straight down rather than spreading horizontally.
2.1 The Mechanics of Double Digging
The physical foundation of biointensive cultivation is double digging. This manual soil preparation technique loosens the soil to a depth of 24 inches, twice the depth of standard garden tilling. Loosening the soil deeply allows roots to penetrate vertically rather than horizontally, preventing root-crowding and allowing plants to be spaced closely together.
- Trenching: Begin by digging a trench across the width of the bed that is 12 inches wide and 12 inches deep. Move this soil to a wheelbarrow; it will be used to fill the final trench at the end of the bed.
- Loosening the Subsoil: Use a spading fork or broadfork to loosen the next 12 inches of soil in the bottom of the trench. Do not turn the soil over or mix it with the topsoil; simply insert the fork, push the handle forward and back to crack the subsoil, and pull it out. This allows aeration, improves drainage, and lets deep roots break through the clay or hardpan layers.
- Successive Trenches: Move back 12 inches and dig a second 12x12-inch trench directly behind the first. Shift the topsoil from this second trench forward into the first trench, covering the loosened subsoil. Repeat the subsoil loosening in the second trench.
- Completion: Repeat this process down the length of the bed. Fill the final trench with the topsoil stored in the wheelbarrow from the first trench.
Double digging should be done when the soil moisture is optimal—not too dry (which makes the soil hard and dusty) and not too wet (which damages soil structure). While double digging is labor-intensive, it only needs to be done once every few years. As long as you never step on the bed and keep adding organic matter, the soil will maintain its loose, aerated structure.
2.2 Broadforking and Minimum Tillage Alternatives
While double digging is the gold standard for initiating a biointensive bed, repeating this process every year can disrupt the established soil layers and harm earthworms and fungal networks. Once a bed has been double-dug, you can maintain its structure using a broadfork (or U-bar). A broadfork consists of two wooden or metal handles attached to a heavy steel bar with 5 to 7 long, sharp tines.
To use a broadfork, step onto the crossbar, using your body weight to push the tines 10 to 14 inches into the soil. Pull the handles back gently to crack and loosen the soil, then lift the tool and move back 6 to 8 inches to repeat the process. This aerates the soil and breaks up compaction without turning the soil over. This minimum-tillage approach preserves the natural stratification of soil microbes, keeping oxygen-loving bacteria near the surface and anaerobic organisms in the lower layers, which maintains soil health and productivity.
2.3 The Biology of the Rhizosphere
The rhizosphere is the narrow zone of soil surrounding plant roots that is directly influenced by root secretions and associated microorganisms. In a biointensive garden, this zone is packed with life. Plants release up to 40% of their photosynthetic energy into the rhizosphere in the form of exudates (carbohydrates, amino acids, and organic acids). These exudates feed the local microbial population, which in turn protects the plant roots and unlocks locked-up nutrients.
Mycorrhizal fungi are particularly important in this relationship. They colonize the plant roots and grow a network of microscopic threads (hyphae) through the soil. These hyphae function as an extension of the plant's root system, reaching into tiny pores to absorb phosphorus, zinc, and water that the roots cannot access. By fostering a healthy rhizosphere through deep soil preparation and organic inputs, we ensure our plants have the constant, steady supply of nutrients required for high-density growing.
2.4 Organic Matter Inputs: Compost, Mulch, and Amendments
To maintain the fertility of intensively cropped beds, you must replace the nutrients harvested in the crops. This is done by adding high-quality organic matter.
- Finished Compost: Apply a 1-to-2-inch layer of well-rotted, aerated compost to the surface of the bed before planting. Work it gently into the top few inches of soil. Compost provides a balanced mix of macro- and micronutrients, improves water retention in sandy soils, and improves drainage in heavy clay soils.
- Mulching: Apply a thick layer of organic mulch, such as clean straw, shredded leaves, or wood chips, to conserve soil moisture and prevent weed growth.
- Mineral Amendments: Use slow-release mineral amendments like greensand (for potassium and trace minerals), rock phosphate (for phosphorus), and agricultural lime (to adjust pH and add calcium). These amendments feed the soil biology, which slowly breaks them down into forms that plant roots can absorb.
3. High-Density Spacing and Spatial Geometry
Conventional row planting is designed for ease of mechanical weeding, leaving up to 70% of the soil surface bare and exposed to sun and wind. Biointensive planting uses close spacing to cover the soil surface, creating a "living mulch."
3.1 Hexagonal Offset Planting Layouts
Instead of planting in square grids or straight rows, biointensive growers use a hexagonal offset layout. In this configuration, plants in every second row are offset, fitting into the pocket between the plants in the preceding row.
- Space Efficiency: A hexagonal layout fits approximately 15% more plants in the same bed area compared to a standard grid layout.
- Living Canopy: As the plants mature, their leaves touch, creating a microclimate canopy that shades the soil. This shade reduces soil evaporation by up to 50%, suppresses weed seed germination, and keeps the soil cool during hot summer days.
- Calculating Offsets: To set up a hexagonal layout, use a planting board or offset line. For a plant requiring 12-inch spacing, the rows should be spaced 10.4 inches apart, with plants offset by 6 inches in alternating rows.
3.2 Microclimate Canopy Dynamics
The dense canopy created by hexagonal spacing acts as a protective shield for the soil. In conventional row gardening, the exposed soil is baked by the sun, causing water to evaporate rapidly and forming a hard crust that prevents air and water from penetrating. In a biointensive bed, the leaf canopy traps humidity and shields the soil from direct solar radiation. This reduces the need for watering, keeps the soil cool (which is essential for root health), and prevents weed seeds from germinating. This living mulch system creates a self-regulating microclimate that keeps soil moisture and temperature stable, allowing plants to focus their energy on growth and fruit production.
3.3 Crop-Specific Spacing Metrics
To implement hexagonal spacing successfully, you must know the exact spacing requirements for each crop. If you plant them too close, they will compete for light and nutrients, resulting in low yields. If you plant them too far apart, you lose the benefits of the living canopy. The table below lists the recommended biointensive spacing for common crops:
| Crop | Conventional Row Spacing (in) | Biointensive Hexagonal Spacing (in) | Yield Increase Factor |
|---|---|---|---|
| Head Lettuce | 12 x 18 | 8 - 10 | 2.5x |
| Carrots | 3 x 12 | 2 - 3 | 3.0x |
| Garlic | 6 x 12 | 5 - 6 | 2.0x |
| Bush Beans | 6 x 18 | 9 | 2.2x |
| Spinach | 4 x 12 | 6 | 2.5x |
| Onions | 4 x 12 | 5 - 6 | 2.0x |
| Beets | 4 x 12 | 4 - 6 | 2.3x |
| Radishes | 2 x 6 | 2 - 3 | 3.5x |
| Swiss Chard | 12 x 18 | 10 - 12 | 2.0x |
| Kale | 18 x 24 | 12 - 15 | 2.2x |
When using these close spacings, monitor the plants for nutrient deficiencies. Because their roots are crowded, they require a constant supply of organic nutrients to support their rapid growth.
 (A diagram illustrating the hexagonal offset planting pattern, which maximizes plant count and shades the soil)
4. Vertical Gardening: The Third Dimension of Yield
When horizontal space is limited, the only way to expand is upward. Vertical gardening utilizes trellises, arches, and vertical poles to support climbing and vining crops, freeing up valuable floor space in the beds.
4.1 Trellising Materials and Designs
- A-Frame Trellises: Made of wooden frames and nylon netting, A-frames are ideal for vining peas, cucumbers, and pole beans. They allow you to grow shade-tolerant crops like spinach or radishes underneath the frame.
- Cattle Panel Arches: Standard 16-foot galvanized cattle panels are bent into an arch and secured with T-posts between two raised beds. Vining squash, melons, and pole beans climb the arch, keeping the fruit clean, suspended, and easy to harvest.
- Single-Leader String Hook Systems: Indeterminate tomatoes, cucumbers, and peppers can be supported by overhead wires and string hooks. As the plant grows, it is wound around the string, and lower leaves are pruned to maintain high airflow and disease prevention.
4.2 Training and Pruning Vining Crops
To keep vertical gardens productive and prevent disease, you must train and prune your crops regularly.
- Indeterminate Tomatoes: Prune to a single main stem by removing all suckers (the shoots that grow in the axils between the leaves and the main stem). Wind the main stem around the support string once a week. As the lower fruit matures, prune off the lower leaves to improve airflow and prevent soil-borne diseases from splashing onto the foliage.
- Cucumbers: Train them up the trellis by weaving the tendrils through the mesh. Prune the first 4 to 6 lateral branches to encourage strong main stem growth, then let the plant branch out near the top of the trellis.
- Vining Squash and Melons: These plants use tendrils to climb, but they need help supporting their heavy vines. Secure the vines to the trellis using soft plant ties or garden twine every 12 inches.
4.3 Support and Slings for Heavy Fruits
Growing heavy crops like winter squash or melons vertically requires active support to prevent the weight of the fruit from snapping the vines. As the fruit develops, support it using soft mesh nets, nylon slings, or old pantyhose tied securely to the trellis frame. This cradles the fruit, allowing it to ripen in the air without touching the damp soil, which prevents rot and pest damage.
5. Companion Intercropping: Plant Synergies and Guilds
Monoculture beds are highly vulnerable to pests and run out of nutrients quickly because all plants require the same resources. Companion intercropping mixes different species in the same bed to create mutual support.
5.1 The Science of Plant Synergies
Plants have distinct root systems, nutrient demands, and growth rates. Mixing these traits optimizes resource use:
- Deep and Shallow Root Systems: Planting deep-rooted carrots alongside shallow-rooted leaf lettuce allows them to draw water and nutrients from different soil depths without competing.
- Heavy and Light Feeders: Pair heavy feeders like brassicas with light feeders like radishes or nitrogen-fixing legumes to avoid depleting soil nutrients.
- Insect Repellants and Trap Crops: Interplanting strongly aromatic French marigolds (Tagetes patula) or nasturtiums (Tropaeolum majus) helps repel insect pests or draw them away from your main crops.
5.2 Allelopathy and Root Exudate Dynamics
When planning companion plantings, you must consider the chemical relationships between plants. Some plants release chemicals from their roots or leaves that can inhibit the growth of nearby plants. This is known as allelopathy. For example, fennel (Foeniculum vulgare) releases chemicals that stunt many common vegetables, including tomatoes and beans. In contrast, other plants release exudates that stimulate nearby crops. Garlic and onions release sulfur compounds that act as natural fungicides, protecting neighboring plants from soil-borne diseases. Understanding these chemical relationships allows us to place plants where they will help, rather than hinder, each other.
5.3 Classic Yield-Maximizing Guilds
- The Three Sisters: A traditional Native American planting system combining corn, pole beans, and winter squash. The corn serves as a natural trellis for the beans; the beans fix atmospheric nitrogen into the soil to feed the corn and squash; and the sprawling squash leaves create a dense ground cover that suppresses weeds and conserves moisture.
- Tomato and Basil: Basil repels thrips, hornworms, and flies while improving tomato growth. In turn, the tall tomato plant provides light afternoon shade for the basil, preventing it from bolting early.
- Carrots and Radishes: Radish seeds germinate quickly, breaking up compacted surface soil and keeping it moist for the slow-germinating carrot seeds. By the time the carrots start growing, the radishes are harvested, leaving space for the carrots to expand.
- Brassicas and Chamomile: Chamomile attracts beneficial predatory wasps and hoverflies, which prey on cabbage loopers and aphids. The chamomile also concentrates calcium, potassium, and sulfur in the soil, benefiting the shallow root systems of kale and broccoli.
 (A diverse companion planting bed featuring tomatoes, basil, and marigolds growing in close proximity)
6. Succession Planting: The Temporal Dimension of Yield
To maximize yields over the course of a year, you must keep your beds planted at all times. Succession planting is the practice of planting seeds or transplants at regular intervals to maintain a continuous harvest, rather than harvesting everything at once.
6.1 Interval Seeding and Transplanting
Instead of planting a 10-foot bed of radishes all on the same day, plant a 2-foot section every 7 to 10 days. This provides a steady supply of fresh vegetables and prevents waste. For crops like lettuce, spinach, and bush beans, interval planting is the key to season-long production.
When transplanting, plan ahead to replace harvested crops immediately. Keep a constant supply of young transplants ready in a nursery area. As soon as a spring crop of spinach is harvested, clear the bed, add a fresh layer of compost, and transplant summer head lettuce or bush beans into the space the same day.
6.2 Fast-Growing Catch Crops
Use fast-growing "catch crops" to fill brief gaps in the garden schedule. If a bed of spring broccoli is harvested in early June and the summer tomatoes are not ready to go in, plant a quick crop of radishes, spinach, or baby salad greens. These crops mature in 21 to 30 days, generating a harvest from space that would otherwise sit idle.
6.3 Crop Rotation and Season Extensions
- Rotation: Rotate crops to prevent the buildup of soil-borne diseases and balance nutrient draw. Follow heavy nitrogen feeders (like corn or brassicas) with nitrogen fixers (like peas or beans), followed by light feeders (like root vegetables).
- Season Extension: Use low tunnels, cold frames, and floating row covers to protect crops from late spring and early autumn frosts. This extends your growing season by 4 to 8 weeks, allowing you to plant more successions.
7. Water, Nutrients, and Maintenance in Dense Gardens
High-density plantings require careful watering and feeding to sustain their rapid growth. If you ignore these needs, the plants will compete for water and nutrients, resulting in low yields.
7.1 Drip Irrigation and Soluble Feeding
- Drip Irrigation: Overhead watering is inefficient in dense gardens because the thick plant canopy blocks water from reaching the soil, leading to high evaporation and leaf diseases. Install drip irrigation tape or emitter tubing directly under the mulch. This delivers water directly to the soil, keeping the foliage dry.
- Mulching: Apply a thick layer of organic mulch, such as clean straw, shredded leaves, or wood chips, to conserve soil moisture and prevent weed growth.
- Liquid Feeding: Dense gardens benefit from regular supplemental feedings of organic liquid fertilizers, such as fish emulsion or compost tea, applied every 2 to 3 weeks during the active growing season.
7.2 Fertigation and Slow-Release Organic Soil Amendments
In high-density commercial setups, growers use fertigation—injecting liquid fertilizers directly into the drip irrigation system. This delivers nutrients and water directly to the plant root zone, reducing waste and ensuring uniform nutrient distribution. For organic growers, slow-release amendments like feather meal (for nitrogen), bone meal (for phosphorus), and kelp meal (for potassium and trace minerals) can be mixed into the soil during spring preparation. These amendments break down slowly, providing a steady supply of nutrients throughout the season.
7.3 Mulch Chemistry and Soil Temperature Stabilization
Applying mulch does more than conserve water; it stabilizes soil temperatures, preventing root stress. During summer, bare soil temperatures can rise above 95°F (35°C), which stunts root growth and slows water uptake. A 2-to-3-inch layer of straw or wood chips keeps soil temperatures up to 15°F (8°C) cooler. As the mulch breaks down, it feeds earthworms and beneficial soil fungi, building soil organic matter and improving bed fertility.
 (A drip irrigation system installed beneath straw mulch in a densely planted vegetable bed)
8. Troubleshooting and Yield Metrics
Managing a high-density, biointensive garden requires close attention to detail. Because plants are grown close together, any issues with nutrients, pests, or disease can spread quickly.
8.1 Identifying Nutrient Competition and Light Stunting
In a dense garden, monitor your crops for signs of competition. If you notice yellowing leaves, slow growth, or leggy stems, the plants may be competing for light or nutrients.
- Light Competition: If tall crops shade out shorter crops, prune the lower leaves of the taller plants or adjust your planting layout next season to place taller crops on the north side of the bed.
- Nutrient Competition: If leaves show signs of nitrogen deficiency (yellowing starting at the leaf tips) or phosphorus deficiency (purpling on the undersides of the leaves), apply a liquid organic fertilizer to correct the issue quickly.
8.2 Pest Monitoring and Disease Prevention
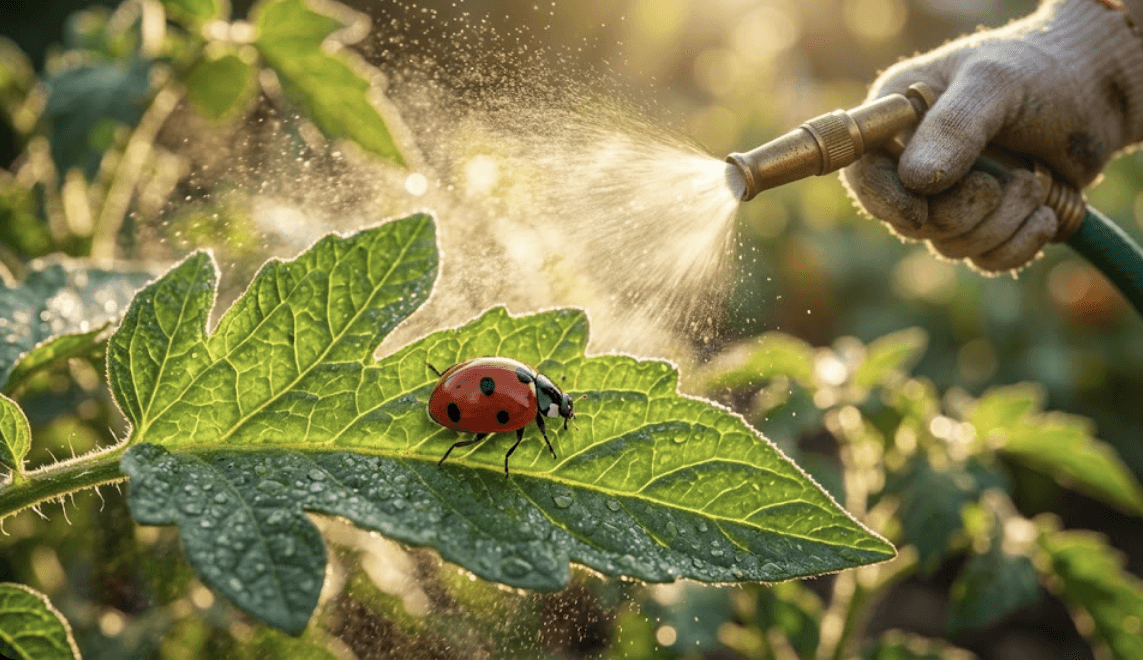
Close plant spacing makes disease prevention critical. Fungal spores thrive in warm, humid conditions with poor airflow. Prevent outbreaks by pruning lower leaves, running drip irrigation instead of overhead watering, and removing any infected plants immediately. Monitor for pests daily, looking for insect eggs or leaf damage. Encourage beneficial insects by planting dill, fennel, and yarrow around the garden borders to attract ladybugs, lacewings, and parasitic wasps.
8.3 Record Keeping and Yield Tracking
To improve your garden's efficiency, keep detailed records of your plantings and harvests. Track the planting date, transplant date, harvest window, and total weight of produce harvested from each bed. This data helps you identify which crop varieties and planting layouts perform best on your property, allowing you to fine-tune your garden plan each year for maximum productivity.
Expert Insights & FAQs
What is biointensive gardening and how does it increase crop yields?
Biointensive gardening is a system that focuses on building organic soil structure so plants can be spaced closely together. Techniques like double digging, hexagonal offset planting, and companion intercropping allow you to grow more plants in a smaller space, producing up to 4 times the yield of conventional rows.
What is double digging and is it necessary for intensive gardening?
Double digging involves manually loosening the soil and subsoil to a depth of 24 inches. This creates a deep, loose soil structure that allows plant roots to grow down rather than outward. This prevents root crowding, making close plant spacing possible.
How does the hexagonal offset planting layout save garden space?
Instead of planting in a square grid, plants are offset in alternating rows so they fit into the spaces between the plants in the adjacent rows. This layout fits about 15% more plants into the same bed space and creates a dense leaf canopy that shades the soil.
Which vegetable varieties are best suited for vertical trellising?
Climbing and vining crops like indeterminate tomatoes, pole beans, climbing peas, cucumbers, summer squash, vining melons, and small gourds are ideal for vertical trellising. Heavy fruits must be supported with slings to keep them from breaking the vine.
What are the best companion plants for heavy-feeding tomatoes?
Basil is an excellent companion plant that repels pests like thrips and hornworms. Marigolds help repel root nematodes, while carrots and radishes utilize different soil depths, making them good choices to plant around the base of tomatoes.
How do I practice succession planting in a small raised bed?
Plant small sections of your beds at regular intervals (every 7 to 10 days) rather than all at once. Use fast-growing catch crops like radishes or salad greens to fill empty spaces when long-season crops are harvested.
How do I water a high-density garden without causing leaf disease?
Use drip irrigation lines or soaker hoses installed underneath a layer of organic mulch. This keeps water at the soil level, preventing splash-back and keeping the plant canopy dry, which reduces fungal diseases.
How do I fertilize high-density plantings without burning plant roots?
Use organic fertilizers like compost, well-rotted manure, and bone meal mixed into the soil during preparation. Supplement during the growing season with diluted liquid organic fertilizers like fish emulsion or compost tea.
Johnnie McCormick
Zone 7b/8a - North Central Alabama
Johnnie McCormick is a gardening hobbyist and the founder of My Garden Spot. Raised in north-central Alabama, his passion for gardening began in his youth. In 2008, he established a large market garden, teaching himself high-yield growing methods. In the years since, he has operated seasonal seedling sales for transplants, specializing in heirloom tomatoes, peppers, eggplants, decorative ground covers like Ajuga (Bugleweed), marigolds, nasturtiums, and fresh kitchen-window herb arrangements (basil, cilantro). Today, he gardens in the hills between Birmingham and Jasper, Alabama (Zone 7b/8a), sharing practical, community-focused gardening resources.
Verified Authoritative Citations & References
In alignment with our strict E-E-A-T research and verification guidelines, this guide cross-references data from the United States Department of Agriculture (USDA) and Cooperative Extension Service programs.
- Cornell Cooperative Extension: Home Vegetable Gardening Guide and vegetable variety recommendations. gardening.cals.cornell.edu
- Penn State Extension: Master Gardener Manual and companion planting matrices. extension.psu.edu
- Alabama Cooperative Extension System (ACES): Raised bed construction plans and regional seed planting calendars. aces.edu
- USDA NRCS: Cover crops and biological soil health guidelines. nrcs.usda.gov

Please log in to view comments.