
How Do You Use Silage Tarps for Occultation and Weed-Free No-Till Beds?
Weed pressure breaks more beginning market gardeners than pests, weather, or market swings combined.
You start the spring full of energy. Then May arrives, and crabgrass explodes across your seedbeds. By late June, you find yourself spending thirty hours a week on your hands and knees, desperately peeling weeds away from fragile carrot tops. Your back aches. Your planting schedule falls two weeks behind. In desperation, you rent a gas-powered rear-tine rototiller, fire up the engine, and churn your beds into fine, powdery dirt.
For about ten days, the garden looks clean. You breathe a sigh of relief.
Then it rains. Within forty-eight hours, an army of dormant weed seeds—churned up from four inches deep into warm topsoil—germinate all at once. The bed turns into a solid green carpet of pigweed, purslane, and foxtail. The weed problem is now ten times worse than before you started, and the fragile fungal hyphae in your soil are shattered into dust.
I made that exact mistake when I set up my first serious market garden beds back in 2008. The mechanical tiller felt like power, but it was a trap.
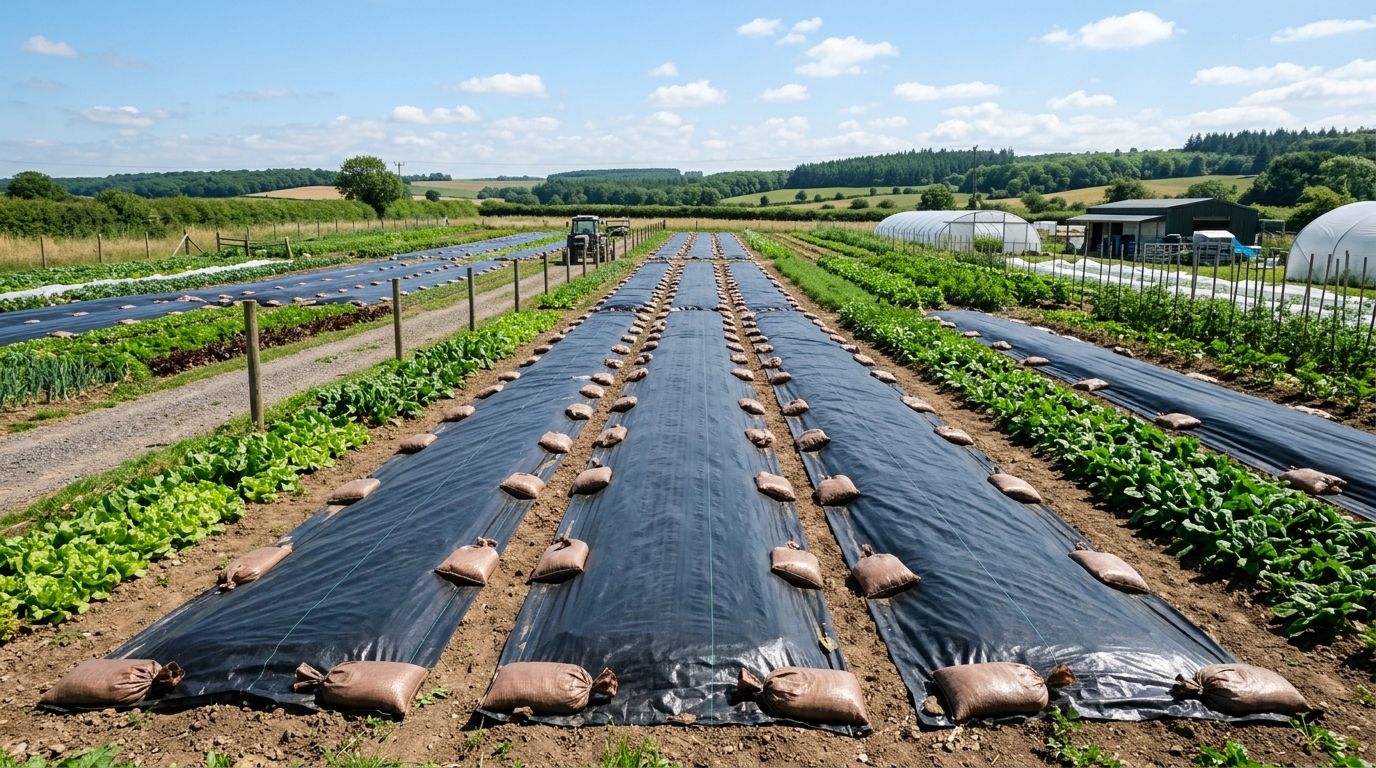
There is an easier, quieter way to clear ground. It requires zero gasoline, zero steel blades, and zero pulverized topsoil. The technique is called occultation, and its primary workhorse is the heavy black agricultural silage tarp.
1. The Rototiller Trap: Why Mechanical Tillage Multiplies Weeds
To appreciate why a simple sheet of black plastic works so well, you have to look at what happens inside the top six inches of native soil.
Every square yard of garden soil holds a subterranean reservoir known as the weed seed bank. This collection contains tens of thousands of dormant seeds dropped by parent weeds over decades. Annual weed seeds are tough survival capsules. Species like redroot pigweed (Amaranthus retroflexus), common lambsquarters (Chenopodium album), and purslane (Portulaca oleracea) can sit in cold, dark, compacted subsoil for twenty to forty years without losing viability.
Those buried seeds remain dormant because they need two specific triggers to wake up: light flashes and oxygen exposure.
THE ROTOTILLER WEED CYCLE
[Dormant Seeds Safely Buried Deep]
               |
               v
  (Rototiller Churns Soil)
               |
               +---> Shatters fungal networks & creates hardpan plow sole
               |
               v
[Buries Surface Organic Matter & Drags Millions of Dormant Seeds Up to Light]
               |
               v
  (Rain / Irrigation Hits Topsoil)
               |
               v
[EXPLOSIVE WEED FLUSH: 10x Worse Than Before]
When you sink rotating steel tines into the ground, you do three destructive things at once:
- You dredge the weed bank. You haul millions of dormant seeds from deep underground right up into the top quarter-inch of soil where warmth and light trigger immediate germination.
- You create a hardpan layer. Directly beneath the depth of the spinning tines (usually four to six inches down), the steel blades pack fine clay particles into a dense, impermeable shelf known as a plow sole. Plant roots hit this barrier and stall out, while heavy rains pool on top instead of draining into deep subsoil aquifers. If you struggle with heavy ground, running deep aeration with a broadfork cracks that compacted hardpan without flipping buried weed seeds upward.
- You oxidize your organic matter. Tillage flings soil particles into the air, flooding the soil profile with oxygen. Aerobic bacteria explode in population, burning through your precious soil carbon reserves in a massive microbial feeding frenzy that releases carbon dioxide into the air and leaves your soil structurally depleted.
Occultation flips this dynamic completely. Instead of dragging buried weed seeds up to the sun, you leave the soil undisturbed. You deal exclusively with the weed seeds already sitting in the top half-inch of the bed, wiping them out where they lie.
2. Occultation vs. Solarization: Two Distinct Biological Paths
Growers often mix up occultation and solarization, using the terms as if they mean the same thing. They do not. While both methods use plastic sheeting to manage weeds, their underlying biological mechanisms, field temperatures, and soil ecological effects are fundamentally different.
+-------------------------------------------------------------------------------------------------------+
|                                    OCCULTATION VERSUS SOLARIZATION                                    |
+--------------------------+------------------------------------+---------------------------------------+
| Agronomic Metric         | Occultation (Silage Tarps)         | Solarization (Clear Polyethylene)     |
+--------------------------+------------------------------------+---------------------------------------+
| Sheeting Material        | 5-mil to 6-mil Opaque Black Poly   | 1-mil to 2-mil Clear Polyethylene     |
| Light Transmission       | 0% (Absolute Darkness)             | 85% to 90% (Full Light Transmission)  |
| Primary Kill Mechanism   | Fatal Germination & Etiolation     | Lethal Thermal Pasteurization         |
| Peak Soil Temperatures   | 95°F to 125°F (Warm & Humid)       | 135°F to 155°F+ (Extreme Heat)        |
| Impact on Earthworms     | Stimulates; worms surface to feed  | Repels; worms dive deep or perish     |
| Impact on Soil Microbes  | Accelerates fungal & bacterial rot | Can pasteurize beneficial organisms   |
| Optimum Seasonal Window  | Usable spring, summer, fall, winter| High summer only (needs intense sun)  |
+--------------------------+------------------------------------+---------------------------------------+
The Solarization Mechanism: Thermal Pasteurization
Solarization relies on thin (1-mil to 2-mil), transparent greenhouse plastic stretched tightly over soaked ground during the longest, hottest weeks of midsummer.
The clear plastic allows solar ultraviolet and infrared radiation to penetrate directly into the soil. The moisture beneath the plastic traps heat through the greenhouse effect. Soil temperatures in the top two inches can climb well above 140°F (60°C).
This extreme heat cooks living organisms. It literally pasteurizes weed seeds, fungal spores, and root nematodes in place.
The downside? It also kills heat-sensitive beneficial soil fungi and beneficial bacteria in that top layer. Earthworms flee deep into the subsoil to escape the baking heat. Solarization only works when you have blazing summer sunshine and temperatures regularly topping 85°F. Try solarizing in cool April or damp October, and the clear plastic turns into a mini-greenhouse that makes weeds grow faster.
The Occultation Mechanism: Fatal Germination
Occultation comes from the Latin word occultare, meaning "to hide or conceal." It uses heavy, completely opaque black plastic to shut out every beam of sunlight.
Under a black silage tarp, the soil stays warm and damp, but it rarely hits the extreme, pasteurizing heat levels of clear plastic.
Because the plastic is black, the soil underneath warms up just enough to fool weed seeds into thinking spring has arrived. The seeds sprout. The tiny white shoots push upward, hunting for light to begin photosynthesis.
They find only pitch darkness.
Without light, the seedlings cannot produce chlorophyll. They stretch out their pale stems (a process called etiolation), burning through their finite endosperm starch reserves. Within days, the seedlings starve and collapse into the warm, damp dirt.
Earthworms and saprophytic bacteria, protected from drying winds and harsh sun beneath the tarp, surge to the surface and eat the dead plant tissue. You end up with a clean seedbed without frying your living soil biology.
3. Silage Tarp Specifications: Why Cheap Tarps Fail
Do not walk into a big-box home improvement store and buy standard woven blue, brown, or silver utility tarps for garden occultation. They will disappoint you every single time.
CHEAP WOVEN UTILITY TARP                 AGRICULTURAL SILAGE TARP
(Home Improvement Store)                 (5-mil to 6-mil Virgin Poly)

[ Loose woven plastic weave ]            [ Solid extruded continuous film ]
- Pinholes let sunlight leak through     - 100% light block; zero pinholes
- Tears easily on sticks & stubble       - High puncture & tear resistance
- Shreds into blue plastic fibers        - UV inhibitors last 5 to 10 years
- Traps heat poorly                      - Deep moisture & thermal retention
Woven hardware store tarps are made of thin ribbons of plastic woven into a cross-hatch grid. Hold one up to the sun, and you can see pinpricks of light shining through the weave. Those tiny rays are more than enough to keep weed seedlings alive.
Even worse, cheap tarps lack industrial ultraviolet (UV) stabilizers. After sixty days under intense summer sunlight, the plastic degrades. It turns brittle and shreds into millions of blue plastic fibers that blow across your property and contaminate your soil for decades.
What to Look For in Real Silage Tarps
Real silage tarps are made for dairy and livestock operations to seal chopped green feed into anaerobic silage bunkers. They are engineered to survive years of brutal weather.
- Material: 100% virgin, extruded low-density polyethylene (LDPE). The plastic is a solid, continuous film with zero weave and zero light penetration.
- Thickness: 5-mil to 6-mil (where 1 mil equals 0.001 inches). Anything thinner than 5-mil punctures easily on sharp stalks; anything thicker than 8-mil becomes too heavy to drag across beds without a tractor.
- Co-Extruded Two-Tone Film: High-grade silage tarps are manufactured with two fused layers: one side is jet black, and the other side is bright white.
- Orientation: For occultation and weed termination, always place the black side facing up toward the sun. The dark surface absorbs solar radiation, warming the ground to speed up weed germination and residue breakdown. The only time you flip the white side up is if you live in an arid desert climate where summer soil temperatures under black plastic would exceed 140°F, or if you want to keep soil cool to hold cool-season brassicas in late spring.
- Lifespan: A quality 5-mil UV-treated silage tarp will easily last five to eight years on a market garden if you handle and store it with basic care.
+----------------------------------------------------------------------------------------------------+
|                                  SILAGE TARP WEIGHT AND SIZE REFERENCE                             |
+--------------------------+------------------------------+------------------------------------------+
| Tarp Dimensions (Feet)   | Total Bed Area Covered (Sq Ft)| Approximate Weight (Dry)                |
+--------------------------+------------------------------+------------------------------------------+
| 10 ft x 50 ft            | 500 sq ft (Two 30" x 50' beds)| 15 - 20 lbs (Easy 1-person carry)        |
| 16 ft x 50 ft            | 800 sq ft (Three 30" beds)   | 25 - 30 lbs (Easy 1-person carry)        |
| 24 ft x 100 ft           | 2,400 sq ft (Six 30" beds)   | 70 - 80 lbs (Manageable 1-2 person drag) |
| 32 ft x 100 ft           | 3,200 sq ft (Eight 30" beds) | 95 - 110 lbs (Requires 2-person handling)|
| 40 ft x 100 ft           | 4,000 sq ft (Ten 30" beds)   | 120 - 135 lbs (Heavy; needs 2-3 crew)    |
+--------------------------+------------------------------+------------------------------------------+
4. Defeating Wind Lift: The Physics of Tarp Anchoring
A silage tarp is a giant, lightweight sail.
If wind slips underneath an edge, aerodynamic lift takes over. A sudden 35-mile-per-hour spring gust can lift a 24x100-foot tarp into the air like a parachute, snapping trellises, smashing greenhouse plastic, and dragging muddy plastic across your neighbors' fields.
Anchoring your tarps properly is non-negotiable.
                     [ WIND GUST: 30+ MPH ]
                               ========>
               ____________________________________________  <-- LIFT FORCES
              /                                            \     ATTEMPT TO
             /     O   O   O   O   O   O   O   O   O        \    BALLOON TARP
   [SANDBAG]================================================[SANDBAG]
   (Every 5')   ^                                        ^  (Every 5')
                |-- Center Zig-Zag Gravel Bag Grid ------|
                    Breaks continuous air pocket pockets
Why Metal Staples and Rocks Fail
Beginning growers often reach for landscape fabric staples or bricks. Both cause serious problems:
- Metal Staples and Sod Pins: Steel wire pins pull right through thin plastic under the steady tension of wind. Even worse, as the tarp ripples in the breeze, the steel edges slice through the plastic, creating tears that ruin the tarp.
- Cinder Blocks, Bricks, and Field Stones: Rough concrete corners and sharp rock edges abrade the plastic. Walk across a tarp pinned with rocks, and you will punch dozens of holes in it. Moving hundreds of dirty bricks by hand is slow, awkward labor.
The Standard: Woven UV-Resistant Gravel Bags
Commercial growers anchor tarps with woven polypropylene sandbags.
- The Fill Material: Do not fill them with fine sand if you can avoid it. Over time, fine sand leaks through the woven fabric when wet, turning the bags into heavy, soggy mud bricks. Fill them instead with pea gravel or 3/8-inch clean crushed rock. Pea gravel drains freely, does not leak, and stays clean and easy to handle in all weather.
- Bag Weight: Fill each bag with 15 to 20 pounds of gravel. That weight holds firm in high winds while remaining light enough to carry two or three bags in each hand without straining your back.
- Perimeter Spacing: Place gravel bags along the entire outer edge of the tarp every 5 to 6 feet. In windy areas, butt the bags end-to-end to seal the windward edge against the dirt.
- The Interior Grid: Anchoring the perimeter is not enough. Wind creates low-pressure suction across the broad center of the plastic. You must lay a grid of gravel bags across the interior of the tarp, spaced roughly 10 to 12 feet apart in a staggered zig-zag pattern. This breaks the surface area into smaller sections, stopping air bubbles from building into full-blown sails.
5. Fatal Germination in Action: What Happens Beneath the Plastic
When you unroll a black silage tarp over a prepared bed, you set off a distinct sequence of biological and chemical events.
+-----------------------------------------------------------------------------------------------------+
|                                TIMELINE OF UNDER-TARP OCCULTATION DYNAMICS                          |
+---------------+----------------------------------------------------+--------------------------------+
| Timeframe     | Soil Environment                                   | Biological Activity            |
+---------------+----------------------------------------------------+--------------------------------+
| Day 1 to 3    | Moisture seals in; soil warms 10°F to 20°F above   | Weed seeds absorb moisture;    |
|               | ambient air; humidity climbs to 95%+               | respiration rates spike        |
+---------------+----------------------------------------------------+--------------------------------+
| Day 4 to 8    | Absolute darkness; oxygen drops slightly as seeds   | Seeds germinate; pale white    |
|               | and microbes respire; condensation drips back down | shoots stretch upward looking  |
|               |                                                    | for light (etiolation phase)   |
+---------------+----------------------------------------------------+--------------------------------+
| Day 9 to 14   | Surface weeds exhaust starch reserves; stem tissues| Seedlings starve and collapse; |
| (Summer Kill) | rot in high humidity; soil temperatures top 115°F   | earthworms surge to the surface|
|               |                                                    | to digest dead plant residue   |
+---------------+----------------------------------------------------+--------------------------------+
| Day 15 to 28  | Surface soil clears; dead weed roots decompose;    | Earthworms leave rich layer of |
| (Spring Window)| mycorrhizal fungi remain safe below high heat zone | surface castings; fine tilth   |
|               |                                                    | forms without any tilling      |
+---------------+----------------------------------------------------+--------------------------------+
| Day 30+       | Bed enters biological stasis; weeds stay gone;     | Soil moisture stays constant;  |
| (Holding Bed) | winter rains cannot leach nitrates or pack down clay| nutrients remain locked in bed |
+---------------+----------------------------------------------------+--------------------------------+
The Critical Role of Moisture
Occultation fails if you spread a tarp over bone-dry dirt.
Weed seeds cannot germinate without water. Soil bacteria and earthworms cannot digest plant tissue in dry ground. If you tarp dry soil, weed seeds simply sit dormant under the plastic. Pull the tarp off four weeks later, water your beds, and those seeds will sprout immediately.
Always saturate your soil before laying the tarp.
Run overhead sprinklers or drip lines until the top four to six inches of the bed reach field capacity. The black plastic locks that moisture in place. During the day, water evaporates off the soil surface, condenses on the underside of the plastic, and drips back down into the dirt, creating a closed-loop humidity chamber that forces weed seeds to sprout.
The Earthworm Surge
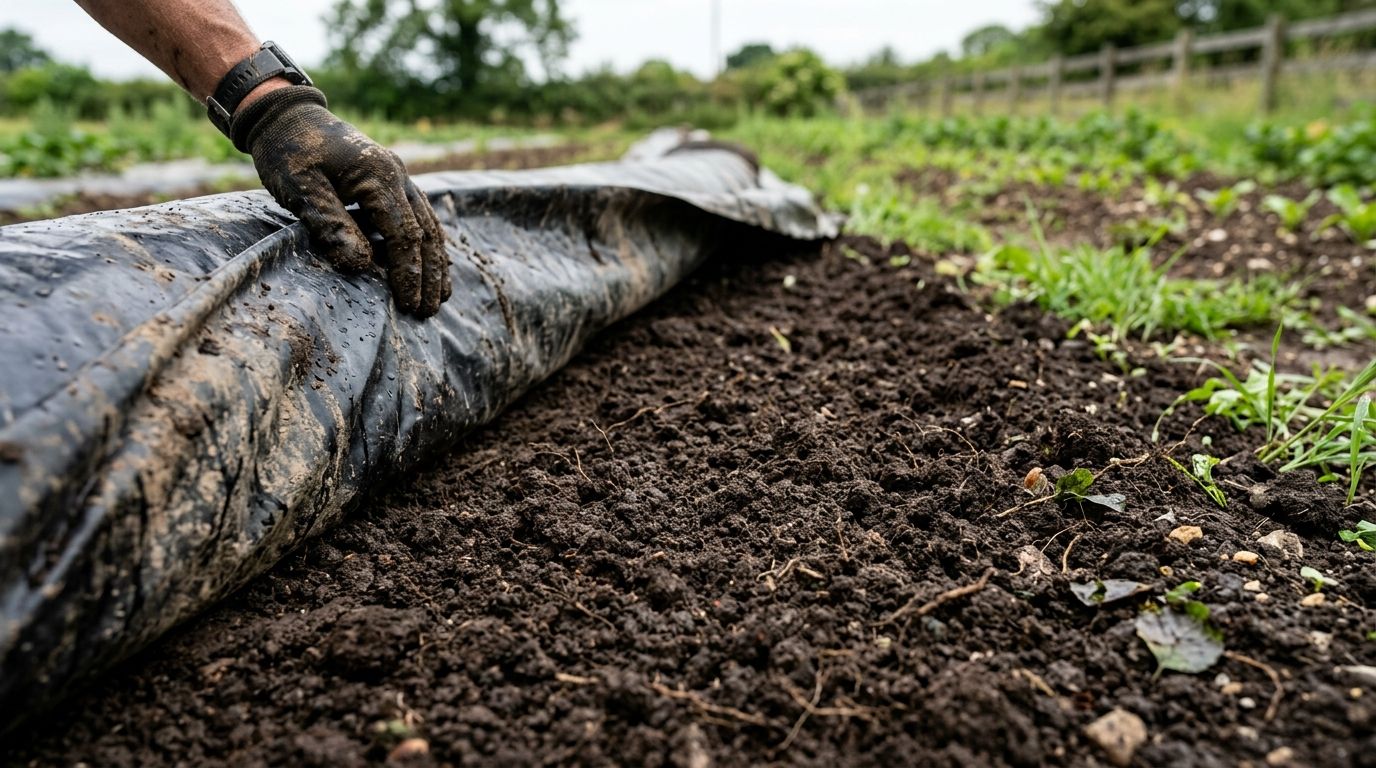
One of the best sights in no-till farming is pulling back a silage tarp that has been down for three weeks.
The soil surface looks completely different. It is soft, dark, and blanketed in fine, crumbly granules. Those granules are pure earthworm castings.
When ground sits bare under the summer sun, earthworms dive deep into the subsoil to escape dehydration and heat. But beneath the cool, damp, shaded cover of a silage tarp, earthworms feel safe right at the surface. They migrate upward by the thousands, feeding on dying weed stems and decaying roots.
As they tunnel, they create permanent vertical macro-pores that aerate the root zone. They coat the bed with worm castings full of plant-available nitrogen, phosphorus, calcium, and beneficial enzymes. You are letting earthworms do the physical bed-prep work that used to require a rototiller, while building long-term soil fertility and regenerative biology at the same time.
6. Seasonal Timelines: Matching Tarp Duration to Soil Temperature
Occultation is driven by soil temperature and biological metabolism. The time required to clear a bed varies dramatically depending on whether you deploy tarps in July or March.
+------------------------------------------------------------------------------------------------------+
|                                   SEASONAL OCCULTATION APPLICATION MATRIX                            |
+---------------+------------------+------------------+------------------------------------------------+
| Season        | Soil Temp (Top 2")| Duration Needed  | Primary Agronomic Purpose                      |
+---------------+------------------+------------------+------------------------------------------------+
| Mid-Summer    | 95°F to 130°F+   | 2 to 3 Weeks     | Rapid bed turnover between cash crops;         |
| (Jun - Aug)   |                  |                  | quick termination of spent greens & brassicas  |
+---------------+------------------+------------------+------------------------------------------------+
| Shoulder      | 60°F to 80°F     | 4 to 6 Weeks     | Spring bed preparation; knocking down early    |
| (Apr-May,Sep) |                  |                  | cool-season weed flushes before planting       |
+---------------+------------------+------------------+------------------------------------------------+
| Early Spring  | 45°F to 55°F     | 6 to 8 Weeks     | Warming cold soil early; germinating early     |
| (Feb - Mar)   |                  |                  | weeds before direct-seeding root crops         |
+---------------+------------------+------------------+------------------------------------------------+
| Full Winter   | Under 40°F       | 3 to 5 Months    | Protecting broadforked beds from rain crusting;|
| (Nov - Mar)   |                  | (Holding Pattern)| holding clean soil ready for early spring      |
+---------------+------------------+------------------+------------------------------------------------+
The Mid-Summer Flash Turnover (10 to 14 Days)
In the heat of midsummer, bed turnover needs to happen fast. When you finish harvesting a bed of spring spinach or head lettuce, you cannot afford to let those beds sit empty for a month while weeds take over.
Cut the spent crop stems at the soil surface, leaving the roots in the ground to feed soil microbes. Water the bed thoroughly. Pull a silage tarp over the beds and weight it down.
Under the baking summer sun, temperatures beneath the black plastic climb quickly past 115°F. Crop residues break down, weed seeds germinate and die, and insect pests like flea beetles or aphids trapped beneath the plastic perish. Within ten to fourteen days, peel the tarp back. The bed is clean, damp, and ready for immediate replanting with fall carrots, brassicas, or greens.
The Winter Holding Pattern: Protecting Soil from Rain and Compaction
One of the most practical ways to use silage tarps on a small farm is for winter holding.
In regions that receive heavy winter rain (like the Pacific Northwest or the Southeast), bare garden beds suffer severe damage between November and March. Relentless rainfall hammers the bare soil surface, washing away loose topsoil, leaching mobile nitrates into waterways, and packing topsoil into a hard, crusted slab. Come spring, the ground is so cold, wet, and compacted that you cannot plant until mid-May.
Instead of leaving beds bare, prepare them in October. Pull spent crops, add a thin layer of compost, aerate the ground with a broadfork, and cover the entire plot with a silage tarp for the winter.
Under the tarp, the soil stays protected. Heavy winter rains run harmlessly off the slick black plastic into pathway drains. The soil beneath remains uncompacted, crumbly, and biologically active. When spring arrives in March, pull the tarp back. While your neighbors are waiting weeks for their waterlogged gardens to dry out enough to run a tiller, your soil is warm, dry, and ready for immediate direct seeding.
7. Terminating Cover Crops Without Mechanical Cultivation
Cover crops are the foundation of regenerative soil building. Growing winter cereal rye, hairy vetch, crimson clover, or buckwheat pumps liquid carbon into the soil, feeds beneficial mycorrhizae, and prevents erosion.
The challenge has always been how to kill the cover crop when it is time to plant vegetables.
Conventional farms spray synthetic herbicides like glyphosate or use heavy tractors to disc the green manure into the soil. Organic growers without tractors often end up fighting cover crops that regrow from the crown, turning a beneficial crop into an aggressive weed.
Silage tarps solve this problem cleanly through no-till occultation.
THE NO-TILL COVER CROP OCCULTATION WORKFLOW

1. MOW DOWN THE STAND
   [Flail mower, weed eater, or heavy roller-crimper drops cover crop flat]
                    |
                    v
2. SATURATE THE RESIDUE
   [Rain or irrigation wets the green biomass completely]
                    |
                    v
3. DEPLOY SILAGE TARP
   [Black side up; seal edges with gravel bags for 3 to 4 weeks]
                    |
                    v
4. BIOLOGICAL BREAKDOWN
   [High humidity + darkness kills crowns; microbes digest stems into mulch]
                    |
                    v
5. PULL TARP & TRANSPLANT
   [Pristine, dark, weed-free seedbed covered in soft in-place organic matter]
The Tarp Termination Protocol
- Timing the Cut: For annual legumes (crimson clover, hairy vetch) and cereal grains (winter rye, oats), wait until the plants hit early flowering (roughly 50% bloom in legumes, or late boot/flowering stage in rye). At this stage, the plant has shifted its energy from root development to seed production, leaving its root crown vulnerable.
- Mow Low to the Ground: Cut the cover crop as close to the soil surface as possible. A walk-behind flail mower or heavy-duty string trimmer with a brush blade works best. Chop the green residue into manageable pieces so it lays flat on the bed.
- Roll Out the Tarp: Immediately cover the freshly cut green residue with a black silage tarp. If the ground is dry, soak it first. Secure the perimeter with gravel bags.
- Let the Microbes Work: Leave the tarp in place for three to four weeks in warm weather. The total darkness prevents the rye crowns from photosynthesizing, killing the root systems without any regrowth. Trapped humidity accelerates the decomposition of the chopped green biomass.
- The Result: When you pull the tarp back, the thick cover crop has broken down into a soft, fragrant brown layer of in-place organic mulch. Earthworms have already pulled half of it into their burrows. You can part the residue with your hands and transplant large starts (tomatoes, squashes, brassicas) directly into the undisturbed, biologically rich ground.
For a deeper dive into cover crop species selection, carbon-to-nitrogen ratios, and termination timings, study the grant-funded research in the SARE Guide to Managing Cover Crops Profitably.
8. Eradicating Tough Perennial Weeds: The Long Starvation Method
Occultation kills annual weeds quickly because annuals rely on tiny seeds with limited energy reserves. A newly germinated annual weed seedling starves within four to seven days without sunlight.
Perennial weeds are a completely different challenge.
Plants like Bermudagrass (Cynodon dactylon), field bindweed (Convolvulus arvensis), quackgrass (Elymus repens), yellow nutsedge (Cyperus esculentus), and Canada thistle (Cirsium arvense) do not rely on seeds alone. They store massive reserves of starches and carbohydrates deep underground in thick taproots, creeping rhizomes, and dormant tubers.
If you put a silage tarp over an established patch of Bermudagrass for three weeks, you will not kill it. When you pull the tarp back, you will see pale, yellow stems running across the ground. Give those stems forty-eight hours of sunlight, and they will turn bright green and start growing again with full vigor.
+------------------------------------------------------------------------------------------------------+
|                               PERENNIAL WEED STARVATION TIMELINES                                    |
+--------------------------+-----------------------+---------------------------------------------------+
| Perennial Weed Species   | Minimum Tarp Duration | Key Management Considerations                     |
+--------------------------+-----------------------+---------------------------------------------------+
| Bermudagrass (Wiregrass) | 8 to 12 Weeks (Summer)| Overlap tarp edges by 3 feet; runners seek light  |
| Field Bindweed           | 12 to 16 Weeks        | Extremely deep taproots; requires continuous dark |
| Quackgrass / Couch Grass | 8 to 10 Weeks         | Sharp rhizomes can push against thin plastic      |
| Yellow Nutsedge          | 12 to 16 Weeks (Warm) | Tubers can survive dry dark; keep soil damp       |
| Canada Thistle           | 10 to 14 Weeks        | Best started after mowing at early bloom stage    |
| Johnson Grass            | 8 to 10 Weeks (Summer)| Heavy root rhizomes exhaust quickly in high heat  |
+--------------------------+-----------------------+---------------------------------------------------+
The Carbohydrate Starvation Strategy
To kill deep-rooted perennials without herbicides or heavy machinery, you have to force the plant to burn through every ounce of its subterranean starch reserves through continuous, unbroken darkness.
- Scalp the Area: Mow the perennial weed patch down to bare soil.
- Soak the Ground: Flood the area with water. Dry rhizomes can sit dormant in dry soil for months without burning energy. Moisture forces the rhizomes to push new shoots.
- Double-Seal the Edges: Bermudagrass and bindweed runners will travel ten feet horizontally under plastic hunting for light. If they find an open edge, they will push shoots into the sun, feeding the underground root network and defeating the tarp. Overlap tarp edges by at least three feet, and weigh the borders down with a continuous wall of gravel bags or buried dirt berms.
- Be Patient (8 to 16 Weeks): Leave the tarp down through the hottest months of the summer. Deprived of light, the plant repeatedly pushes pale, yellow shoots. Each flush of growth burns stored carbohydrates from the roots. Because no photosynthesis can occur, those energy reserves are never replenished. Eventually, the root system exhausts its starch supply, rots in the warm soil, and dies.
9. Bed Turnover Workflow: Efficient Tarp Handling for Solo Growers
A 24x100-foot silage tarp covers six thirty-inch beds and weighs roughly eighty pounds dry. When it is coated in mud, rainwater, and morning dew, it can easily weigh over a hundred pounds.
If you do not have a clear system for moving and folding tarps, you will waste hours wrestling with wet plastic.
THE ACCORDION-FOLD STORAGE SYSTEM

[ Tarp Laid Out Across 6 Beds ]
===================================================
Pull edge over bed 1 & 2  --> |  Folded Half
Pull edge over bed 3 & 4  --> |  Folded Quarter
---------------------------------------------------
[ Narrow 4-Foot Long Band Across End of Bed ]
                   |
                   v
[ Roll Tightly from One End Like a Sleeping Bag ]
                   |
                   v
[ Compact Cylinder: Easy for 1 Person to Carry / Strap ]
The Accordion-Fold Method
Never bunch a silage tarp into a tangled ball like an old bedsheet. You will never unroll it cleanly again. Use the accordion-fold technique:
- Clear Standing Water First: Before moving bags, grab a stiff push broom or leaf blower and push pooled rainwater off the low spots of the tarp.
- Remove Interior Bags First: Pick up your interior gravel bags and stack them in wheelbarrows or garden carts. Remove the perimeter bags last so a rogue gust of wind does not catch the tarp while you work.
- The Longitudinal Fold: Working with a partner (or walking back and forth if solo), grab the long edge of the tarp and fold it lengthwise into the center. Walk to the other side and do the same. Repeat this process until your twenty-four-foot-wide tarp is folded into a long, neat band roughly three to four feet wide running down the length of the garden pathway.
- The Roll-Up: Start at one short end and roll the folded band tightly, exactly like rolling up a heavy sleeping bag. As you roll, push remaining air bubbles out ahead of you.
- Secure and Store: Tie a length of baling twine or a ratchet strap around the rolled cylinder. One person can easily tilt this compact bundle into a wheelbarrow and move it to the next plot. Store rolled tarps on wooden pallets off bare ground so rodents do not nest inside them over winter.
10. Preparing the Bed for Seeding After Tarp Removal
Once you pull your silage tarp back, your bed is weed-free, dark, and full of earthworm castings. But how do you go from a raw, uncovered bed to planted carrot seeds without disturbing the weed bank?
POST-TARP SEEDBED PREPARATION STEPS

1. INSPECT THE SURFACE
   [Clear any stray wood chunks, rocks, or large un-decomposed plant stalks]
                   |
                   v
2. LIGHT SUB-SURFACE AERATION (Optional)
   [Step through with a broadfork to crack deep compaction; DO NOT INVERT SOIL]
                   |
                   v
3. BED SHAPING & AMENDMENT
   [Add 1/2" layer of weed-free screened compost; feather with a bed prep rake]
                   |
                   v
4. SURFACE SMOOTHING (The Tilther)
   [Run a wire weeder or battery-powered tilther over the top 1/2" ONLY]
                   |
                   v
5. DIRECT SEEDING
   [Sow immediately with high-precision push seeders like Jang or Earthway]
The Golden Rule: Do Not Dig Deep
The most important rule after occultation is do not use tools that reach deeper than half an inch into the soil.
The entire purpose of occultation was to clear the top half-inch of soil while leaving the deep weed seed bank sleeping underneath. If you take a shovel, garden fork, or rotary cultivator and churn the soil four inches deep after pulling the tarp, you ruin the entire process. You will drag new weed seeds right back to the surface.
- Broadforking: If the subsoil needs loosening, step through the bed with a broadfork. Push the tines deep, lean back thirty degrees to crack the subsoil hardpan, and pull the tines straight out. This aerates the root zone without flipping soil layers.
- Compost Topdressing: Spread a light, half-inch topdressing of clean, finished, screened compost over the bed surface. This provides ready fertility for early roots and creates a smooth planting medium.
- Surface Tilthing: Use a landscape rake, wire weeder, or shallow battery-powered tilther to smooth the top half-inch of compost and soil into a fine seedbed.
- Direct Seeding: Roll your precision push seeder (such as a Jang Seeder or Earthway) straight down the bed. Because the soil is weed-free and smooth, your seeder drops seeds at uniform depths, leading to even germination and clean stands.
11. Economic and Labor Analysis: The Return on Silage Tarps
Market gardening is a business. Every tool you purchase must earn its keep in labor savings, crop quality, or increased bed turns.
+------------------------------------------------------------------------------------------------------+
|                                   TILLAGE VERSUS OCCULTATION COST COMPARISON                         |
+--------------------------+------------------------------------+--------------------------------------+
| Cost Factor              | Rear-Tine Rototiller System        | Silage Tarp Occultation System       |
+--------------------------+------------------------------------+--------------------------------------+
| Initial Tool Investment  | $800 - $2,500 (Tiller + Engine)   | $120 - $180 (One 24'x100' Tarp)      |
| Annual Maintenance       | $50 - $150 (Oil, spark plugs, gas) | $0 (Zero moving mechanical parts)    |
| Bed Turn Labor Time      | 45 mins/bed (Tilling & rake out)   | 10 mins/bed (Pull tarp, rake smooth) |
| Follow-Up Weeding Labor  | 4 to 8 hours per bed per week      | 30 to 45 minutes per bed per week    |
| Impact on Soil Organic C | Degrades carbon; oxidizes humus    | Preserves carbon; builds worm humus  |
| Fungal Network Health    | Shattered by spinning tines        | Undisturbed; hyphae stay intact      |
+--------------------------+------------------------------------+--------------------------------------+
Calculating Your Labor Savings
Consider a small-scale market garden with twenty thirty-inch beds devoted to direct-seeded root crops and greens.
In a tilled system, weed flushes force the grower to spend roughly four hours per bed weeding during the crop cycle. Across twenty beds, that equals eighty hours of hand weeding over a six-week rotation. At a modest farm labor value of $18 per hour, you are spending over $1,400 in labor just pulling weeds out of dirt.
In an occultation system, the pre-plant weed flush is largely wiped out before the seeds go in the ground. Hand-weeding time drops by 70% to 85%. You spend less than forty-five minutes per bed doing quick surface passes with a stirrup hoe or wire weeder.
A single $150 silage tarp pays for itself in labor savings within the first three weeks of use. It frees up hours of your week, letting you focus on harvesting, washing, packing, and selling high-value produce instead of crawling in the mud. For broader strategies on running lean, profitable growing spaces, explore our foundational guide on small-scale production and business fundamentals.
12. Troubleshooting Real-World Field Challenges
While silage tarping is simple in principle, field conditions will throw challenges your way. Here is how to handle the most common issues:
1. Water Pooling and Mosquitoes
During heavy spring downpours, water pools in low spots on the tarp. These puddles can hold hundreds of pounds of water, making the tarp impossible to move without tearing. In warm weather, stagnant puddles become mosquito breeding zones.
- The Fix: When laying your tarps, crown your garden beds slightly so water drains naturally into pathways. If a low spot collects water, pump it off with a cheap siphon hose, sweep it off with a wide broom, or use a cordless leaf blower to push the water toward the edge before you unweight the gravel bags.
2. Rodent Nesting Beneath Winter Tarps
Mice and voles love winter tarps. The dark, dry, predator-free space underneath provides ideal nesting habitat, and rodents can chew through drip irrigation lines left in the beds.
- The Fix: Never leave drip tape or plastic irrigation fittings beneath winter tarps. Pull and roll your irrigation lines before laying the plastic. Keep the grass around the perimeter of your garden mowed short so hawks, owls, and barn cats have clear visibility to hunt rodents before they reach the tarps.
3. Repairing Punctures and Tears
Accidents happen. A sharp stick, an errant garden fork tine, or a dog running across the plot can punch a hole in your tarp. Leaving holes open allows sunlight to penetrate, creating localized weed patches.
- The Fix: Never use standard gray duct tape. Duct tape adhesive dissolves in summer heat and peels away after two rainstorms. Keep a roll of UV-resistant silage repair tape in your tool shed. Clean the torn plastic with rubbing alcohol or a dry rag, apply the repair tape smoothly over both sides of the tear, and press firmly. Silage repair tape uses an industrial acrylic adhesive that bonds permanently to polyethylene and survives years of full sun.
Expert Insights & FAQs
Will a standard silage tarp application kill aggressive perennial weeds like bindweed?
Occultation will eventually kill perennial weeds, but because these plants have massive root energy reserves in their taproots or rhizomes, short-term tarping (4 weeks) is not enough. Eradicating aggressive perennials requires continuous, unbroken tarping for 3 to 6 months to fully starve the root system.
How do I keep a massive silage tarp from blowing away in a storm?
Use heavy-duty woven polypropylene sandbags filled with 15-20 lbs of pea gravel or sand. Place them every 5 to 8 feet along the entire perimeter of the plastic, and in a zig-zag grid across the center to effectively disrupt wind lift physics and prevent air pockets from forming.
Do I absolutely need to water the soil before putting down a silage tarp?
Yes, deep soil saturation is the most critical step of the process. Adequate moisture is required to initiate the rapid breakdown of organic matter by soil microbes and to force the dormant weed seeds to germinate so they can be effectively eradicated in the dark.
What is the exact difference between solarization vs occultation?
Solarization uses clear greenhouse plastic to magnify the sun's rays, superheating and pasteurizing the soil to kill seeds and pathogens, which unfortunately also harms beneficial soil microbes. Occultation uses opaque black plastic to starve plants of light while preserving a cooler, moister environment that actively stimulates healthy soil biology.
Does occultation kill weed seeds?
Yes, but indirectly through a process called fatal germination. The warm, moist environment under the tarp tricks temperature-dependent weed seeds into sprouting. Because there is absolute darkness, the fragile seedlings quickly starve to death, actively depleting the active weed seed bank in the topsoil.
What is the best thickness for silage tarp occultation?
The best and most reliable thickness is 5-mil to 6-mil UV-treated polyethylene. This specific thickness provides the perfect balance of puncture resistance against tools and animals, weight for wind resistance, and physical maneuverability for a small farm crew.
How long to leave a silage tarp on the soil?
The timeline depends heavily on the season and ambient temperatures. In the peak heat of high summer, 3 to 4 weeks is usually sufficient. In the cooler shoulder seasons of spring and fall, 6 to 8 weeks is required. Tarps can also be left on all winter (3 to 6 months) to protect prepped soil from rain compaction and nutrient leaching.
What is occultation gardening?
Occultation gardening is the regenerative agricultural practice of covering soil with an opaque, impermeable material—usually a 5-mil black silage tarp—to block sunlight, trap soil moisture, and eradicate weeds through light starvation and fatal germination.
Johnnie McCormick
Zone 7b/8a - North Central Alabama
Johnnie McCormick is a gardening hobbyist and the founder of My Garden Spot. Raised in north-central Alabama, his passion for gardening began in his youth. In 2008, he established a large market garden, teaching himself high-yield growing methods. In the years since, he has operated seasonal seedling sales for transplants, specializing in heirloom tomatoes, peppers, eggplants, decorative ground covers like Ajuga (Bugleweed), marigolds, nasturtiums, and fresh kitchen-window herb arrangements (basil, cilantro). Today, he gardens in the hills between Birmingham and Jasper, Alabama (Zone 7b/8a), sharing practical, community-focused gardening resources.
Verified Authoritative Citations & References
In alignment with our strict E-E-A-T research and verification guidelines, this guide cross-references data from the United States Department of Agriculture (USDA) and Cooperative Extension Service programs.
- USDA Natural Resources Conservation Service (NRCS): Soil Quality and Cation Exchange Capacity technical references. nrcs.usda.gov
- Cornell Cooperative Extension: Soil Health Manual and organic composting guidelines. soilhealth.cals.cornell.edu
- Penn State Extension: Soil Buffering Ratios, acidity management, and soil testing procedures. extension.psu.edu
- Alabama Cooperative Extension System (ACES): Soil testing procedures and compost formulation standards. aces.edu


Please log in to view comments.