Raised Bed Gardening: The Ultimate Beginner's Guide to Success

Raised Bed Gardening: The Ultimate Beginner's Guide to Success
Welcome to the definitive guide to raised bed gardening, your first step towards a more productive, manageable, and beautiful garden. For beginners and seasoned gardeners alike, elevating your garden beds is a transformative act. It’s about taking control of the single most important factor in your garden’s success: the soil. Imagine harvesting crisp lettuce, juicy tomatoes, and vibrant carrots from a garden that requires less weeding, less bending, and suffers from fewer soil-borne problems. This isn't a fantasy; it's the everyday reality for millions who have embraced this highly effective cultivation method. Raised beds solve a multitude of common gardening challenges, from poor native soil composition like heavy clay or rock-filled ground, to poor drainage that can lead to root rot. They offer a pristine, contained environment where you can craft the perfect growing medium from scratch, warm the soil faster in the spring for an earlier start, and create a physical barrier against common pests like slugs and burrowing animals. This guide will walk you through every critical decision, from choosing the right materials and dimensions to mixing the perfect soil and planning your layout for a continuous, bountiful harvest. Let's build your dream garden, one raised bed at a time.
What are the primary advantages of raised bed gardening over in-ground planting?
Raised bed gardening represents a fundamental shift in how we approach cultivation, moving from amending existing conditions to creating ideal ones. This control is the root of its many advantages, making it a preferred method for home gardeners and small-scale market farmers.
Deeper Dive into the Benefits:
Total Soil Control: This is the paramount advantage. If your native soil is heavy clay, excessively sandy, rocky, or contaminated, amending it can take years of hard work. With a raised bed, you can fill it with a perfectly balanced, friable, and nutrient-dense soil mix from the start. This is a game-changer for plant health and productivity. For a comprehensive look at getting your soil right, review our ultimate guide to spring soil preparation and amending.
Superior Drainage: In a raised structure, excess water drains away freely due to gravity and the loose, uncompacted soil structure. This prevents waterlogged conditions that starve plant roots of oxygen and promote fungal diseases like root rot, a common issue in heavy clay soils.
Earlier Planting and a Longer Season: The soil in a raised bed is contained above ground level, exposing it to more sunlight and air. This allows it to warm up significantly faster in the spring compared to in-ground soil. This temperature difference can mean planting weeks earlier, a crucial advantage in colder climates. You can consult our Planting Calendar to see how this might affect your specific planting dates.
Reduced Weed Pressure: By filling your bed with fresh, clean soil and compost, you start with a virtually weed-free environment. The raised walls also act as a physical barrier, preventing many creeping weeds and lawn grasses from encroaching. Any weeds that do appear are easy to pull from the loose soil.
Improved Ergonomics and Accessibility: A raised bed brings the garden up to you. A bed that's 18 to 24 inches high can be tended from a seated position, making gardening accessible and enjoyable for individuals with back pain, knee problems, or mobility challenges. It simply means less bending and stooping for everyone.
Effective Pest Barrier: The frame of a raised bed provides a useful barrier against ground-level pests like slugs and snails. Furthermore, by installing hardware cloth at the base during construction, you can create an impenetrable fortress against burrowing pests like gophers, voles, and moles.
No Soil Compaction: Because all work is done from the pathways, you never step in your growing area. This prevents soil compaction, which can inhibit root growth, reduce water penetration, and harm soil life. The soil remains light and airy, allowing roots to thrive.
What are the best materials for constructing long-lasting raised beds?
The material you choose for your raised bed frame is a significant decision, impacting your garden's aesthetics, budget, and lifespan. There is no single "best" material; the optimal choice depends on your specific priorities.
Material Comparison Table
| Material | Lifespan (Years) | Cost | Pros | Cons |
|---|---|---|---|---|
| Cedar | 15-20+ | $$$ | Naturally rot and insect resistant, beautiful appearance, stable (won't warp easily). | High upfront cost. |
| Redwood | 15-20+ | $$$$ | Excellent rot and insect resistance, similar to cedar. | Very expensive, availability can be limited. |
| Douglas Fir | 5-7 | $$ | Good strength, more affordable than cedar/redwood. | Not as rot-resistant; will decay faster. |
| Pine (Untreated) | 3-5 | $ | Very affordable and widely available. | Rots quickly in contact with soil. Best for temporary beds. |
| Galvanized Steel | 20+ | $$$ | Extremely durable, won't rot or warp, modern aesthetic, heats soil quickly. | Can get hot in very sunny climates, higher initial cost. |
| Composite Wood | 25+ | $$$$ | Made from recycled plastic and wood fibers, inert, won't rot, splinter, or warp. | Very expensive, can look less natural. |
| Concrete Blocks | 50+ | $$ | Highly durable, modular, relatively inexpensive. | Can leach lime, raising soil pH over time. Heavy and labor-intensive to install. |
| Natural Stone | 100+ | $$$$ | Permanent, beautiful, natural aesthetic. | Very expensive and requires significant skill and labor to construct (mortared or dry-stacked). |
A Note on Pressure-Treated Wood
For decades, gardeners avoided pressure-treated wood due to concerns about arsenic from chromated copper arsenate (CCA). However, since 2003, residential-use pressure-treated lumber has been treated with safer copper-based compounds like Alkaline Copper Quaternary (ACQ). While university studies have shown minimal leaching of copper into the soil, many gardeners still prefer to err on the side of caution. If you choose to use modern ACQ-treated wood, lining the inside of the bed with a food-grade plastic barrier is a common practice for peace of mind when growing edibles.
What are the optimal dimensions for raised beds to ensure easy maintenance?
Thoughtful design is crucial for an ergonomic and productive raised bed garden. The goal is to be able to reach every square inch of your growing space without ever having to step into the bed and compact the soil.
Width: The Most Critical Dimension
The rule of thumb is based on the average adult's reach. Most people can comfortably reach about 24 inches (2 feet) into a garden bed without straining. Therefore:
- 4-foot (48-inch) maximum width: This is the standard for beds that you can walk around on all sides. It allows you to reach the center from either side.
- 2 to 3-foot (24-36 inch) maximum width: This is ideal for beds placed against a fence, wall, or another structure, where you only have access from one side.
Resist the temptation to go wider to get more growing space. A 5-foot wide bed will quickly become a source of frustration, leading to compacted soil in the middle where you're forced to step or awkward, painful stretching.
Depth: How Deep is Deep Enough?
The ideal depth depends on what you plan to grow. While you can get away with shallower beds for some crops, a good all-purpose depth provides more flexibility and a larger buffer for moisture and nutrients.
- 6-8 inches: Sufficient for shallow-rooted crops like lettuce, spinach, radishes, and most herbs.
- 10-12 inches: This is the sweet spot and the most recommended depth. It's deep enough for almost all common garden vegetables, including carrots, beets, broccoli, peppers, and bush beans.
- 18-24 inches or more: Recommended for deep-rooted crops like large indeterminate tomatoes, asparagus, and potatoes. This height also offers significant ergonomic benefits, allowing you to garden while sitting on the edge of the bed.
Length and Pathways
- Length: The length is the most flexible dimension. 8-foot and 10-foot lengths are common because they align with standard lumber sizes, minimizing cuts and waste. You can make them as long as you like, but consider breaking up very long runs (over 16 feet) with a cross-path for easier access.
- Pathways: Don't neglect the space between your beds. Pathways should be a minimum of 18-24 inches for comfortable walking. If you need to navigate with a wheelbarrow or garden cart, plan for pathways that are at least 36 inches wide.
How do you prepare the ground under a raised bed to prevent weeds and pests?
Proper site preparation is a crucial step that prevents future headaches from persistent weeds and burrowing pests. Taking the time to do this right will save you countless hours of work later.
Step-by-Step Ground Preparation
Site Selection and Clearing: Choose a location that receives at least 6-8 hours of direct sunlight per day for most vegetables. Clear the area of any large rocks, sticks, or woody debris. Mow the existing grass or vegetation as short as possible.
Level the Area: Place your assembled raised bed frame in its final position. Use a level to check it. If the ground is sloped, dig out the high side and use the soil to build up the low side until the frame sits perfectly level. This ensures even water distribution throughout the bed.
Install a Pest Barrier (Optional but Recommended): If you live in an area with burrowing pests like gophers, voles, or moles, this step is non-negotiable. Before filling the bed, cut a piece of 1/4-inch or 1/2-inch hardware cloth (a sturdy metal mesh) to fit the bottom of your frame. Lay it inside the frame on the ground and staple it securely to the interior bottom edge of the wood or metal. This creates a permanent barrier that these pests cannot chew through.
Install a Weed Barrier (The Lasagna Method): This organic, no-dig method is the best way to handle the grass and weeds under your bed.
- Gather Materials: Collect plain brown cardboard boxes (remove all plastic tape and labels) or stacks of newspaper (8-10 sheets thick, no glossy ads).
- Lay it Down: Place a thick, overlapping layer of cardboard or newspaper directly on top of the mown grass inside the frame. Ensure there are no gaps where light can penetrate. The overlap should be at least 6 inches.
- Soak it Thoroughly: Use a hose to completely saturate the cardboard or newspaper layer. This helps it conform to the ground, starts the decomposition process, and attracts beneficial earthworms.
This barrier smothers the vegetation underneath by blocking sunlight, effectively killing it. Over the course of a season, the paper and cardboard will decompose, adding organic matter to the soil below and improving its structure. This is far superior to using plastic sheeting, which is impermeable and can disrupt the natural soil ecosystem. For larger areas, some market gardeners employ a similar light-blocking technique using silage tarps for weed-free no-till beds.
What is the perfect soil mix recipe to fill a raised bed for maximum growth?
Creating your own soil mix is the single most impactful thing you can do to guarantee success. You are building the perfect home for your plant's roots—a medium that is light, fluffy, rich in organic matter, and teeming with microbial life. Bagged "garden soil" or "potting mix" can be used, but mixing your own is often more cost-effective for larger beds and gives you complete control over the quality.
Calculating Your Soil Needs
First, you need to determine the volume of your bed. The formula is simple:
Volume in Cubic Feet = Length (ft) x Width (ft) x Depth (ft)
Example: For a standard 4 ft wide by 8 ft long by 1 ft deep bed: 4 ft x 8 ft x 1 ft = 32 cubic feet
Soil amendments are often sold by the cubic yard. To convert cubic feet to cubic yards, divide by 27: 32 cubic feet / 27 = ~1.19 cubic yards
So, for one 4x8x1 bed, you would need approximately 1.2 cubic yards of material in total.
The Three Pillars of Perfect Raised Bed Soil
Compost (30-50% of total volume): This is the powerhouse of your soil mix. High-quality compost provides a slow-release source of essential nutrients, improves soil structure, enhances water retention, and introduces a diverse population of beneficial microorganisms. You can use your own homemade compost or purchase it in bulk. Understanding the science of composting and the carbon-to-nitrogen balance can help you create a superior product at home.
Topsoil/Loam (30-50% of total volume): This component provides the mineral base and structure for your mix. Use a high-quality, screened topsoil or loam. Avoid using heavy clay or sandy soil from your yard, as this can introduce compaction issues and weed seeds. Loam is the ideal, as it's a balanced mix of sand, silt, and clay.
Aeration Amendment (10-30% of total volume): This keeps the soil light and fluffy, preventing compaction and ensuring that roots have access to oxygen. Excellent options include:
- Perlite or Vermiculite: Mined volcanic minerals that are extremely lightweight and porous. Vermiculite also has the added benefit of retaining water.
- Coconut Coir or Peat Moss: These fibrous materials improve both aeration and water retention. Coir is a renewable byproduct of the coconut industry, while peat moss is a less sustainable option.
- Pine Bark Fines: Small, shredded pieces of pine bark that add air pockets and slowly decompose over time.
Sample Soil Recipes
Classic All-Purpose Mix:
- 50% High-Quality Compost
- 50% Screened Topsoil
- Good for gardeners who want simplicity and have access to excellent bulk compost and topsoil.
Mel's Mix (from Square Foot Gardening):
- 1/3 Peat Moss or Coconut Coir
- 1/3 Coarse Vermiculite
- 1/3 Blended Compost (from as many different sources as possible)
- An excellent, lightweight, and water-retentive mix, especially good for rooftop or balcony gardens.
Bio-intensive High-Nutrient Mix:
- 40% Compost
- 40% Screened Topsoil
- 10% Aged Manure or Vermicompost (worm castings)
- 10% Perlite or Coconut Coir
- Ideal for heavy-feeding crops like tomatoes, peppers, squash, and corn.
What irrigation and watering systems work best for raised garden beds?
Raised bed soil, by design, is well-draining. This is a major benefit for root health, but it also means the soil can dry out faster than in-ground gardens, especially during hot, windy weather. Consistent and efficient watering is therefore critical.
Comparison of Watering Methods
| Method | Water Efficiency | Pros | Cons |
|---|---|---|---|
| Hand Watering | Low | Inexpensive startup, allows for inspection of plants. | Time-consuming, inconsistent water delivery, promotes leaf diseases if done improperly, easy to over or under water. |
| Overhead Sprinklers | Low-Medium | Can cover a large area quickly. | Wastes significant water to evaporation and wind, wets foliage which promotes fungal diseases, can lead to soil crusting. |
| Soaker Hoses | High | Inexpensive, easy to install, delivers water to the root zone. | Can clog over time, less precise water delivery than drip, may degrade in sunlight over a few seasons. |
| Drip Irrigation | Very High | Most water-efficient, highly customizable, delivers precise amount of water to each plant, keeps foliage dry, can be fully automated. | Higher initial cost and more complex setup than other methods. |
Setting Up a Simple Drip Irrigation System
For most gardeners, a basic drip irrigation system offers the best return on investment in terms of time saved and improved plant health. Here are the basic components you'll need:
- Timer: Attaches to your spigot and automates your watering schedule. This is the single best upgrade for any watering system.
- Backflow Preventer: A safety device that prevents garden water from siphoning back into your home's water supply.
- Filter: Removes sediment that could clog the small drip emitters.
- Pressure Regulator: Reduces your home's water pressure to the low pressure required for drip systems (typically 25 PSI).
- Mainline Tubing (1/2" Poly): This is the main artery of your system, running from the spigot to your raised bed.
- Feeder Tubing (1/4" Vinyl): Smaller tubes that branch off the mainline to deliver water to specific locations.
- Emitters: The small plastic heads that drip water at a controlled rate (e.g., 0.5, 1, or 2 gallons per hour).
A typical layout for a 4x8 bed involves running a single 1/2" mainline down the center of the bed and then punching in 1/4" feeder lines with emitters placed near the base of each plant.
How Much and How Often to Water
- The Goal: Aim to provide about 1 inch of water per week, but this can vary greatly based on weather and crop type.
- The Method: Water deeply and infrequently rather than shallowly and often. Deep watering encourages plants to develop strong, deep root systems.
- The Test: The best way to know if you need to water is to check the soil. Stick your finger 2-3 inches into the soil. If it feels dry at that depth, it's time to water.
How do you plan crop spacing and layout within a raised bed system?
Raised beds are perfect for intensive gardening, a method that aims to maximize yields from a small space. Forget traditional single-file rows with wide, empty paths between them. In a raised bed, you can treat the entire surface as usable growing area.
Square Foot Gardening (SFG)
Developed by Mel Bartholomew, SFG is a simple and brilliant system for organizing your raised bed. The surface of the bed is divided into a grid of 1x1 foot squares.
- How it Works: Each square is planted with a specific number of plants, depending on their mature size. Instead of thinking about spacing between rows, you only think about how many plants fit in a square.
- Example Spacing per Square Foot:
- 1 Plant: Tomato (staked), Pepper, Eggplant, Broccoli, Cabbage
- 4 Plants: Lettuce (leaf), Swiss Chard, Marigolds
- 9 Plants: Bush Beans, Spinach, Onions (for bulbs)
- 16 Plants: Carrots, Radishes, Scallions
Our interactive Garden Planning Tool is designed to help you easily visualize and implement SFG or other intensive spacing methods for your specific bed dimensions.
Key Layout Principles
Sun Orientation: This is the most important rule. Always plant your tallest crops on the north side of the bed (in the Northern Hemisphere). This includes plants like indeterminate tomatoes, pole beans on a trellis, or sunflowers. This ensures they don't cast a shadow over their shorter neighbors as the sun moves across the sky.
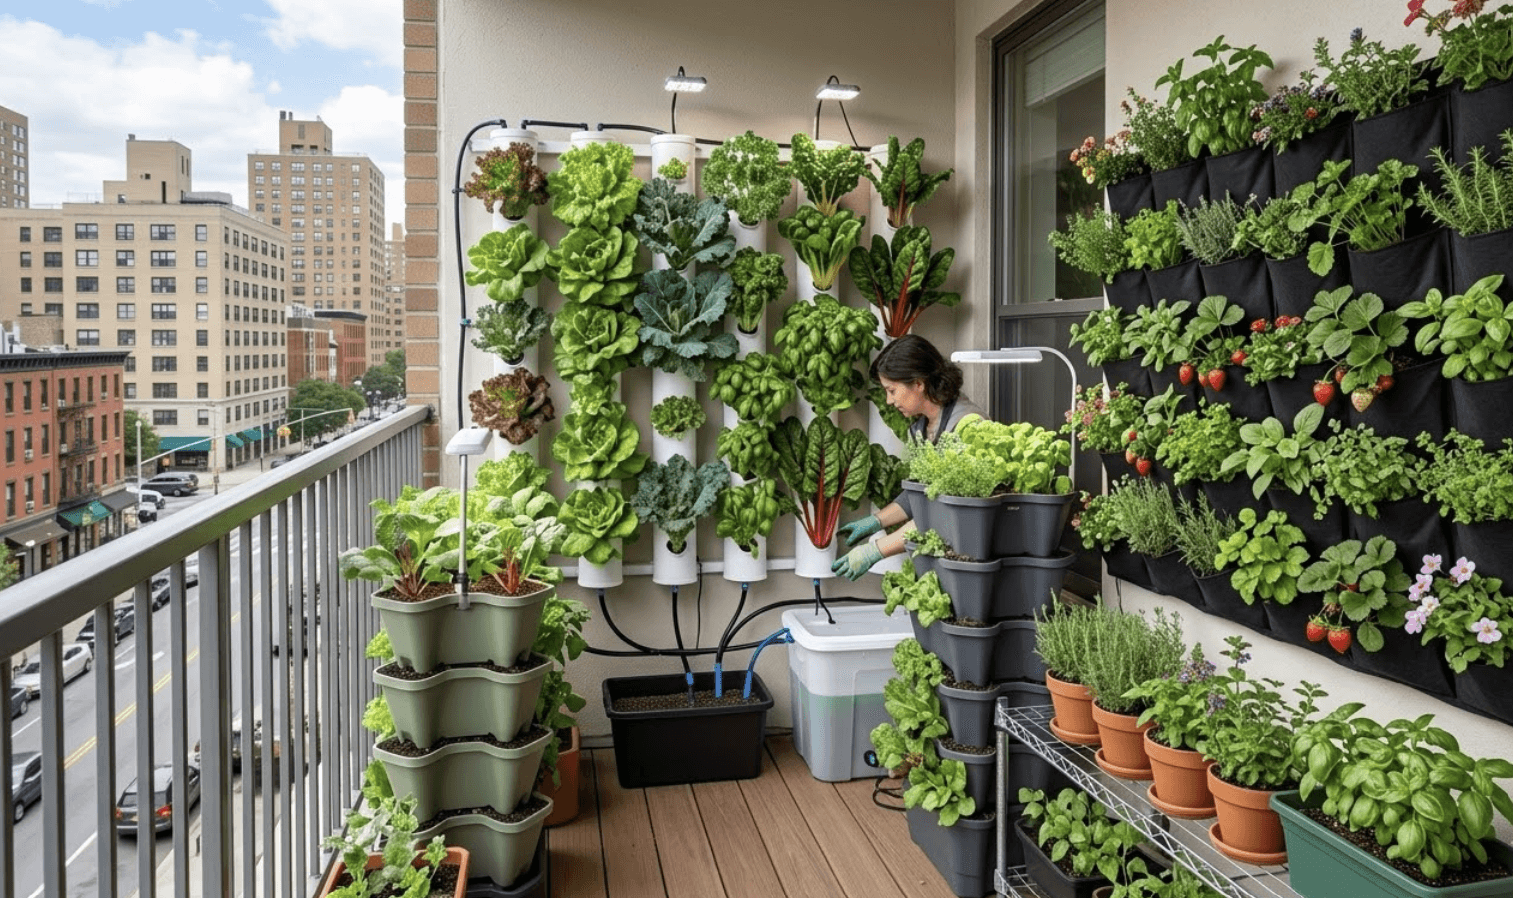
Vertical Gardening: A raised bed is the perfect anchor for trellises, cages, and other vertical supports. Growing vining plants like cucumbers, peas, melons, and pole beans upwards saves an enormous amount of bed space, improves air circulation (reducing disease), and makes harvesting easier. Explore our guide on vertical gardening to maximize yields in minimal spaces.
Companion Planting: Group plants that help each other thrive. Some plants can deter pests, attract beneficial insects, or improve the growth of their neighbors. For example, planting basil near tomatoes is thought to repel tomato hornworms. You can explore thousands of beneficial and detrimental pairings with our Companion Visualizer tool.
Succession Planting: To get a continuous harvest, don't plant everything at once. When a fast-growing crop like lettuce or radishes is harvested, immediately plant something new in its place. For example, follow an early spring spinach crop with summer bush beans, and then follow the beans with a fall planting of garlic.
What simple seasonal maintenance tasks keep raised beds highly productive?
Raised beds are a closed ecosystem, and the intense cultivation they support means nutrients are used up more quickly than in a traditional garden. A simple seasonal maintenance routine is essential for long-term soil health and productivity.
Spring Kick-Start
- Remove Winter Mulch: Pull back any mulch you applied in the fall to allow the soil to warm up.
- Amend with Compost: This is the most important annual task. The soil level in your bed will likely have dropped by a few inches over the winter as organic matter decomposed. Add 1 to 3 inches of high-quality compost to the top of the bed. You can gently work it into the top few inches with a garden fork, but aggressive tilling is unnecessary and can harm soil structure.
- Add Targeted Fertilizers (Optional): If you know your crops are heavy feeders (e.g., tomatoes, corn), you can add a balanced, slow-release organic granular fertilizer at this time according to package directions.
- Check Irrigation: Turn on your drip or soaker hose system and check for any leaks, cracks, or clogged emitters before planting begins.
Summer Care
- **Mulch, Mulch
Expert Insights & FAQs
What are the primary advantages of raised bed gardening over in-ground planting?
Raised bed gardening offers superior control over soil quality, ensuring a perfect, nutrient-rich growing medium from day one. Key benefits include improved drainage to prevent root rot, faster soil warming in the spring for an extended growing season, significantly fewer weeds, and better ergonomics that reduce physical strain.
What are the best materials for constructing long-lasting raised beds?
The best materials balance longevity, cost, and safety. Naturally rot-resistant woods like Cedar and Redwood are top choices, lasting 10-20 years. Galvanized steel offers excellent durability and a modern look. For a budget-friendly option, untreated pine can last several years, especially if the interior is protected.
What are the optimal dimensions for raised beds to ensure easy maintenance?
For easy access, a raised bed should be no wider than 4 feet if accessible from both sides, or 2-3 feet if against a wall. The length can vary, with 8 or 10 feet being common. A depth of 10-12 inches provides ample root space for the vast majority of vegetables.
How do you prepare the ground under a raised bed to prevent weeds and pests?
First, clear and level the site. To suppress weeds and grass without chemicals, use the sheet mulching method by laying down a layer of overlapping cardboard or newspaper directly on the ground. For protection against gophers or voles, staple a layer of sturdy hardware cloth to the bottom of the frame.
What is the perfect soil mix recipe to fill a raised bed for maximum growth?
The ideal raised bed soil, often called garden gold, is a balanced blend of three components: one-third high-quality compost for nutrients, one-third topsoil or loam for structure and minerals, and one-third an aeration material like perlite, vermiculite, or coconut coir to prevent compaction and ensure good drainage.
What irrigation and watering systems work best for raised garden beds?
Drip irrigation and soaker hoses are the most efficient and effective watering methods for raised beds. They deliver water slowly and directly to the plant roots, which conserves water, reduces evaporation, and keeps foliage dry to prevent common fungal diseases. A simple timer can automate the entire process.
How do you plan crop spacing and layout within a raised bed system?
Utilize intensive planting techniques like Square Foot Gardening, which uses a grid to space plants based on their mature size. Always place tall crops like tomatoes or trellised cucumbers on the north side of the bed to prevent them from shading smaller plants. Incorporate companion planting for natural pest control.
What simple seasonal maintenance tasks keep raised beds highly productive?
Each spring, amend the bed by top-dressing with 1-2 inches of fresh compost to replenish nutrients. During summer, apply a thick layer of mulch to conserve moisture and suppress weeds. In the fall, remove spent plants and consider planting a cover crop like clover to protect and enrich the soil over winter.
Johnnie McCormick
Zone 7b/8a - North Central Alabama
Johnnie McCormick is a gardening hobbyist and the founder of My Garden Spot. Raised in north-central Alabama, his passion for gardening began in his youth. In 2008, he established a large market garden, teaching himself high-yield growing methods. In the years since, he has operated seasonal seedling sales for transplants, specializing in heirloom tomatoes, peppers, eggplants, decorative ground covers like Ajuga (Bugleweed), marigolds, nasturtiums, and fresh kitchen-window herb arrangements (basil, cilantro). Today, he gardens in the hills between Birmingham and Jasper, Alabama (Zone 7b/8a), sharing practical, community-focused gardening resources.
Verified Authoritative Citations & References
In alignment with our strict E-E-A-T research and verification guidelines, this guide cross-references data from the United States Department of Agriculture (USDA) and Cooperative Extension Service programs.
- Cornell Cooperative Extension: Home Vegetable Gardening Guide and vegetable variety recommendations. gardening.cals.cornell.edu
- Penn State Extension: Master Gardener Manual and companion planting matrices. extension.psu.edu
- Alabama Cooperative Extension System (ACES): Raised bed construction plans and regional seed planting calendars. aces.edu
- USDA NRCS: Cover crops and biological soil health guidelines. nrcs.usda.gov
Please log in to view comments.