
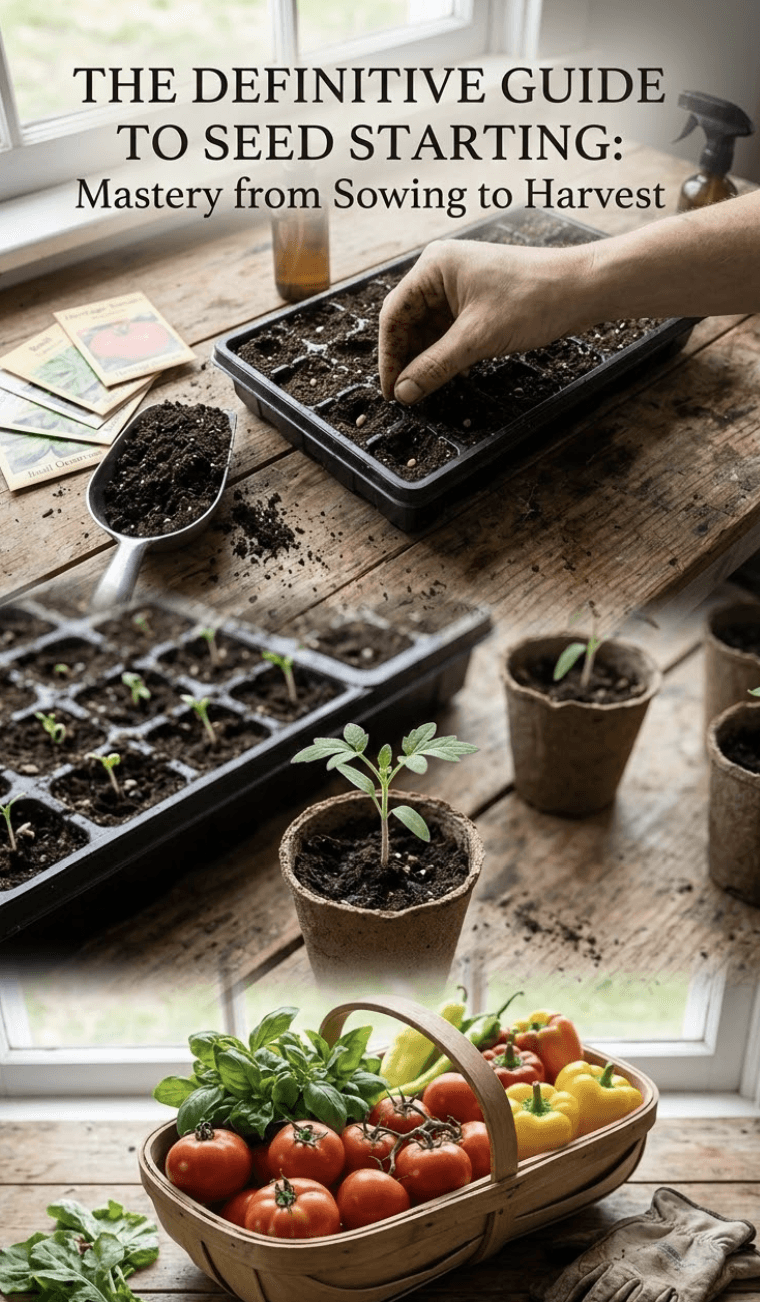
Seed Starting 101: A Complete Indoor Guide for Beginners
Mastering the art of indoor seed starting is the definitive threshold between casual, seasonal gardening and true horticultural self-sustainability. While purchasing nursery transplants offers immediate gratification and convenience, it severely limits your access to genetic diversity, ties your harvest to commercial availability, and introduces the risk of importing external pathogens and pests into your carefully managed localized soil ecosystem. Starting your own seeds indoors grants you absolute control over the cultivation lifecycle, access to thousands of heirloom and open-pollinated varieties, and a significant reduction in the long-term economic cost per plant.
This comprehensive, academic-level guide explores the physiological mechanics of seed germination, details the precise environmental controls required for successful indoor cultivation, and provides a master-level breakdown of sowing schedules, maintenance routines, and transplanting protocols for every major garden crop.
The Physiology of Germination
To successfully start seeds and achieve high germination rates, one must fundamentally understand the biological mechanisms at play. A seed is a fully formed but dormant embryo, waiting in stasis for highly specific environmental triggers to break its dormancy. This process relies on a precise intersection of three primary variables: moisture, temperature, and, in some specific botanical cases, light exposure.
Imbibition and Enzymatic Activation: The very first stage of germination is imbibition, which is the rapid, passive uptake of water by the dry seed coat. This sudden hydration activates metabolic enzymes within the seed that immediately begin breaking down the seed's endosperm (the stored starches) into usable, simple sugars for the embryo. If the growing medium dries out during this critical, highly vulnerable phase, the embryo will desiccate and die instantly.
Temperature and the Thermodynamics of Soil: Different plant families have evolved highly specific soil temperature requirements to trigger germination. Cool-season crops (such as Brassicas) can germinate in soil temperatures as cold as 50°F (10°C). However, warm-season crops (such as those in the Solanaceae family) require consistent, elevated soil temperatures between 75°F and 85°F (24°C - 29°C) to break dormancy efficiently. Ambient room temperature is rarely an accurate reflection of wet soil temperature.
Photoblastic Responses (Light vs. Darkness Requirements): While the vast majority of vegetable seeds require total darkness to germinate and should be planted at a depth equal to roughly twice their diameter, some seeds exhibit a positive photoblastic response. Seeds like lettuce, celery, snapdragons, and certain herbs require direct exposure to light to trigger the germination enzymes and must be surface-sown and gently pressed into the medium without being covered.
Essential Equipment for Indoor Cultivation
Success in indoor seed starting is entirely dictated by your ability to precisely control the microclimate. Attempting to start seeds on a cold, drafty, or inconsistently lit windowsill almost universally results in weak, diseased, or severely "leggy" plants that fail to thrive in the garden.
Sterile, Soil-Less Growing Medium: Never, under any circumstances, use garden soil, compost, or heavy outdoor potting soil for indoor seed starting. Outdoor soil harbors dormant fungal spores (specifically Pythium and Rhizoctonia, which cause the fatal "damping-off" disease) as well as weed seeds and insect eggs. You must use a sterile, soil-less seed starting mix. These mixes are typically composed of finely milled peat moss or sustainably sourced coco coir for base structure, perlite for essential root aeration, and vermiculite for consistent moisture retention.
High-Intensity Full-Spectrum Lighting: Natural window light is insufficient for healthy, compact seedling development, inevitably leading to phototropism (the plant stretching weakly toward the light source). Utilize full-spectrum LED grow lights suspended exactly 2 to 4 inches above the top of the foliage canopy. These lights must be raised incrementally as the plants grow. Seedlings require 14 to 16 hours of intense, direct light daily to synthesize enough energy for root development.
Thermostatic Seedling Heat Mats: Because ambient room temperature (usually 68°F to 72°F) is insufficient for warm-season crops, thermostatic seedling heat mats are required. Placed directly beneath the germination trays, these mats provide localized, bottom-up conduction heat, raising the soil temperature 10 to 20 degrees above the ambient room temperature to ensure rapid, uniform germination.
Airflow and Mechanical Ventilation: Once the seeds have breached the soil surface, constant, gentle airflow becomes mandatory. An oscillating fan set on a low setting mimics natural outdoor wind. This mechanical stress creates micro-tears in the cellular walls of the seedling stems. The plant repairs these tears by producing lignin, resulting in a thick, robust, structural stem capable of withstanding outdoor elements after transplanting. Furthermore, airflow prevents stagnant, humid micro-climates at the soil surface, which breed fungal pathogens.
Calculating Your Sowing Schedule by Hardiness Zone
Timing is the single most critical mathematical calculation in indoor seed starting. Starting seeds too early results in large, "root-bound" plants that exhaust their cellular space and suffer severe, sometimes fatal, transplant shock when finally moved outdoors. Starting too late wastes precious weeks of your geographic growing season, risking crop loss to autumn frosts.
Your entire indoor sowing schedule revolves around one highly localized metric: your Average Last Spring Frost Date. While your USDA Hardiness Zone (e.g., Zone 5b, Zone 8a) helps identify your general geographic climate and perennial survival rates, the specific statistical frost date for your exact zip code is the anchor for your sowing calendar.
Step 1: Identify Your Last Frost Date: Consult your local university agricultural extension or a reliable localized planting calendar to find the precise date when the statistical danger of frost passes in your micro-climate.
Step 2: Consult the Cultivar Data: Read the back of your seed packet or the breeder's catalog. Look for the specific phrase, "Start indoors X to Y weeks before average last frost."
Step 3: Calculate Backward: If your last frost date is firmly established as May 15th, and a specific tomato cultivar requires 6 weeks of indoor vegetative growth, you will count backward exactly 42 days on the calendar to arrive at a strict indoor sowing date of April 3rd.
Crop-Specific Sowing and Germination Guidelines
Different botanical families have evolved vastly different requirements for germination and root development. Below is the master-level guide to handling the major vegetable varieties for optimal yields.
1. Solanaceae (Tomatoes, Peppers, Eggplants)
When to Start: 6 to 8 weeks before the last frost. Note that hot peppers (Capsicum chinense) and eggplants grow significantly slower in their early stages than tomatoes and should universally be started at the full 8-week mark.
Germination Protocol: These are tropical and subtropical natives that require absolute warmth. Use a thermostatic heat mat to maintain a precise soil temperature of 80°F to 85°F (27°C - 29°C). Germination typically takes 5 to 14 days, depending on the heat consistency. Remove from the heat mat the moment 50% of the tray has sprouted to prevent rapid soil desiccation.
Transplanting and Root Biology: Tomatoes possess a unique biological trait: adventitious roots. They have the ability to grow new root structures directly from the epidermal tissue of their main stems. Therefore, when transplanting to the garden or greenhouse, you must bury them deeply, stripping the bottom leaves and sinking the stem into the soil up to the top node. Peppers and eggplants do not share this trait and must be planted exactly at their original soil line to avoid stem rot.
2. Brassicas (Broccoli, Cabbage, Cauliflower, Kale, Brussels Sprouts)
When to Start: 4 to 6 weeks before the last frost for a spring-harvested crop. Brassicas can also be started in mid-summer (in shaded, cool areas) for an autumn/winter harvest.
Germination Protocol: These are rugged, cool-season crops. They germinate highly efficiently at standard ambient room temperatures (65°F - 70°F / 18°C - 21°C) and completely eschew the need for a heat mat. High heat can actually inhibit their germination. Sprouting occurs rapidly, often within a mere 3 to 7 days.
Transplanting and Root Biology: Brassicas are uniquely frost-hardy. Due to their cellular structure and sugar concentrations, they act as natural antifreeze. They can (and should) be hardened off and transplanted into the garden 2 to 4 weeks before your last frost date, provided the soil is workable.
3. Cucurbits (Cucumbers, Summer Squash, Winter Squash, Melons)
When to Start: Exactly 2 to 4 weeks before the last frost. These plants are incredibly fast, aggressive growers. Starting them any earlier will result in massive, unmanageable vines tangling under your grow lights.
Germination Protocol: Cucurbits have incredibly sensitive, brittle taproots. They absolutely despise root disturbance and suffer from severe, growth-stunting transplant shock if their root mass is manipulated. It is highly recommended to start these seeds in biodegradable vessels (such as composted cow manure pots or high-quality peat pots) so the entire vessel can be planted directly into the soil without ever extracting the root ball. Maintain soil temps around 75°F (24°C).
Transplanting and Root Biology: Wait until the danger of frost is entirely zero and the garden soil has thoroughly warmed to at least 65°F (18°C) before moving them outdoors. Cold soil will stunt a cucurbit permanently.
4. Alliums (Onions, Leeks, Shallots)
When to Start: 10 to 12 weeks before the last frost. Alliums are incredibly slow, steady, methodical growers that require a massive head start to achieve proper bulb size before the summer solstice triggers their bulbing phase.
Germination Protocol: Start allium seeds thickly broadcasted in a deep, communal tray or flat. They do not require individual cells. Maintain a soil temperature of 70°F (21°C).
Transplanting and Root Biology: As the green, grass-like shoots grow tall and begin to flop over under the grow lights, you must routinely give them a "haircut" with sterilized scissors, trimming the tops back to 3 inches tall. This prevents them from tangling and forces the plant's metabolic energy downward into root system development and cellular bulb structure rather than excessive top foliage.
5. Legumes (Beans, Peas) and Root Crops (Carrots, Radishes, Turnips)
When to Start: Do not start these indoors under any circumstances.
Germination Protocol: These botanical varieties should be strictly and exclusively direct-sown into the outdoor garden beds. Root crops will permanently deform, fork, or stunt if their delicate primary taproot hits the bottom of a starter cell or is disturbed during transplanting. Legumes grow with such immense speed outdoors that starting them indoors yields absolutely zero practical time advantage and only increases the risk of transplant shock.
Daily Maintenance: Watering, Nutrition, and Up-Potting
Germination is only the first hurdle. Cultivating a seed into a robust transplant requires daily, meticulous horticultural management.
The Bottom-Watering Imperative: Never water seedlings from above. Top-watering compresses the delicate soil structure, displaces tiny seeds, and leaves the soil surface perpetually wet, creating a perfect breeding ground for fungus gnats and mold. Instead, practice bottom-watering. Pour filtered water directly into the solid, watertight tray holding your cellular inserts. Allow the soil medium to wick the moisture upward via natural capillary action for 30 minutes, then pour out any excess standing water to prevent root asphyxiation.
Nutritional Protocols: Seeds contain a precise amount of internal endosperm designed to sustain the plant entirely through germination and the unfurling of the "cotyledons" (the first set of smooth, embryonic leaves). The sterile seed-starting mix contains zero nutrients. Therefore, you must intervene exactly when the plant develops its first set of "true leaves" (the leaves that resemble the mature plant). Begin applying a heavily diluted, quarter-strength organic liquid fertilizer (such as a 2-3-1 fish emulsion or kelp extract) once a week via the bottom-watering method.
Potting On (Up-Potting): If a plant outgrows its initial starter cell before the outdoor weather is completely cooperative, you must perform "potting on." Carefully extract the seedling and move it into a larger 3-inch or 4-inch pot filled with a richer, nutrient-dense potting soil (not seed starter mix). This prevents the roots from circling the cell and strangling themselves (becoming root-bound).
The Transplanting Protocol: The Science of Hardening Off
Taking a seedling directly from the coddled, perfectly climate-controlled, windless, UV-filtered environment of your home and placing it directly into the harsh, dynamic reality of the outdoor garden will result in immediate cellular collapse and death via severe ultraviolet sunburn, wind snap, or thermal shock. You must initiate a gradual biological adaptation process known in horticulture as "hardening off."
Day 1-3 (The Introduction): Place the trays of seedlings outdoors in deep, completely protected shade (such as a covered northern porch or under a dense tree canopy) for 2 to 3 hours during the mildest, early-morning part of the day. Bring them indoors to their safe environment well before the afternoon heat.
Day 4-7 (Building Resilience): Gradually introduce the plants to dappled, filtered sunlight and gentle morning breezes for 4 to 6 hours. The mechanical stress of the wind will force the stems to thicken rapidly. Continue bringing them inside every single night.
Day 8-10 (Full Exposure): Gradually expose the plants to direct, intense afternoon sun. Leave them out overnight for the first time, provided the nighttime temperatures are strictly adhering to the plant's minimum requirements (above 50°F / 10°C for warm-season crops like tomatoes and peppers).
Day 11-14 (Final Integration): The plants' epidermal cuticles have now thickened significantly to block excess UV radiation, their root systems are primed, and their stems are rich in structural lignin. They are now officially ready for permanent transplanting into your raised beds, market garden rows, or community cooperative plots. Transplant on an overcast day or in the late evening to minimize final planting shock.
Expert Insights & FAQs
What is "damping off" and how do I completely prevent it?
Damping off is a highly destructive, soil-borne fungal disease (usually caused by *Pythium* or *Rhizoctonia* species) that causes the stems of perfectly healthy seedlings to suddenly pinch, shrivel, and turn black at the exact soil line, resulting in the plant collapsing and dying within hours. It is 100% fatal and highly contagious to the rest of the tray. It is prevented by exclusively using sterilized, soil-less peat/coir mediums, thoroughly washing your plastic trays with a 10% bleach solution between seasons, ensuring excellent mechanical airflow with a fan, and avoiding overwatering via bottom-watering techniques.
Why are my indoor seedlings growing incredibly tall, skinny, pale, and falling over?
This physiological condition is called "legginess" or phototropism. It is entirely caused by insufficient light intensity. The plant is exhausting its finite metabolic energy reserves stretching upward to find a stronger light source. A sunny window is never enough. To fix this, you must immediately lower your LED grow lights to within exactly 2 to 4 inches of the highest foliage canopy and ensure the lights remain on for a strict 14 to 16 hours a day.
Can I safely reuse the leftover potting soil from last year's patio containers for indoor seed starting?
Absolutely not. Reused outdoor potting soil almost universally harbors dormant fungal spores, microscopic pests, fungus gnat larvae, and bacterial pathogens. Indoor seed starting requires a clinically pristine, highly sterile environment to protect the highly vulnerable, immunologically weak embryonic plants. Always start with fresh, sterilized seed starting mix.
Exactly when should I start applying fertilizer to my indoor seedlings?
You should completely withhold fertilizer during the initial germination phase. The seed contains all the nutrition it needs. You must only begin applying a heavily diluted (1/4 to 1/2 strength) organic, water-soluble liquid fertilizer once the plant successfully unfurls its first set of "true leaves." Applying fertilizer too early will chemically burn the fragile embryonic root hairs and kill the plant.
What is the botanical difference between "true leaves" and "seed leaves" (cotyledons)?
The very first leaves to emerge from the soil upon germination are the cotyledons (seed leaves). These are actually part of the seed embryo itself. They often look round, thick, and highly generic, looking nothing like the mature plant. The next set of leaves to grow from the central apical meristem will be the "true leaves." These true leaves will possess the distinct shape, texture, and botanical characteristics of the specific plant variety (e.g., the serrated edges of a tomato leaf).
Is the bottom-watering method truly superior to standard top-watering for young seedlings?
Yes, fundamentally and scientifically. Bottom-watering involves pouring water directly into the solid, watertight base tray holding your cellular seedling inserts, allowing the soil medium to wick the moisture upward via capillary action. This method actively encourages deep, aggressive downward root growth as the roots chase the moisture. Crucially, it keeps the very top surface of the soil completely dry, which drastically reduces the environmental conditions necessary for fungal growth and fungus gnat infestations.
A layer of white, fuzzy mold is growing on the surface of my seedling soil. Is my plant ruined?
Not necessarily, but it is a dire warning sign regarding your micro-climate. Saprophytic fungi naturally exist to decompose organic matter in wet environments and are generally harmless to the living plant tissue. However, their presence is a massive indicator that your soil is remaining far too wet, your humidity is too high, and your environment severely lacks proper mechanical airflow. Scrape the mold off gently with a sterile tool, immediately cease watering until the trays feel light, and turn on an oscillating fan to dry the soil surface.
My entire tray of seeds failed to germinate after three weeks. What catastrophic error occurred?
Total, 100% germination failure in a tray is almost exclusively caused by one of three primary environmental or biological factors: 1) The soil was allowed to dry out completely during the critical imbibition phase, causing the awakened embryo to instantly desiccate and die. 2) The soil temperature was significantly too cold (or dangerously too hot) for the specific cultivar, keeping the seeds in deep dormancy. 3) The seed stock itself was severely aged, improperly stored (exposed to high heat or humidity in storage), and biologically non-viable.
Johnnie McCormick
Zone 7b/8a - North Central Alabama
Johnnie McCormick is a gardening hobbyist and the founder of My Garden Spot. Raised in north-central Alabama, his passion for gardening began in his youth. In 2008, he established a large market garden, teaching himself high-yield growing methods. In the years since, he has operated seasonal seedling sales for transplants, specializing in heirloom tomatoes, peppers, eggplants, decorative ground covers like Ajuga (Bugleweed), marigolds, nasturtiums, and fresh kitchen-window herb arrangements (basil, cilantro). Today, he gardens in the hills between Birmingham and Jasper, Alabama (Zone 7b/8a), sharing practical, community-focused gardening resources.
Verified Authoritative Citations & References
In alignment with our strict E-E-A-T research and verification guidelines, this guide cross-references data from the United States Department of Agriculture (USDA) and Cooperative Extension Service programs.
- Cornell Cooperative Extension: Home Vegetable Gardening Guide and vegetable variety recommendations. gardening.cals.cornell.edu
- Penn State Extension: Master Gardener Manual and companion planting matrices. extension.psu.edu
- Alabama Cooperative Extension System (ACES): Raised bed construction plans and regional seed planting calendars. aces.edu
- USDA NRCS: Cover crops and biological soil health guidelines. nrcs.usda.gov
Please log in to view comments.