How Do You Start a Profitable Commercial Microgreens Business on Racks with Restaurant Chef Sales?

How Do You Start a Profitable Commercial Microgreens Business on Racks with Restaurant Chef Sales?
In the entire world of agriculture, there is no enterprise with a higher revenue density than commercial microgreens.
Think about traditional outdoor farming for a moment. To grow a head of cabbage, you prepare soil, transplant a seedling, weed the bed for seventy days, defend it against hornworms and flea beetles, pray for rain, and finally harvest a head you sell for three dollars. If hail ruins the crop in week eight, two months of labor evaporate instantly.
Now consider commercial microgreens. In an air-conditioned spare bedroom, basement, or garage corner occupying an eight-by-four-foot footprint, you stack two chrome wire utility racks. On those racks, you slide forty shallow plastic nursery flats. You sow organic seeds, water them from the bottom, flip on a bank of LED shop lights, and harvest seven to twelve days later. Each ten-by-twenty-inch tray yields between eight and sixteen ounces of pristine, nutrient-dense cotyledon greens that local restaurant chefs gladly purchase for twenty-five to forty-five dollars per pound.
A single four-tier wire shelving rack taking up just eight square feet of floor space can reliably churn out $500 to $800 in gross weekly revenue. That is over $2,500 a month produced from a corner of your house that used to store holiday decorations and old lawn chairs.
I began growing commercial microgreens down here in Alabama around 2009. At the time, I was running full outdoor beds, but summer heat waves in July and August would regularly spike past 95°F with crushing humidity, scorching our field lettuces and bringing tender spring greens to a screeching halt. Moving indoors into controlled environment racks gave us year-round, weather-proof cash flow that insulated our farm business from droughts, freezes, and torrential rains.
Yet, despite the alluring profit margins, hundreds of eager beginners crash and burn in their first six months. They buy cheap lights, overwater their trays, get overrun by fuzzy damping-off mold, or grow thirty trays of delicate red amaranth without a single buyer lined up.
Commercial microgreens is not a casual gardening hobby; it is a precision indoor manufacturing process coupled with aggressive, relationship-driven business-to-business (B2B) sales. This guide lays out every step of the operational blueprint: facility engineering, environmental control, seed density mathematics, harvest sanitization, packaging, and the exact script for walking into high-end restaurant kitchens to secure recurring commercial chef accounts.
Controlled Environment Facility Engineering: Wire Racks, Photons, and Airflow
Outdoor plants rely on nature for soil microbes, sun, wind, and rain. When you grow indoors, you are playing God. Every single environmental variable—light spectrum, photoperiod, temperature, vapor pressure deficit (VPD), relative humidity, and airflow—must be intentionally engineered and mechanically maintained.
The Structural Rack Anatomy
Do not build custom wooden shelving. Raw wood absorbs ambient moisture, harbors fungal spores, warps over time, and is nearly impossible to sanitize between harvest cycles.
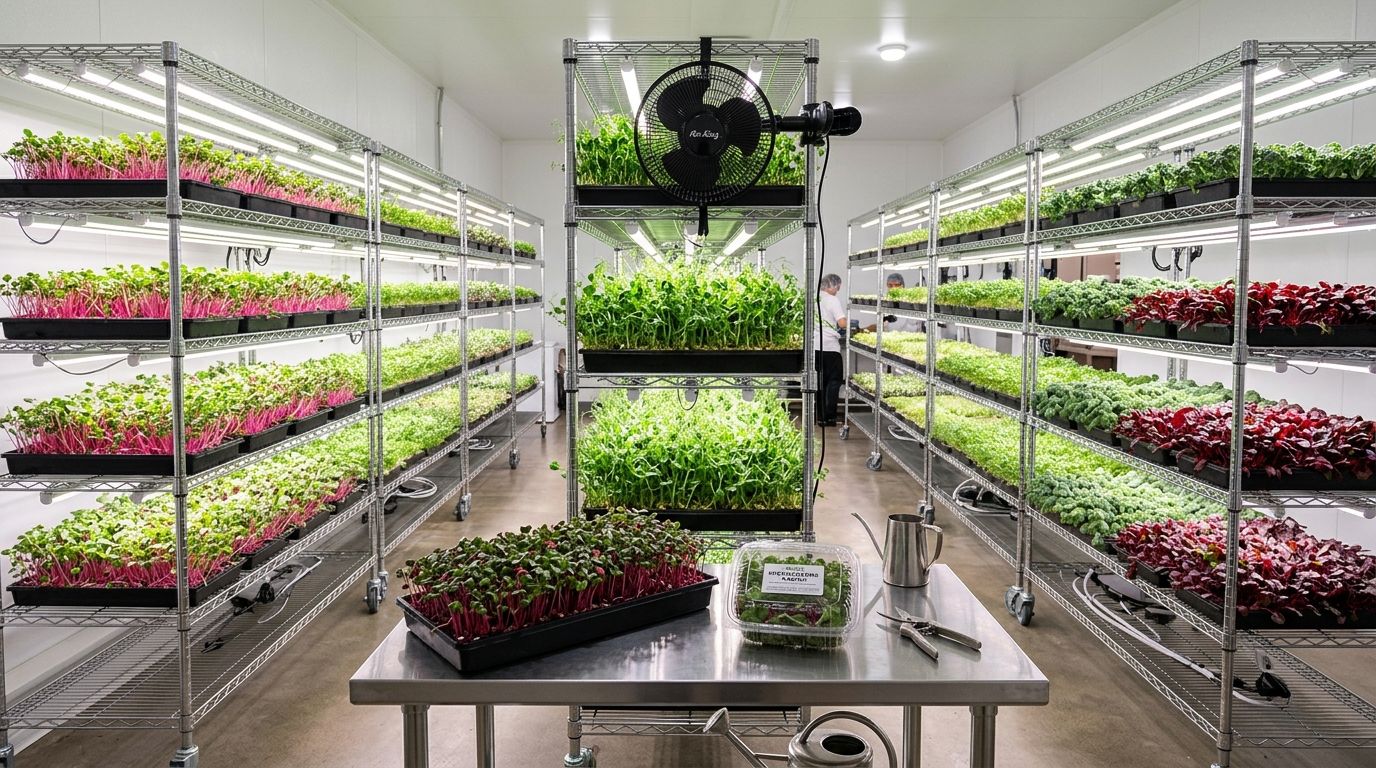
Standardize exclusively on heavy-duty 4-tier or 5-tier chrome wire shelving units (typically 48 inches wide, 18 or 24 inches deep, and 72 inches tall, commonly sold by brands like Seville Classics or Metro):
- Why Chrome Wire? Wire grid decks allow unrestricted vertical air circulation, prevent stagnant humidity pockets from forming under trays, and provide endless tie-off points for mounting light fixtures and zip-tying electrical cords.
- Tray Capacity: A standard 48-inch wide shelf comfortably accommodates four 1020 nursery trays per tier. On a 4-tier rack, you have 16 active tray slots. On a 5-tier rack, you can manage 20 active trays simultaneously.
- Tier Spacing: Position your shelves with 10 to 12 inches of vertical clearance between the top of the lower tray and the underside of the light fixture above it. This provides sufficient room for seedlings to stretch during canopy development while keeping light intensity concentrated.
Lighting Engineering: PAR, Lumens, and Spectrum
Beginners waste thousands of dollars buying expensive high-intensity horticultural blurple LED grow lights or metal halide fixtures designed for flowering cannabis. Microgreens do not flower, set fruit, or develop heavy vegetative bulk. They grow strictly to the first true-leaf stage, drawing almost all of their initial energy from the starches stored inside the seed endosperm.
You do not need expensive commercial grow fixtures. Standard commercial LED shop light utility strips produce exceptional, award-winning microgreens at a fraction of the capital cost:
- Color Temperature: Select fixtures rated at 6500 Kelvin (Daylight). The blue-heavy daylight spectrum keeps seedlings compact, stocky, and vibrant, preventing pale, leggy stems.
- Fixture Configuration: Mount two 4-foot LED strip fixtures (each pulling 18 to 22 watts) per shelf level. Two fixtures spaced 6 to 8 inches apart provide uniform light distribution across all four 1020 trays without hot spots or shaded edges.
- Photoperiod: Plug all rack lighting banks into a simple digital heavy-duty timer set to 16 hours on / 8 hours off. Continuous 24-hour light stresses the tender seedlings and wastes electricity; plants require an 8-hour respiration dark period to process photosynthates.
The War on Mold: Relative Humidity and Airflow Dynamics
Fungal contamination—specifically damping-off caused by Pythium, Rhizoctonia, and Botrytis cinerea (gray mold)—is the number one killer of indoor microgreen operations. Because microgreen seeds are sown at extreme densities (thousands of seeds per square foot), the microclimate within the dense root canopy creates a hyper-humid swamp.
Without aggressive climate controls, white cobweb mold will destroy twenty trays in forty-eight hours:
- Target Relative Humidity (RH): Maintain your production room between 40% and 50% RH. Anything above 60% drastically multiplies fungal spore germination. Invest in a dedicated commercial compressor dehumidifier (rated for 50 to 70 pints per day) piped directly into a floor drain or sink.
- Temperature Targets: Hold the ambient room temperature between 68°F and 72°F (20°C to 22°C). Warmer temperatures (above 76°F) accelerate fungal reproduction; cooler temperatures (below 64°F) slow seed germination and increase crop cycle times.
- Active Air Movement: Mount 6-inch clip-on oscillating fans on both ends of every single rack tier, blowing a gentle, continuous breeze directly across the plant canopy. Air movement breaks the humid boundary layer hugging the leaves, accelerates transpiration, and strengthens stem cell walls.
Agronomic Production: Media, Seeding Densities, and Germination Physics
Growing commercial microgreens requires standardized culinary recipes. You measure seed weights on a gram scale, track germination hours with a timer, and harvest at the exact day when cotyledons are fully expanded and the first true leaf is barely peeking through.
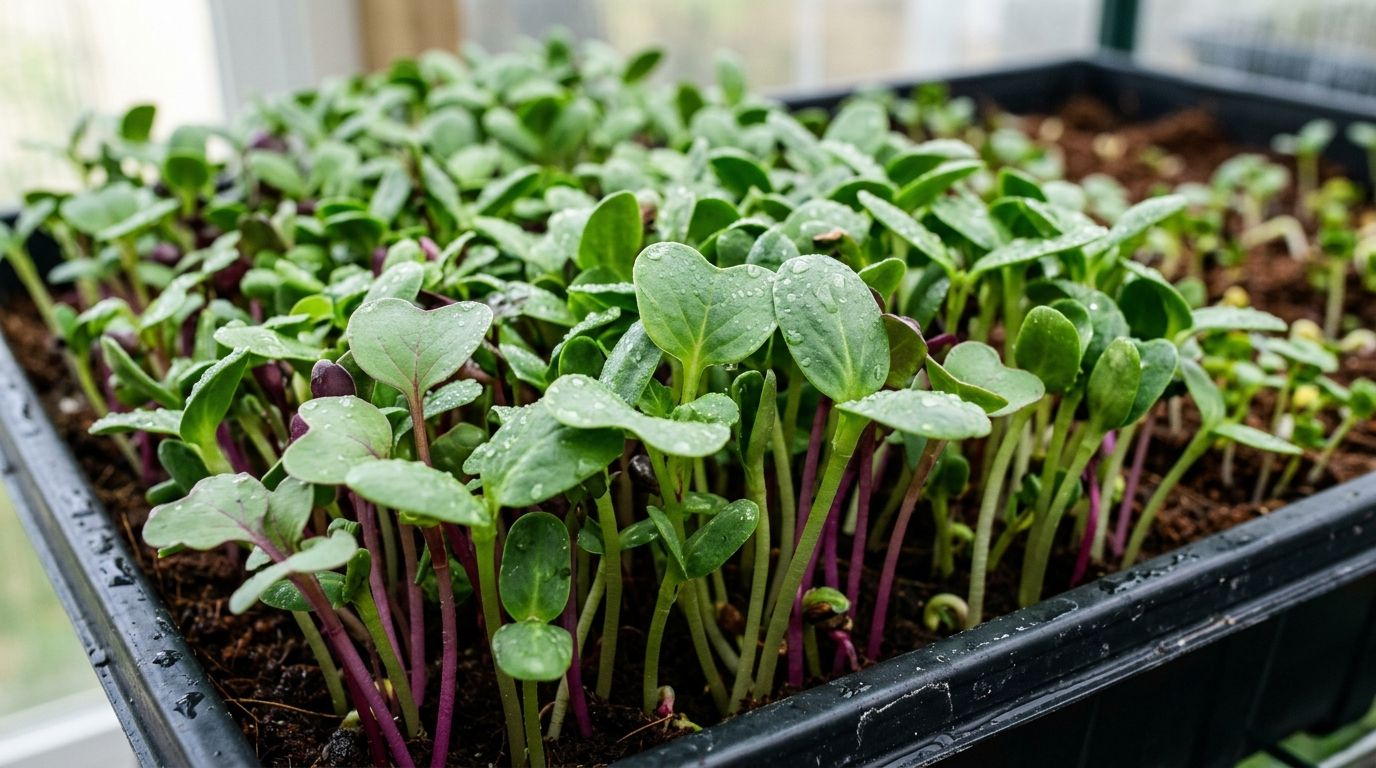
Selecting the Growing Medium: Coir vs. Soil vs. Mats
Your choice of growing medium directly impacts labor, input costs, and product cleanliness:
| Medium Type | Cost / Tray | Pros | Cons | Best Suited For |
|---|---|---|---|---|
| Organic Coco Coir | $0.25 - $0.35 | Naturally sterile, pathogen-free, excellent water retention, light and easy to ship as compressed bricks. | Low native nutrient content (fine for 10-day crops; requires light ocean minerals for 21-day crops). | The Industry Gold Standard. Ideal for sunflower, radish, brassicas, and salad blends. |
| Organic Peat Potting Mix | $0.35 - $0.50 | Abundant micro-nutrients, supports longer-cycle crops (cilantro, basil). | Messy indoors, contains perlite/bark chunks that can stick to harvested stems; dust issues. | Basil, cilantro, sorrel, and 3-week specialty crops. |
| Hemp / Jute Fiber Mats | $1.20 - $1.60 | Zero soil mess, pristine clean stems, 100% biodegradable, preferred by some live-tray chefs. | Expensive (quadruples input cost per tray); dries out very quickly; prone to root rot if over-saturated. | Live-tray sales to ultra-clean high-end sushi bars. |
The Two-Tray Bottom-Watering System
Never overhead-water microgreens once they have emerged from germination. Wetting delicate foliage from above traps moisture in the canopy, splashing soil particles onto the leaves and guaranteeing mold outbreaks.
Always use the Two-Tray Nesting System:
- The Bottom Reservoir Tray: A standard heavy-duty 1020 plastic tray without drain holes.
- The Top Planting Tray: A shallow 1-inch or 1.25-inch "microgreen depth" 1020 tray with slotted drain holes that nests snugly inside the bottom tray.
- The Bottom-Watering Technique: Fill the top slotted tray with 1 inch of moist coco coir, tamp it smooth, seed, and germinate. Once green shoots emerge under lights, you never pour water on the plants. Instead, you simply lift the top slotted tray, pour 16 to 24 ounces of fresh, pH-balanced water (pH 6.0 - 6.5) directly into the bottom reservoir tray, and drop the slotted tray back down. The soil wicks the water upward through the drainage slots, keeping the roots hydrated while the stems and foliage remain completely dry.
Seeding Density and Weight Reference Table
Seeding density is a delicate mathematical balance. Sow too sparsely, and your yield per tray plummets, making the crop unprofitable. Sow too densely, and poor air circulation suffocates the roots, triggering catastrophic damping-off.
Use this verified commercial seeding table for standard 1020 shallow trays:
| Microgreen Variety | Seed Weight / 1020 Tray | Pre-Soak Time | Blackout / Weight Period | Days Under Lights | Total Days to Harvest | Realistic Yield / Tray | Wholesale Value / Tray |
|---|---|---|---|---|---|---|---|
| Black Oil Sunflower | 120 - 140 grams | 8 - 12 hours | 3 - 4 days (weighted) | 4 - 6 days | 8 - 10 days | 12 - 16 oz | $25 - $35 |
| Speckled Pea Shoots | 200 - 250 grams | 8 - 12 hours | 3 - 4 days (weighted) | 5 - 7 days | 9 - 11 days | 14 - 20 oz | $25 - $35 |
| Rambo / China Rose Radish | 30 - 35 grams | None (direct sow) | 3 days (weighted) | 4 - 5 days | 6 - 8 days | 10 - 14 oz | $25 - $30 |
| Waltham 29 Broccoli | 20 - 25 grams | None (direct sow) | 3 days (weighted) | 4 - 6 days | 8 - 10 days | 8 - 12 oz | $25 - $30 |
| Red Garnet Amaranth | 10 - 12 grams | None (direct sow) | 4 days (dome blackout) | 6 - 8 days | 10 - 12 days | 5 - 8 oz | $35 - $45 |
| Genovese / Italian Basil | 12 - 15 grams | None (direct sow) | 5 days (dome blackout) | 12 - 16 days | 18 - 22 days | 6 - 9 oz | $35 - $50 |
For comprehensive research on commercial tray yields, biological nutrient densities, and food safety sanitation guidelines, review the University of Florida IFAS Extension Microgreen Production Publications.
The Blackout and Weighting Phase: Forcing Hypocotyl Elongation
Why do professional microgreens have thick, uniform, upright three-inch stems, while amateur greens look tangled, short, and weak?
The secret is the Weighted Blackout Phase:
- After sowing seeds evenly across tamped coco coir and misting thoroughly with clean water, do not put the tray under lights.
- Stack another empty 1020 tray directly on top of the seeds. On top of that empty tray, place a 10 to 15-pound paver brick or patio paver.
- You can stack up to four or five newly seeded trays directly on top of each other in a vertical column, with a single brick on the top tray.
- The Science: The physical weight forces the germinating roots to dig aggressively downward into the coir to anchor themselves. Simultaneously, the complete darkness and mechanical resistance trigger the production of plant growth hormones (gibberellins and auxins), forcing the young hypocotyl stems to stretch upward in unison with incredible vigor.
- After 3 to 4 days, when the seedlings have pushed the weighted trays up 1 to 2 inches, remove the weights, unstack the trays, and place them directly under your daylight LED fixtures. Within twenty-four hours, pale yellow seedlings transform into a brilliant, deep emerald canopy.
Harvesting, Post-Harvest Sanitization, and Packaging
Harvesting microgreens is where profit margins are protected or destroyed. If your harvest technique is sloppy, you will contaminate clean greens with bits of coco coir, crush tender leaves, or pack wet greens that turn to brown liquid inside the clamshell within seventy-two hours.
The Clean Cut Technique
Never tear or yank microgreens. You need razor-sharp surgical cuts:
- The Tools: Use a dedicated scalloped 10-inch harvest knife (such as a high-carbon Victorinox bread knife) or specialized rotary electric greens scissors. Keep an oil stone nearby; dull blades crush plant vascular bundles, causing stems to oxidize and turn brown at the cut edge.
- Cutting Height: Cut precisely 1/2-inch to 3/4-inch above the soil line. Never cut flush against the soil; cutting too low draws dirt and coir fibers into your harvest, forcing you to wash the greens.
- The Golden Rule: Never Wash Commercial Microgreens. If you harvest cleanly with proper knife discipline, commercial microgreens do not need to be washed. Washing microgreens saturates their delicate cellular structure with water, bruising the cotyledons and slashing their commercial shelf life from fourteen days down to four days. Top culinary chefs explicitly prefer unwashed, dry-cut microgreens because they remain razor-crisp on the hot line.
Condensation Management and Packing
Produce transpires moisture. If warm greens are packed into sealed plastic containers and shoved into a walk-in cooler, the warm air cools rapidly, condensing water droplets against the plastic lid. That trapped condensation drips back down onto the microgreen canopy, triggering rapid bacterial breakdown.
- Pre-Harvest Chill: Move mature trays into your walk-in cooler or refrigerator for two hours before cutting. Chilling the live plants removes field heat from the stems before harvest.
- Drying Screen Aeration: If there is any surface dew on the leaves, spread the cut greens across food-grade stainless steel wire mesh drying screens with a small fan blowing gentle air across them for ten minutes before packaging.
- Packaging Selection: Standardize on crystal-clear, vented PET clamshells (made from recyclable post-consumer plastic or plant-based PLA).
- 8 oz Volume Clamshells: Perfect for retail grab-and-go (holding 2 oz of fluffy greens like radish or broccoli, or 3.5 oz of dense sunflower).
- 32 oz / 64 oz Catering Clamshells: Essential for commercial restaurant deliveries (holding 8 oz to 1 lb of cut microgreens).
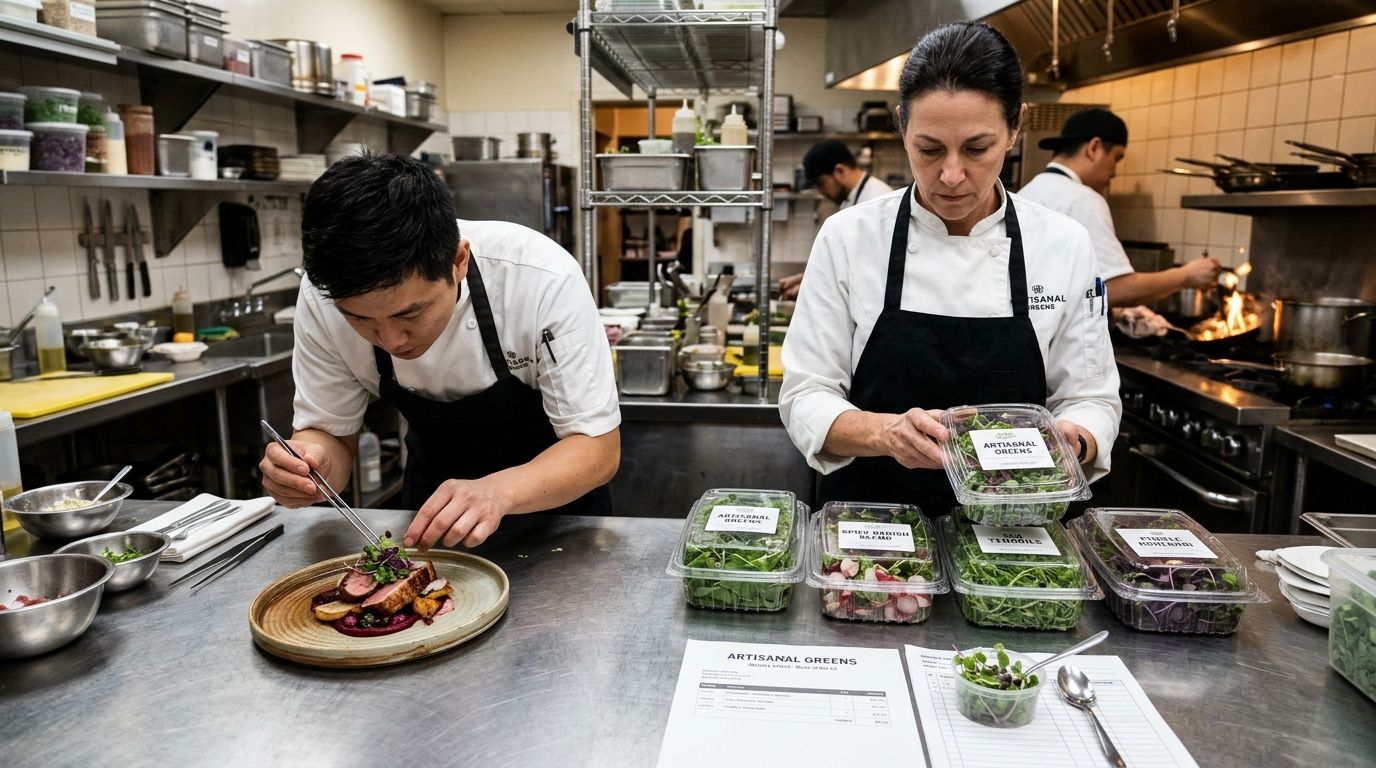
- Professional Labeling: Slap a clean, high-contrast branded label over the clamshell hinge (acting as a tamper-evident seal). Your label must include your farm name, logo, variety name (e.g., "Artisanal Spicy Radish Microgreens"), net weight, harvest date, and clean contact info.
Mastering Restaurant Chef Sales: The B2B Wholesale Engine
Selling microgreens at a farmers market is fine for weekend cash flow, but building a reliable, scalable $50,000 enterprise requires recurring wholesale restaurant accounts.
Restaurants provide predictable, weekly recurring revenue. A high-end farm-to-table bistro does not buy one clamshell on impulse; they place a standing order for four pounds of sunflower shoots and six clamshells of purple radish every single Tuesday, fifty-two weeks a year.
The Mindset of an Executive Chef
To sell to chefs, you must understand the relentless pressure of a commercial kitchen:
- Chefs Are Exhausted and Time-Starved: The executive chef is managing prep cooks, ordering fish, balancing labor food costs, and cooking eighty covers a night. They do not have time to read long emails, listen to rambling sales pitches, or navigate clunky online shopping carts.
- The Commercial Food Service Problem: National produce distributors (US Foods, Sysco) deliver microgreens that were harvested ten days ago in California, bounced across three refrigerated distribution hubs, and arrive at the restaurant crushed, slimy, and expiring in 48 hours for $40 a pound.
- Your Unfair Advantage: You walk into the kitchen with microgreens cut four hours ago, bursting with intense flavor, standing rigid, and guaranteed to stay crisp in their walk-in for two full weeks. You are offering a superior product at a competitive price with local provenance.
The Sacred Kitchen Protocol: When and How to Visit
Never, under any circumstances, walk into a restaurant kitchen between 11:30 AM and 1:30 PM (lunch rush) or after 4:30 PM (dinner service). If you walk into a kitchen while tickets are flying and saute pans are on fire, the chef will throw you out and never speak to you again.
The sacred window for farm sales is between 2:00 PM and 3:30 PM, Tuesday through Thursday:
- Park at the back of the building. Walk directly to the kitchen delivery door (the back door, not the front dining room hostess stand).
- Knock politely. When a dishwasher or line cook answers, smile and ask: "Is Chef Marco in the kitchen? I brought by a fresh harvest sample for him to taste."
- When the chef steps over, be brief, professional, and respectful of their time. Keep your pitch to sixty seconds.
The 60-Second Kitchen Pitch Script
"Hey Chef Marco, my name is Johnnie from Oak Hill Micro-Farm down in Shelby County.
I know you're prepping for dinner, so I won't take two minutes of your time.
I grow artisanal microgreens indoors under controlled LED racks and harvest within four hours of delivery.
I brought you this complimentary chef sampler box—there's spicy Rambo radish, speckled pea tendrils,
black oil sunflower, and purple kohlrabi.

Taste them, throw them on tonight's specials, and see how they hold up on your hot line.
I left my one-page wholesale price sheet inside the box with my cell phone.
I deliver in town every Tuesday and Friday morning with zero delivery minimums.
I'll shoot you a quick text on Thursday to see what you thought. Thank you for your time, Chef!"
Hand them the sample box, shake their hand, and walk away immediately. Do not linger. Do not pressure them to order on the spot. Let the extraordinary flavor and crispness of your greens do the selling for you.
Structuring Wholesale Pricing and Standing Orders
Standardize your commercial pricing to make ordering effortless for the kitchen:
- Cut Bulk Catering Tubs (1 lb / 16 oz):
- Standard Varieties (Sunflower, Speckled Pea, Radish, Broccoli): $28 to $35 per pound.
- Specialty / Slow Varieties (Red Amaranth, Cilantro, Purple Basil, Sorrel): $40 to $55 per pound.
- Live 1020 Trays (Uncut):
- Some high-end sushi bars and fine dining kitchens prefer buying the entire live tray so their line cooks can snip microgreens to order right on the plating line. Charge $25 to $35 per live 1020 tray, with a $3 deposit per plastic tray to ensure they return your empty flats.
The Weekly Communication Rhythm
Once a chef becomes an account, you communicate almost exclusively via SMS text message:
- Sunday Evening (7:00 PM): Shoot a short broadcast text: "Hey Chef! Harvesting for Tuesday morning delivery. We've got gorgeous pea shoots, spicy radish, and fresh sunflower. Let me know what you need for the week by Monday noon!"
- Tuesday Morning Delivery: Deliver between 8:30 AM and 10:30 AM. Walk into the walk-in cooler, place the fresh clamshells neatly on their produce shelf, rotate older containers forward (FIFO - First In, First Out), hand the chef the carbon-copy invoice, get a signature, and leave.
Review our foundational operational guides on standardizing market garden bed geometry and building a roadside driveway farmstand to create a multi-channel direct farm sales strategy.
Financial Enterprise Model: 2 Racks to $2,500/Month
Let us examine the concrete economics of running a bootstrapped commercial microgreens rack enterprise in a spare 10x10-foot room:
Initial Capital Expenditure Budget (Two 4-Tier Racks)
Two-Rack Commercial Startup Budget
├── Two 48x18x72-inch Heavy-Duty Chrome Wire Shelves: $190 ($95 each)
├── Sixteen 4-Foot 6500K LED Daylight Shop Lights: $180 ($45 per 4-pack)
├── 80 Heavy-Duty 1020 Nursery Trays (40 slotted + 40 solid): $180
├── Eight 6-inch Clip-on Oscillating Rack Fans: $140
├── 50-Pint Commercial Dehumidifier with drain hose: $220
├── Digital Heavy-Duty Grounded Outlet Timer: $25
├── High-Precision Digital Gram Scale (0.1g accuracy): $30
├── Two 10-inch Scalloped Harvest Knives: $50
├── Initial Bulk Seed Stock (Sunflower, Pea, Radish, Broccoli): $180
├── 5 Compressed Bales OMRI Organic Coco Coir: $95
└── 500 Clear Vented PET Clamshell Containers & Custom Roll Labels: $160
Total Capitalization Investment: ~$1,450
Monthly Operational Cash Flow Projection (32 Trays / Week)
With two 4-tier racks (holding 32 active trays on a rolling two-week cycle), you harvest roughly 16 trays per week (or roughly 12 to 15 pounds of cut microgreens weekly):
- Weekly Gross Revenue: 16 trays × $30 average wholesale value = $480 / week ($1,920 to $2,080 / month).
- Weekly Input Costs:
- Seeds (organic bulk): ~$35 / week
- Coco coir media: ~$10 / week
- Clamshell packaging & labels: ~$15 / week
- Electricity (lights, fans, dehumidifier): ~$20 / week
- Delivery fuel: ~$15 / week
- Total Weekly Cost of Goods Sold (COGS): $95 / week ($380 / month).
- Net Monthly Profit: $1,540 to $1,700 / month on an initial investment of under $1,500.
Add two more racks into that same spare room, and you easily eclipse $3,500 to $4,000 in monthly net profit on less than 20 hours of total labor per week.
The 8-Week Microgreen Enterprise Launch Timeline
Launching an indoor commercial microgreens business requires disciplined execution across production testing, sample distribution, and account onboarding. Follow this eight-week timeline:
8-Week Microgreen Business Roadmap
├── Week 1: Facility Buildout & Electrical Calibration
│   ├── Assemble chrome wire shelving; mount dual 6500K LED fixtures per tier.
│   ├── Install clip fans; position commercial dehumidifier; calibrate timer to 16/8 cycle.
│   └── Hydrate coco coir bricks and verify baseline environmental targets (70°F, 45% RH).
├── Week 2: Test Batch Calibration (Zero Sales)
│   ├── Sow test trays of Radish, Sunflower, Pea Shoots, and Broccoli at calibrated gram weights.
│   ├── Practice the 4-day weighted paver blackout phase; monitor germination percentages.
│   └── Move trays to light; test bottom-watering absorption rates and evaluate fan airflow.
├── Week 3: Harvest Calibration & Shelf Life Testing
│   ├── Harvest test trays with scalloped knife; weigh yields per tray.
│   ├── Pack cut greens into vented clamshells; store in refrigerator at 36°F.
│   └── Inspect clamshells daily for 14 days to audit crispness, moisture, and leaf breakdown.
├── Week 4: Branding, Licensing & Wholesale Collateral
│   ├── Form LLC, register farm name, and obtain local commercial business license.
│   ├── Design professional clamshell labels and print one-page wholesale restaurant menu.
│   └── Map out a target list of 15 high-end, chef-driven independent restaurants in your town.
├── Week 5: Chef Sampling Campaign (The Golden Window)
│   ├── Grow 16 pristine sample clamshells featuring a colorful four-variety culinary flight.
│   ├── Visit target restaurant backdoors between 2:00 PM and 3:30 PM, Tuesday through Thursday.
│   └── Deliver free sample boxes to executive chefs using the 60-second pitch script.
├── Week 6: Follow-Up & Standing Order Onboarding
│   ├── Follow up via text message on Thursday afternoon to gather feedback and culinary notes.
│   ├── Secure first 3 to 5 standing weekly restaurant accounts; establish delivery days.
│   └── Calculate seeding schedules to match committed weekly order volumes.
├── Week 7: Commercial Production & Delivery Launch
│   ├── Execute first commercial production runs; harvest cleanly early Tuesday morning.
│   ├── Deliver fresh clamshells in insulated coolers; provide signed carbon-copy invoices.
│   └── Re-seed nursery flats immediately to maintain uninterrupted weekly supply chain.
└── Week 8: Expansion & System Optimization
    ├── Evaluate crop margins and chef preferences; eliminate slow or unpopular varieties.
    ├── Add second delivery route day (Friday) to supply restaurants for peak weekend dinner rushes.
    └── Reinvest operating cash flow into additional wire racks to scale production capacity.
Commercial indoor microgreens represent the ultimate convergence of human-scale agriculture and lean enterprise economics. You do not need twenty acres of rolling farmland, a half-million-dollar mortgage, or massive diesel machinery to feed your community and earn an exceptional livelihood. With a pair of wire shelving racks, clean organic seed, disciplined environmental control, and genuine relationships with local culinary chefs, you can build a thriving, recession-proof farm enterprise right inside your own home.
Expert Insights & FAQs
How much money can you realistically make growing microgreens indoors?
A single 4-tier wire shelving rack holding 16 active 1020 trays on a two-week rotation generates between $500 and $800 in gross weekly revenue. Operating two racks in a spare bedroom or basement reliably yields $2,000 to $2,500 per month with profit margins exceeding 70%.
Do you need expensive grow lights to produce commercial microgreens?
No. Because microgreens are harvested at the cotyledon or first true-leaf stage (typically within 7 to 12 days), standard 4-foot 6500K (Daylight) LED utility shop lights producing clean white spectrum light perform exceptionally well at a fraction of the cost of specialized horticultural fixtures.
How do you prevent mold and damping-off on dense microgreen trays?
Maintain ambient room relative humidity strictly between 40% and 50% using a commercial dehumidifier, keep temperatures at 68°F to 72°F, install oscillating fans on every shelf tier to circulate air, and bottom-water trays through a reservoir rather than overhead misting.
Why are microgreen trays weighted down with paver bricks during germination?
Weighting newly seeded trays in total darkness forces young roots to anchor deeply into the growing medium. The physical resistance triggers plant hormone release (gibberellins), producing thicker, stronger, more uniform hypocotyl stems with identical harvest heights.
Should you wash microgreens before packaging them for restaurants?
No. Professional growers harvest microgreens cleanly 1/2-inch above the soil line without pulling dirt. Washing delicate microgreens saturates their tissue and cuts shelf life from 14 days down to 3 days. Chefs explicitly prefer dry-cut, unwashed greens for superior crispness.
How do you sell microgreens to restaurant chefs without commercial sales experience?
Visit the kitchen backdoor between 2:00 PM and 3:30 PM (after lunch rush, before dinner prep). Keep your pitch under 60 seconds, hand the chef a free curated sample clamshell box with a one-page wholesale price sheet, and follow up via text message 48 hours later.
What are the most profitable microgreen varieties for beginners?
Black oil sunflower, speckled pea shoots, and Rambo or China Rose radish are the best starter crops. They germinate quickly (6 to 10 days), produce heavy yields per tray (12 to 16 ounces), and have high culinary demand across restaurant accounts.
How long do freshly harvested microgreens stay fresh in a clamshell?
When harvested dry, chilled prior to cutting, and packed into vented PET clamshells stored at 36°F to 38°F (2°C to 3°C), commercial microgreens retain crisp texture, intense flavor, and vibrant visual appeal for 10 to 14 days.
Johnnie McCormick
Zone 7b/8a - North Central Alabama
Johnnie McCormick is a gardening hobbyist and the founder of My Garden Spot. Raised in north-central Alabama, his passion for gardening began in his youth. In 2008, he established a large market garden, teaching himself high-yield growing methods. In the years since, he has operated seasonal seedling sales for transplants, specializing in heirloom tomatoes, peppers, eggplants, decorative ground covers like Ajuga (Bugleweed), marigolds, nasturtiums, and fresh kitchen-window herb arrangements (basil, cilantro). Today, he gardens in the hills between Birmingham and Jasper, Alabama (Zone 7b/8a), sharing practical, community-focused gardening resources.
Verified Authoritative Citations & References
In alignment with our strict E-E-A-T research and verification guidelines, this guide cross-references data from the United States Department of Agriculture (USDA) and Cooperative Extension Service programs.
- USDA Agricultural Marketing Service (AMS): Community Supported Agriculture (CSA) standards and local market surveys. ams.usda.gov
- Penn State Extension: Small Farm Economics, financial planning, and crop pricing research documents. extension.psu.edu
- Cornell Cooperative Extension: Market gardening business planning and local sales guidelines. smallfarms.cornell.edu
- Alabama Cooperative Extension System (ACES): Local food regulations, CSA legal permits, and farm safety standards. aces.edu



Please log in to view comments.