How Do You Start a Vegetable Garden with Zero Experience and Get Your First Harvest?

How Do You Start a Vegetable Garden with Zero Experience and Get Your First Harvest?
If you have never planted a single seed in your life, walking into a garden center in spring is an overwhelming experience. You are confronted by towering displays of colorful seed packets, bags of mysterious fertilizers stamped with numbers like 10-10-10, walls of specialized tools, and rows of green plastic pots holding plants you cannot identify. Everyone on social media seems to possess an effortless green thumb, harvesting overflowing baskets of heirloom vegetables while your own potted houseplant on the windowsill is turning yellow.
I know that feeling intimately. When I decided to grow food for the first time down here in Alabama back in 2008, I did not have a mentor. I thought gardening simply meant digging a hole in our tough red clay, tossing in a tomato seedling, pouring a bucket of water over it, and waiting for nature to do the rest.
Two weeks later, that tomato plant was dead. The heavy clay suffocated the root system, an afternoon thunderstorm turned the hole into a stagnant puddle of water, and July heat baked the soil into the hardness of a brick. I sat on my porch feeling utterly defeated, convinced I lacked some mystical genetic talent that real gardeners possessed.
Here is the truth I wish someone had told me on that humid afternoon: there is no such thing as a green thumb. Nobody is born with instinctive agricultural knowledge. Gardening is not magic; it is a predictable, learnable biological skill. Plants do not care about your experience level, your background, or how many house plants you have killed in the past. They require only four fundamental inputs: sunlight, oxygenated moisture, loose aerated root medium, and basic nutrients.
If you provide those four inputs in the right balance, seeds will germinate, roots will anchor, leaves will photosynthesize, and food will grow. It is as reliable as physics.
This guide is written specifically for the person who has never grown anything in their life. We will bypass complicated jargon, skip expensive farm equipment, and walk you step-by-step from an empty yard or patio to picking your very first bowl of crisp, sweet homegrown vegetables within thirty days.
The Botanical Baseline: How a Plant Actually Works
Before touching a shovel, you need a five-minute mental model of what a plant is doing. When beginners fail, it is almost never because of neglect; it is almost always because they love their plants to death by giving them the wrong things at the wrong times.
1. Photosynthesis: Sun as the Only Fuel
Humans eat calories to generate biological energy. Plants do not "eat" soil. Soil provides water and trace minerals, but 100% of the energy a plant uses to build cell walls, leaves, and fruit comes from sunlight.
Through photosynthesis, green chlorophyll pigments inside leaves absorb solar photons, combine them with carbon dioxide from the air and water from the soil, and synthesize simple sugars (glucose).
- The Sunlight Threshold: Fruiting vegetables (tomatoes, peppers, squashes, cucumbers, melons) require intense cellular energy. They demand at least 6 to 8 hours of uninterrupted, direct sunlight hitting their leaves every single day. A bright, sunny room or a shaded patio under an oak tree will keep a fern alive, but a tomato plant in that environment will stretch toward the light, grow tall and spindly, drop its yellow flowers, and never produce a single ripe fruit.
- The Cool-Weather Exception: Leafy greens (lettuce, spinach, arugula, Swiss chard) and fast root crops (radishes) do not have to produce energy-dense fruit or seeds. They can thrive on 4 to 5 hours of direct sunlight or gentle dappled morning light, making them the ultimate starter crops for partially shaded yards.
2. Roots Need Oxygen as Much as Water
The single most common mistake made by first-time gardeners is overwatering.
Beginners assume that if water is good, more water must be better. They spray their garden every morning and evening with a hose nozzle. Within ten days, the plant leaves turn pale yellow, droop limply, and the stem rots at the soil line. Confused, the beginner assumes the plant is thirsty and pours on even more water, accelerating the death spiral.
Roots are living biological tissues. They respire. They must absorb oxygen directly from tiny air pockets (pore spaces) between soil particles. When you overwater or plant in compacted, heavy clay without drainage, those pore spaces stay permanently flooded with water. The roots literally drown. Deprived of oxygen, root tips die, rot setting in via fungal pathogens like Pythium, and the plant loses its ability to pull moisture up to the leaves.
A drowning plant wilts because its rotted root system can no longer drink. Soil must be allowed to breathe between waterings.
3. The Seed's Miracle: Stored Energy
Inside every tiny vegetable seed—even a tiny radish seed no larger than a grain of sand—sits an embryonic plant accompanied by a dense packet of stored carbohydrates called the endosperm.
When moisture and warmth penetrate the outer seed coat, cellular enzymes wake up. The seed does not need fertilizer, compost, or rich nutrients to sprout. It feeds on its own internal lunchbox. The first baby leaves that emerge are called cotyledons (seed leaves). They look rounded and simple. Only after the cotyledons unfold to catch the sun does the plant produce its first "true leaves," which carry the distinct serrated or lobed shape of the mature vegetable.
Understanding this biological timeline prevents panic: your only job during the first seven days is providing gentle moisture and warmth. The seed does the heavy lifting.
Native Dirt vs. Living Soil: Ditching the Backyard Mud
The second fatal trap for beginners is walking into the backyard with a hand trowel, digging up a bucket of native lawn dirt, dumping it into a plastic pot, and planting a seed.
In an undisturbed natural forest or prairie, native soil has had centuries to build organic matter, fungal networks, and earthworm tunnels. But in a modern residential subdivision, the developer scraped away the fertile topsoil decades ago with heavy bulldozers, leaving behind heavily compacted subsoil clay, construction rubble, and sand.
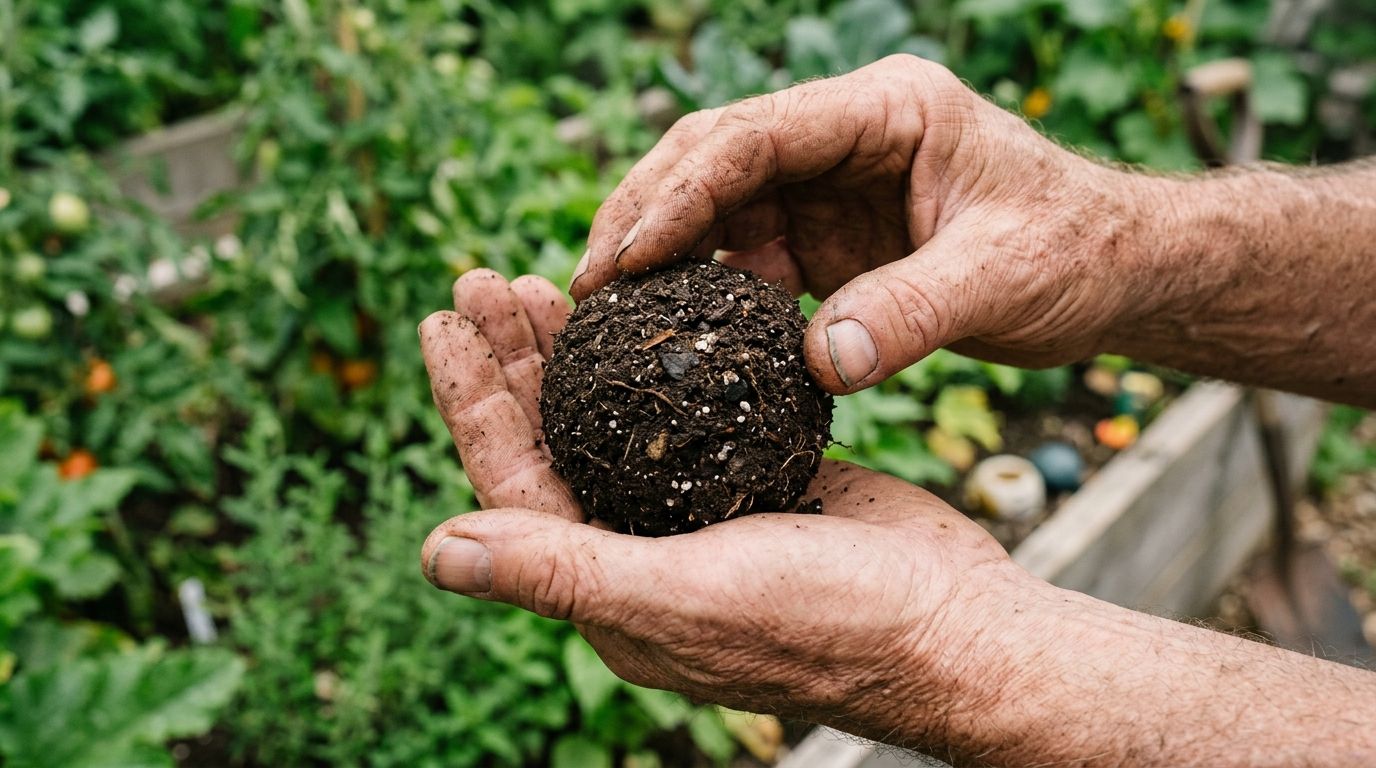
Why Container and Raised Bed Soil Must Be Engineered
In a container or small raised bed, water behaves differently than in a vast open field. Gravitational pull creates a perched water table at the bottom of the container. If your growing medium is too dense, the bottom third of the pot becomes a soggy swamp while the top crust bakes into concrete.
A beginner should never plant directly into raw native ground without a soil test and months of broadforking and organic amendments. Your fast track to guaranteed success is a contained growing medium:
- Component 1: Aerated Base (Sphagnum Peat Moss or Coconut Coir): Holds up to twenty times its weight in water while maintaining loose, fibrous capillary pathways. Coir and peat provide a pathogen-free, lightweight structural foundation.
- Component 2: Drainage Aggregate (Coarse Horticultural Perlite or Vermiculite): Perlite is volcanic glass expanded by high heat into sterile white popcorn-like nuggets. It does not decompose. It creates permanent pore spaces that allow excess water to drain away instantly, ensuring your plant roots always have access to fresh oxygen.
- Component 3: Biological Fuel (Finished Organic Compost): Compost is decomposed plant and animal matter teeming with billions of beneficial bacteria, mycorrhizal fungi, and protozoa. Compost delivers slow-release nitrogen, phosphorus, potassium, and micronutrients while acting like a biological sponge that buffers pH.
The Foolproof "Squeeze Test"
How do you know if your soil texture is right? Grab a handful of moist garden mix from your bed or container and squeeze it firmly in your fist like a snowball, then open your fingers:
- The Clay Failure: If it forms a tight, sticky, shiny mud ball that you could carve with a knife, it has too much clay. Water will pool and roots will rot.
- The Sand Failure: If it immediately falls apart into loose grains through your fingers without holding any shape at all, it has too much sand. Water will drain instantly and the plant will dehydrate within hours.
- The Perfect Loam: If the soil holds together in a light, crumbly ball, but shatters effortlessly into soft, dark granules when you poke it gently with your thumb, your texture is immaculate. It holds moisture without waterlogging and allows tender root hairs to push through without resistance.
For regional soil guidelines and state extension resources, review the authoritative University of Georgia Extension Vegetable Gardening Guide.
Choosing Your Starter Footprint: Container vs. 4x4 Raised Bed
The third classic mistake is ambition overload. A beginner reads three gardening blogs, rents a gas-powered rototiller, tears up a thirty-by-fifty-foot patch of their back lawn, plants twenty different crops, and by the Fourth of July, the entire patch is consumed by knee-high weeds, squash vine borers, and cracked soil. Burned out and exhausted, they surrender.
Start small. A small garden that is carefully managed and brimming with healthy crops will produce three times more food than a neglected, overgrown quarter-acre jungle.
| Growing Setup | Ideal Location | Total Cost to Setup | Maintenance Time | Best For |
|---|---|---|---|---|
| 5-Gallon Fabric Grow Bags | Sunny patio, wooden deck, apartment balcony, or concrete driveway. | $15 - $25 per container | 5 minutes / day | Zero yard space, renters who move, absolute beginners wanting 1-2 crops. |
| 4x4-Foot Cedar Raised Bed | Flat, level sunny spot on lawn or backyard turf. | $80 - $130 complete | 10 minutes / day | Homeowners with a small yard wanting a full family salad and vegetable station. |
| Subdivided In-Ground Bed | Sunny lawn area with good natural drainage. | $30 - $50 (cardboard & compost) | 15 minutes / day | Budget-conscious growers using no-till sheet mulching over existing grass. |
The Genius of the 4x4-Foot Raised Bed
If you have a modest yard, a single four-by-four-foot raised bed (10 to 12 inches deep) is the ultimate classroom:
- Zero Stepping on Soil: A human arm has a comfortable reach of roughly two feet. In a 4x4-foot bed, you can easily reach the dead center from either side without ever stepping on the soil. Because your feet never press down on the growing area, the soil never compacts. It remains as fluffy and aerated on day ninety as it was on day one.
- No Weeding Lawn Grass: By laying thick corrugated cardboard directly over your existing lawn grass inside the wooden frame before filling it with soil, you smother the grass completely. Earthworms eat the wet cardboard, digest the dead grass roots, and leave behind nutrient-dense castings.
- Four-Zone Grid System: Subdivide your 4x4 bed into sixteen individual one-foot squares using simple twine or wooden battens. In one square foot, you can grow sixteen radishes. In another, nine bush beans. In another, four heads of crisp lettuce. This visual structure eliminates overcrowding and makes planting math effortless.
The "Big 5" Foolproof Crops: Guaranteed Early Wins
Do not start your gardening journey with fussy, slow-growing crops. Growing cauliflower, Brussels sprouts, or heirloom brandywine tomatoes requires months of vigilant pest management, staking, and consistent temperature controls. If your first plant fails to produce after ninety days of effort, you will likely quit.
You need quick, dramatic, high-confidence victories. The following five vegetables are resilient, forgiving of beginner mistakes, naturally resistant to common pests, and provide fast culinary rewards.
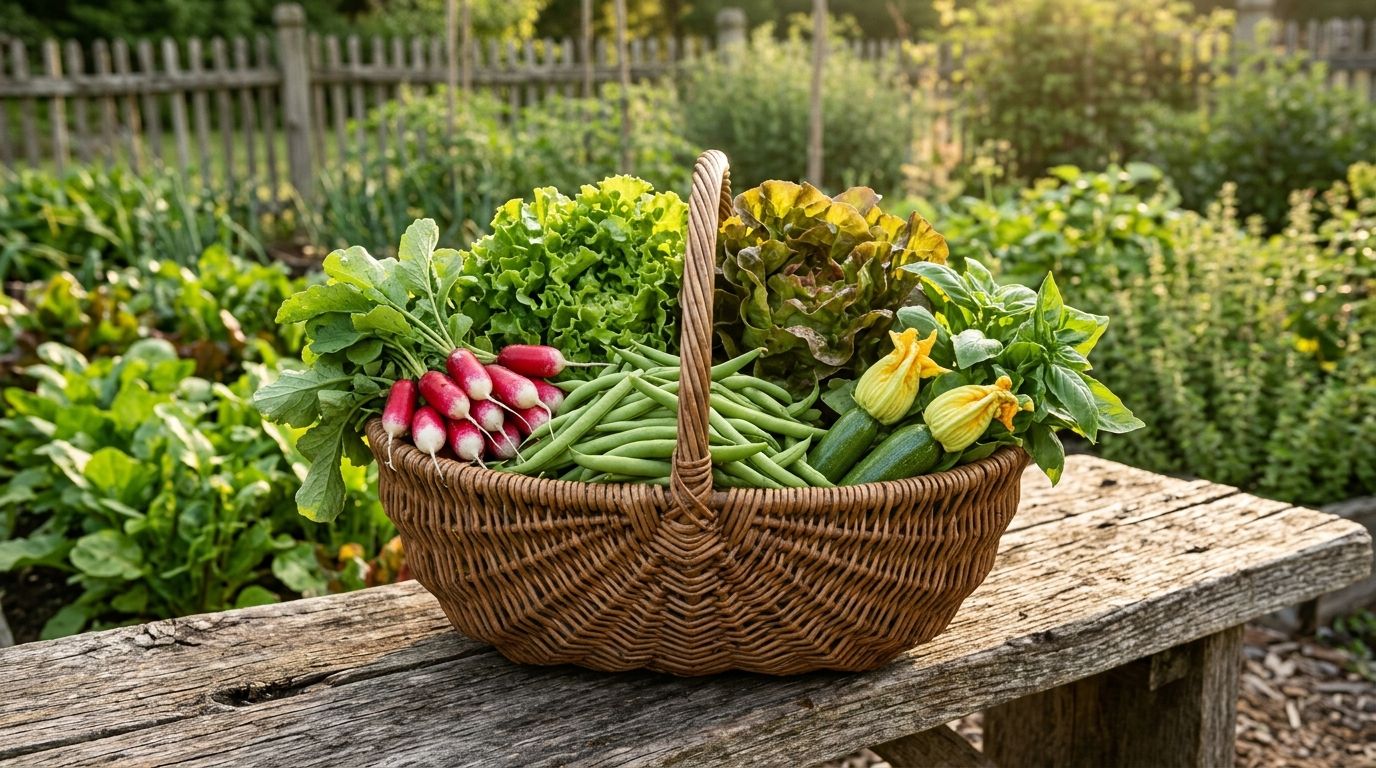
1. French Breakfast Radishes (Harvest in 21 to 25 Days)
- Why Beginners Love It: Radishes are the undisputed speed champion of the vegetable kingdom. You sow a seed on Saturday; by Tuesday morning, bright green shoots are bursting from the ground. In just over three weeks, you pull crisp, bicolored magenta-and-white roots from the soil.
- How to Eat Them: Forget the sharp, woody radishes sitting in grocery store plastic bags. Fresh-picked garden radishes are sweet, crisp, and peppery. Slice them paper-thin onto warm toasted sourdough bread spread with sweet unsalted butter and flaky sea salt.
2. Cut-and-Come-Again Looseleaf Lettuce (Harvest in 30 Days)
- Varieties: Black Seeded Simpson, Salad Bowl, or Red Sails.
- Why Beginners Love It: Unlike heading iceberg lettuce that takes seventy-five days to form a hard ball, looseleaf lettuce grows as an open rosette of tender leaves. You do not pull the whole plant from the ground. When the outer leaves reach four to five inches tall, you simply snip them with kitchen scissors one inch above the soil, leaving the center crown untouched. Within seven days, fresh new leaves grow back. A single four-foot row will provide fresh salad greens for your dinner table every week for two months.
3. Bush Snap Green Beans (Harvest in 50 to 55 Days)
- Varieties: Provider, Contender, or Blue Lake 274.
- Why Beginners Love It: Bush beans do not require tall trellises or wooden poles; they grow as sturdy, self-supporting two-foot bushes. Beans are legumes; their roots form symbiotic partnerships with soil rhizobia bacteria that pull inert nitrogen gas from the atmosphere and convert it into plant-available fertilizer right in your bed. They produce clusters of white flowers that transform into sweet, tender green pods you can snap and eat raw right off the bush.
4. Black Beauty Zucchini (Harvest in 45 to 55 Days)
- Why Beginners Love It: Zucchini is an agricultural powerhouse. A single healthy plant occupying a three-by-three-foot space will produce between eight and fifteen pounds of tender squash over a six-week summer window. Their massive, dark green leaves shade the soil, conserving water and suppressing weeds.
- The Golden Rule: Harvest them when they are six to eight inches long. If you leave them on the plant, they will quietly swell into three-pound woody baseball bats with tough seeds and watery flesh.
5. Genovese Sweet Basil (Harvest in 25 to 40 Days)
- Why Beginners Love It: Basil is practically indestructible if it receives full sun and warm weather. It loves heat, thrives in terracotta containers, and emits aromatic volatile oils that naturally deter flying insect pests. Pinching off the top clusters of leaves forces the plant to branch outwards into a dense, bushy herb factory, providing continuous fresh foliage for homemade pesto and pasta sauces.
The Step-by-Step Practical Walkthrough: From Seed to First Harvest
Follow this chronological procedural roadmap to launch your first vegetable garden without guesswork.
Beginner Garden Launch Roadmap
├── Step 1: Execute the 3-Point Sunlight & Water Access Audit
├── Step 2: Assemble Your Starter Raised Bed or Containers
├── Step 3: Blend Your Aerated Living Growing Medium
├── Step 4: Map Your Seeding Calendar with Local Frost Dates
├── Step 5: Master the 2X Depth Sowing Method
├── Step 6: The Uncompromising Art of Seedling Thinning
├── Step 7: Deep Watering Mastery & The Finger Knuckle Test
└── Step 8: The Cut-and-Come-Again Continuous Harvest
Review our interactive Garden Calculator & Bed Space Planner and Local Frost Date Calendar to confirm exact planting dates for your regional zip code.
The 5 Fatal Beginner Traps (And the Immediate Fixes)
Every mistake you are about to make has already been made ten thousand times by growers before you. Learn these five classic failure points now so you can sidestep them entirely:
Trap 1: The "Sip and Splash" Surface Watering Habit
- The Mistake: Standing outside with a garden hose nozzle set to "jet" for forty-five seconds every afternoon, lightly spraying the top quarter-inch of soil.
- Why It Kills Plants: Surface wetting evaporates into the atmosphere within thirty minutes under the summer sun. Because moisture never penetrates deeper than half an inch, the plant's roots stay clustered near the surface where they bake and desiccate.
- The Fix: Water deeply, slowly, and less frequently. Apply water directly at the base of the plant using a gentle watering can or soaker wand until water drains cleanly from container holes or soaks four inches deep into raised beds. Then walk away for two or three days until the top two inches dry out.
Trap 2: Sowing Out of Season (Ignoring the Cool vs. Warm Calendar)
- The Mistake: Buying packets of spinach and lettuce seeds in late July during a 95°F heatwave, or planting warm-season tomato and pepper transplants outside during a damp, chilly weekend in March.
- Why It Kills Plants: Cool-weather crops (lettuce, spinach, radishes, peas) undergo hormonal distress in summer heat; they instantly "bolt" (send up tall, bitter flower stalks) and die. Warm-season crops (tomatoes, peppers, basil, cucumbers) have zero frost tolerance; temperatures below 45°F cause permanent root stunting, and a single light frost (32°F) turns them into black slime overnight.
- The Fix: Check your local Last Spring Frost Date. Sow radishes, lettuce, and peas four weeks before your last frost date. Plant tomatoes, squash, beans, and basil two weeks after your last frost date when nighttime soil temperatures remain consistently above 55°F (13°C).
Trap 3: Emotional Resistance to Seedling Thinning
- The Mistake: Refusing to pull out crowded seedlings because "it feels cruel to kill something so healthy."
- Why It Kills Plants: A packet contains five hundred seeds. If you let thirty radish seedlings grow crammed together in a four-inch cluster, none of them will form an edible bulb. They will compete viciously for water, light, and nutrients, producing only tangles of weak leaves and stringy, woody taproots.
- The Fix: Reframe thinning as crop care, not murder. Use small kitchen scissors to snip off excess seedlings at ground level rather than yanking roots. Better yet: eat the thinned seedlings! Radish and lettuce thinnings are tender, gourmet microgreens that taste incredible sprinkled over scrambled eggs or salads.
Trap 4: Blasting Delicate Seedlings with Full-Force Hose Nozzles
- The Mistake: Blasting newly planted beds with high-pressure hose sprayers, dislodging seeds, washing them into deep corners, or burying them beneath two inches of suffocating mud.
- Why It Kills Plants: Seeds must remain at their exact calibrated depth. High-pressure water gouges deep craters in the soil, washing tiny seeds down to the bottom where they rot in darkness.
- The Fix: Use a watering can equipped with an inverted brass rose nozzle, which breaks water into a soft, upward-arcing gentle rain, or use the "mist" setting on your hose nozzle held three feet above the bed.
Trap 5: Giving Up After the First Bug or Yellow Leaf
- The Mistake: Noticing a chewed leaf or a hornworm, panicking, and dousing the entire garden in toxic broad-spectrum chemical insecticides, or assuming you have failed and abandoning the project.
- Why It Kills Plants: A garden is an ecosystem. Insects and minor leaf blemishes are completely natural. Chemical sprays kill beneficial ladybugs, predatory wasps, and pollinators along with the pests, leaving your garden vulnerable to massive secondary pest outbreaks.
- The Fix: Treat every pest or yellow leaf as diagnostic data, not personal failure. Hand-pick large caterpillars and drop them into a jar of soapy water. Spray small aphid clusters with a sharp blast of water or organic insecticidal soap. Pull off yellowing lower leaves to improve airflow. Every challenge you overcome builds agricultural competence.
Water Chemistry and Temperature: What Beginners Overlook
While we have established that overwatering is the primary cause of root rot, the quality and temperature of your water can quietly sabotage healthy plants without you ever realizing the culprit.
City Tap Water vs. Rainwater
Most suburban and urban homeowners attach a hose directly to municipal city water spigots. Municipal water treatment facilities add chlorine or chloramines to kill pathogenic bacteria in city drinking pipes.
While low concentrations of chlorine evaporate if water sits in an open bucket for twenty-four hours, modern water authorities increasingly use chloramines (chlorine bonded with ammonia), which do not dissipate into the air. In heavy, concentrated doses over months, chlorinated tap water can reduce beneficial microbial colonies in your living compost.
- The Temperature Shock Rule: In mid-summer, a black rubber garden hose sitting out on a sunny lawn can heat stagnant water inside the hose up to a scalding 130°F (54°C) to 140°F. If you turn on the spigot and spray your plants immediately, that superheated water will literally cook tender seedling leaves and kill delicate root hairs. Conversely, in early spring, spraying ice-cold 42°F well water over warm tomato roots causes thermal shock, stunting vegetative growth for days.
- The Best Practice: Always purge your garden hose for thirty seconds away from the garden until the water runs completely cool and ambient to the touch before directing it toward your raised beds or containers. If feasible, set up a simple 55-gallon rain barrel beneath a clean gutter downspout. Rainwater is naturally soft, contains zero salts or chlorine, and carries dissolved trace nitrogen picked up from the atmosphere.
Visual Diagnostic Guide: What Your Vegetable Leaves Are Trying to Tell You
Plants cannot speak, but their foliage communicates their exact physiological state. Use this troubleshooting matrix when your garden shows symptoms of stress:
| Foliage Symptom | Primary Cause | Secondary Indicators | Immediate Corrective Action |
|---|---|---|---|
| Lower leaves turning pale yellow, veins stay green | Nitrogen Deficiency | Slow growth, smaller new leaves, overall stunted posture. | Top-dress with 1 inch of rich worm castings or apply diluted organic fish emulsion (5-1-1). |
| Entire plant yellowing, leaves limp and soggy | Severe Overwatering (Root Rot) | Soil feels marshy; sour, stagnant smell at root zone. | Stop watering immediately. Allow the top 2-3 inches to dry out; ensure container drain holes are open. |
| Leaf edges brown, crispy, and curling inward | Under-Watering / Heat Scorch | Dry soil pulling away from container walls; leaves brittle. | Deep soak container until water drains from bottom; move pots to afternoon shade during 95°F+ heat. |
| Tall, spindly, pale stems leaning sideways | Light Starvation (Etiolation) | Wide gaps between leaf nodes; stems cannot support weight. | Move bed or pots into minimum 6-8 hours direct sun; supplement indoor seedlings with 6500K LEDs. |
| Tiny white or yellow stippled dots on leaf tops | Spider Mite / Flea Beetle Damage | Fine webbing on leaf undersides (mites) or shotgun holes (beetles). | Blast foliage undersides with a sharp stream of water; apply organic insecticidal soap or neem oil spray. |
| White powdery film coating upper leaf surfaces | Powdery Mildew (Fungal) | Occurs in late summer with humid nights and poor airflow. | Prune infected leaves; avoid overhead watering; spray with a 1:9 milk-and-water solution in direct sun. |
| Sunken, leathery black spots on bottom of tomatoes | Blossom End Rot (Calcium Transport Failure) | Caused by erratic watering, not lack of soil calcium. | Water consistently on a steady schedule so calcium can be continuously transported by vascular transpiration. |
Water Chemistry and Temperature: What Beginners Overlook
While we have established that overwatering is the primary cause of root rot, the quality and temperature of your water can quietly sabotage healthy plants without you ever realizing the culprit.
City Tap Water vs. Rainwater
Most suburban and urban homeowners attach a hose directly to municipal city water spigots. Municipal water treatment facilities add chlorine or chloramines to kill pathogenic bacteria in city drinking pipes.
While low concentrations of chlorine evaporate if water sits in an open bucket for twenty-four hours, modern water authorities increasingly use chloramines (chlorine bonded with ammonia), which do not dissipate into the air. In heavy, concentrated doses over months, chlorinated tap water can reduce beneficial microbial colonies in your living compost.
- The Temperature Shock Rule: In mid-summer, a black rubber garden hose sitting out on a sunny lawn can heat stagnant water inside the hose up to a scalding 130°F (54°C) to 140°F. If you turn on the spigot and spray your plants immediately, that superheated water will literally cook tender seedling leaves and kill delicate root hairs. Conversely, in early spring, spraying ice-cold 42°F well water over warm tomato roots causes thermal shock, stunting vegetative growth for days.
- The Best Practice: Always purge your garden hose for thirty seconds away from the garden until the water runs completely cool and ambient to the touch before directing it toward your raised beds or containers. If feasible, set up a simple 55-gallon rain barrel beneath a clean gutter downspout. Rainwater is naturally soft, contains zero salts or chlorine, and carries dissolved trace nitrogen picked up from the atmosphere.
Visual Diagnostic Guide: What Your Vegetable Leaves Are Trying to Tell You
Plants cannot speak, but their foliage communicates their exact physiological state. Use this troubleshooting matrix when your garden shows symptoms of stress:
| Foliage Symptom | Primary Cause | Secondary Indicators | Immediate Corrective Action |
|---|---|---|---|
| Lower leaves turning pale yellow, veins stay green | Nitrogen Deficiency | Slow growth, smaller new leaves, overall stunted posture. | Top-dress with 1 inch of rich worm castings or apply diluted organic fish emulsion (5-1-1). |
| Entire plant yellowing, leaves limp and soggy | Severe Overwatering (Root Rot) | Soil feels marshy; sour, stagnant smell at root zone. | Stop watering immediately. Allow the top 2-3 inches to dry out; ensure container drain holes are open. |
| Leaf edges brown, crispy, and curling inward | Under-Watering / Heat Scorch | Dry soil pulling away from container walls; leaves brittle. | Deep soak container until water drains from bottom; move pots to afternoon shade during 95°F+ heat. |
| Tall, spindly, pale stems leaning sideways | Light Starvation (Etiolation) | Wide gaps between leaf nodes; stems cannot support weight. | Move bed or pots into minimum 6-8 hours direct sun; supplement indoor seedlings with 6500K LEDs. |
| Tiny white or yellow stippled dots on leaf tops | Spider Mite / Flea Beetle Damage | Fine webbing on leaf undersides (mites) or shotgun holes (beetles). | Blast foliage undersides with a sharp stream of water; apply organic insecticidal soap or neem oil spray. |
| White powdery film coating upper leaf surfaces | Powdery Mildew (Fungal) | Occurs in late summer with humid nights and poor airflow. | Prune infected leaves; avoid overhead watering; spray with a 1:9 milk-and-water solution in direct sun. |
| Sunken, leathery black spots on bottom of tomatoes | Blossom End Rot (Calcium Transport Failure) | Caused by erratic watering, not lack of soil calcium. | Water consistently on a steady schedule so calcium can be continuously transported by vascular transpiration. |
Transitioning from First Harvest to Abundance
Once you pick that first crisp radish, snip that first bowl of fresh lettuce, and taste the incredible difference between store-bought vegetables and food harvested ten minutes before dinner, a profound shift occurs. You realize that you possess the agency to produce real, nutrient-dense food with your own hands.
From a single 4x4-foot raised bed or three patio containers, you can expand systematically:
- Succession Planting: As soon as you harvest your early spring radishes in May, drop bush bean seeds into those exact empty spots to harvest green beans in July.
- Composting Your Scraps: Save your kitchen vegetable peels, coffee grounds, and yard trimmings to build free, rich organic fertilizer that replaces store-bought bagged soil.
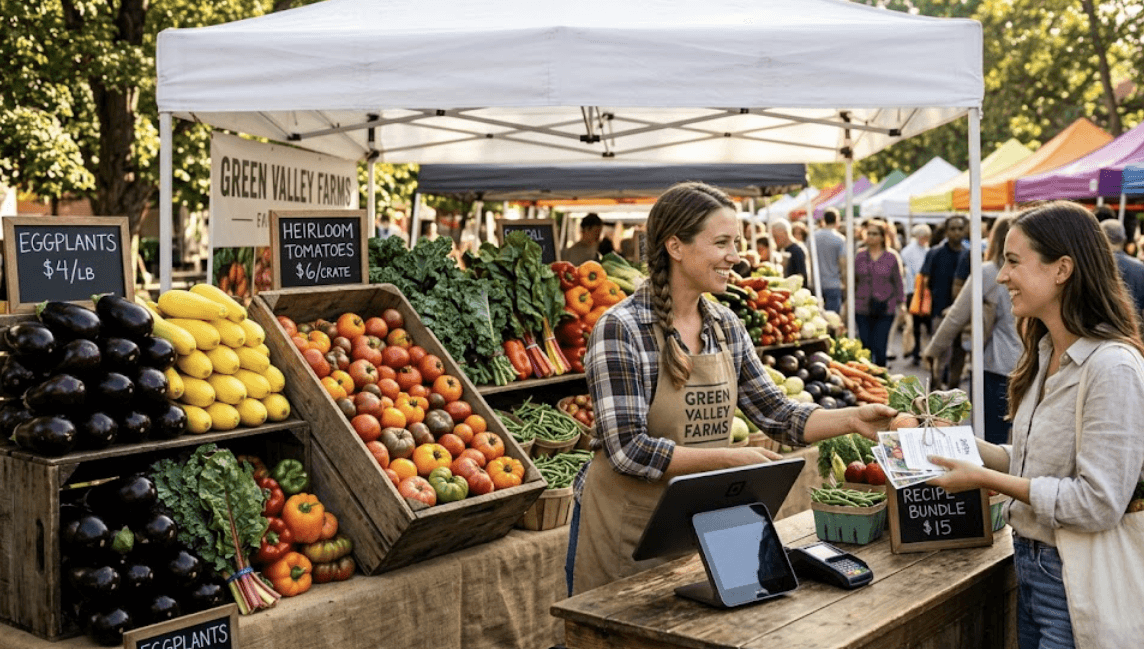
- Scaling to Monetization: Once your home garden produces more food than your family can eat, you are ready to explore our masterclass on building a driveway honesty box and backyard farmstand or scaling your growing footprint to a quarter-acre commercial market garden.
You do not need acres of rolling land, expensive machinery, or a degree in horticulture to feed yourself and your family. Start with one small bed, five packets of seeds, and the simple commitment to step outside for ten minutes each morning. Nature will handle the rest.
Step-by-Step Instructions
Conduct a 3-Point Sunlight & Water Access Audit

Before buying seeds or soil, spend a sunny Saturday observing your yard or patio. Check the spot at 9:00 AM, 12:00 PM, and 4:00 PM. A vegetable garden requires at least 6 to 8 hours of direct, unfiltered sunlight hitting the ground. Ensure the location is within easy reach of an outdoor hose spigot—if you have to haul five-gallon buckets of water across a long yard in July heat, you will neglect watering.
Choose Your Starter Footprint (Containers vs. 4x4 Raised Bed)

Select your growing enclosure. If you have zero yard or rent your home, purchase three to five 5-gallon fabric grow bags. If you have a backyard lawn, build or buy a simple 4x4-foot cedar raised bed (10 to 12 inches deep). Place the bed directly over the grass, lining the bottom with thick, overlapping corrugated cardboard (remove all tape) to permanently smother lawn grass without digging.
Blend Your Aerated Living Growing Medium
Never fill your bed with native lawn dirt. Create an aerated, fertile growing mix using the classic Mel's Mix ratio: 1/3 coarse horticultural vermiculite or perlite (for aeration and drainage), 1/3 sphagnum peat moss or coconut coir (for moisture retention), and 1/3 blended organic compost (from composted mushroom manure, worm castings, and decomposed plant matter). Mix thoroughly until it shatters softly in your hands.
Select the 'Big 5' Foolproof Beginner Seeds
Purchase five reliable seed varieties: French Breakfast or Cherry Belle radishes (fast harvest), Black Seeded Simpson or Salad Bowl looseleaf lettuce (cut-and-come-again greens), Provider or Contender dwarf bush snap beans (nitrogen-fixing pods), Black Beauty zucchini (heavy summer yields), and Genovese sweet basil (pest-deterring herb). Avoid slow, fussy crops like cauliflower or Brussels sprouts for your first season.
Master the 2X Depth Sowing Method

The golden rule of seed planting: plant each seed at a depth equal to two times its thickness. Tiny lettuce and basil seeds need only be pressed lightly 1/8-inch into moist soil and barely dusted with compost. Radishes go 1/4-inch deep. Large bean seeds go 1 inch deep. Mist the surface gently with a rose-nozzle watering can so seeds are settled without washing away.
The Uncompromising Art of Seedling Thinning

Seven to ten days after sowing, your seeds will emerge in dense green rows. When seedlings reach two inches tall with their first true leaves, thin them ruthlessly. Snip excess radish seedlings so they are 2 to 3 inches apart. Thin lettuce to 6 inches apart, and bush beans to 4 inches apart. Use small scissors rather than pulling roots to avoid disturbing adjacent plants, and toss the snipped thinnings into a salad as tender microgreens.
Deep Watering Mastery (The Finger Knuckle Test)
Never water on an automated daily timer. Before watering, push your clean index finger two inches deep into the soil. If it feels cool, dark, and damp at your second knuckle, step away—the roots have plenty of moisture and need oxygen. If it feels warm and bone dry, soak the soil deeply at the base of the plants until moisture reaches four inches deep. Mulch the bed surface with 1 inch of clean straw to conserve water.
The Cut-and-Come-Again Continuous Harvest
In 21 to 25 days, gently pull radishes when their round red shoulders push above the soil line. For looseleaf lettuce, never pull the plant up by the roots; use sharp kitchen shears to snip only the outer mature leaves 1 inch above the soil, leaving the center crown intact to grow a brand new harvest the following week. Pick bush green beans when pods are smooth and crisp before inner seeds bulge, encouraging the plant to flower and produce continuously.
Expert Insights & FAQs
How much time does a beginner vegetable garden actually take each day?
A beginner 4x4 raised bed or container setup takes only 5 to 10 minutes a day. Daily tasks consist of checking soil moisture with your finger, looking under leaves for pests, pulling occasional tiny weeds, and harvesting mature produce.
Can you grow vegetables successfully in containers on a balcony or patio?
Yes. Five-gallon fabric grow bags or large terracotta pots are exceptional for growing leafy lettuce, bush green beans, radishes, peppers, and fresh herbs, provided the patio receives at least 6 hours of direct sunlight daily.
What is the easiest vegetable to grow for someone who has never gardened before?
French breakfast radishes and cut-and-come-again looseleaf lettuce are the absolute easiest. Radishes are ready to harvest in 21 to 25 days, while looseleaf lettuce allows continuous snipping of outer leaves in just 30 days with minimal care.
Why do my vegetable seedlings always look tall, skinny, and fall over?
Seedlings become tall, skinny, and pale (a condition called etiolation or 'legginess') because they are starving for light. Move containers to an area receiving 6 to 8 hours of direct outdoor sun, or place indoor seedling trays under bright LED shop lights 2 inches above the canopy.
How do you know when a vegetable garden actually needs to be watered?
Never water on a rigid daily schedule. Insert your index finger two inches deep into the soil. If it feels cool and damp, do not water. Only apply water when the soil feels completely dry down to your second knuckle.
Can you use regular dirt from your backyard lawn in pots or raised beds?
No. Native backyard dirt is often heavy, compacted clay or sand that lacks aeration. In containers and raised beds, it compacts into hard brick and drowns roots. Always use an aerated blend of organic compost, peat moss or coco coir, and horticultural perlite.
Why is thinning seedlings necessary if they all look healthy?
When seeds germinate close together, they compete intensely for light, moisture, and root space. If left unthinned, crowded plants will stunt each other, producing only weak leaves and no edible bulbs or fruit. Thinning to proper spacing gives remaining plants the resources to reach full size.
What should you do if insects start chewing holes in your vegetable leaves?
Do not spray toxic synthetic pesticides. Hand-pick large caterpillars or beetles and drop them into soapy water. Spray small soft-bodied pests like aphids with a sharp jet of hose water or organic insecticidal soap, and preserve predatory beneficial insects like ladybugs.
Johnnie McCormick
Zone 7b/8a - North Central Alabama
Johnnie McCormick is a gardening hobbyist and the founder of My Garden Spot. Raised in north-central Alabama, his passion for gardening began in his youth. In 2008, he established a large market garden, teaching himself high-yield growing methods. In the years since, he has operated seasonal seedling sales for transplants, specializing in heirloom tomatoes, peppers, eggplants, decorative ground covers like Ajuga (Bugleweed), marigolds, nasturtiums, and fresh kitchen-window herb arrangements (basil, cilantro). Today, he gardens in the hills between Birmingham and Jasper, Alabama (Zone 7b/8a), sharing practical, community-focused gardening resources.
Verified Authoritative Citations & References
In alignment with our strict E-E-A-T research and verification guidelines, this guide cross-references data from the United States Department of Agriculture (USDA) and Cooperative Extension Service programs.
- USDA Agricultural Marketing Service (AMS): Community Supported Agriculture (CSA) standards and local market surveys. ams.usda.gov
- Penn State Extension: Small Farm Economics, financial planning, and crop pricing research documents. extension.psu.edu
- Cornell Cooperative Extension: Market gardening business planning and local sales guidelines. smallfarms.cornell.edu
- Alabama Cooperative Extension System (ACES): Local food regulations, CSA legal permits, and farm safety standards. aces.edu



Please log in to view comments.