How Do You Cure and Store Winter Squash and Pumpkins for Long-Term Storage?

Introduction to Winter Squash and Pumpkins
Winter squash and pumpkins are the quintessential symbols of the autumn harvest. As members of the highly diverse Cucurbitaceae family, they encompass a wide range of species, including the reliable butternut squash, the deeply ribbed acorn squash, the massive Hubbard squash, and the classic jack-o'-lantern pumpkins. These warm-season crops thrive in temperate climates, requiring well-draining soil, full sun, and a long growing season to reach their maximum potential.
For many gardeners and homesteaders, the ultimate goal of growing winter squash is to build a reliable winter pantry. Unlike summer squash (like zucchini or crookneck), which are harvested immature and consumed immediately, winter squash are grown specifically for their incredible storage capabilities. However, getting a pumpkin from the garden plot to the middle of February in perfect condition requires more than just picking it and putting it on a shelf.
Understanding the botany, physiology, and necessary environmental conditions for curing and storing winter squash is essential for optimizing their longevity. Whether you are a beginner looking to save your first successful harvest or an advanced grower seeking to refine your root cellar techniques, this comprehensive guide—brought to you with the analytical and growth-oriented mindset of the Intuitive Neurons community—will provide you with the exact science and practical steps needed to master winter squash preservation.
Part 1: The Botany and Physiology of Winter Squash
To truly understand how to cure and store these fruits, we must first look at how they are built. Winter squash and pumpkins are vining (or sometimes bush-type) plants that produce large, broad leaves designed to capture immense amounts of solar energy. This energy is funneled directly into the development of large, nutrient-dense fruits.
The Three Main Species
While we casually group them as "squash" or "pumpkins," they primarily fall into three distinct botanical species, each with unique storage characteristics:
- Cucurbita pepo: This includes acorn squash, delicata, spaghetti squash, and most standard carving pumpkins. Storage profile: These generally have thinner skins and shorter shelf lives (1 to 3 months). They often do not require a long curing period.
- Cucurbita moschata: This includes butternut squash, cheese pumpkins, and tromboncino. Storage profile: Excellent keepers. Their thick rinds and dense flesh allow them to store for 4 to 6 months or more under the right conditions.
- Cucurbita maxima: This includes Hubbard, kabocha, buttercup, and giant pumpkins. Storage profile: The champions of long-term storage. With incredibly hard, corky rinds, some C. maxima varieties can easily last up to 8 months.
Anatomy of the Fruit and Rind
The physiological mechanisms that control fruit growth and development are complex, involving the coordination of hormonal signals, nutrient uptake, and environmental factors. For storage, the most important part of the anatomy is the rind.
The rind is composed of a waxy cuticle—a literal barrier of plant waxes that prevents water loss (desiccation)—and a network of lignified cells that provide immense structural support. When we cure a squash, we are actively encouraging the plant's biology to increase the thickness of this waxy layer and to generate suberin (a corky, waterproof substance) over any scratches or minor wounds. The stem (or peduncle) is another critical anatomical feature; it acts as the umbilical cord during growth but can become an entry point for bacteria if broken off prematurely or improperly handled.

Part 2: Pre-Harvest: Soil Biology and Preparation
The journey to a six-month storage life does not begin at harvest; it begins in the soil. The chemical and physical composition of your squash at the time of harvest directly dictates its ability to fight off pathogens in the pantry.
The Role of Soil Health in Fruit Durability
Soil health is critical for growing resilient winter squash and pumpkins. A well-structured soil with adequate organic matter, nutrients, and beneficial microorganisms is essential. If a squash is grown in nutrient-poor soil, its cell walls will be weak, making it highly susceptible to fungal infections during storage. For more information on building a living soil web, visit our Soil Health & Composting section. Additionally, our ultimate soil health guide provides a comprehensive overview of soil biology and management practices.
Advanced Soil Preparation and Fertilization
Before planting winter squash and pumpkins, the soil should be prepared by incorporating rich organic matter such as well-aged compost, leaf mold, or composted manure. But beyond the basics of Nitrogen (N), Phosphorus (P), and Potassium (K), advanced growers must pay attention to secondary macronutrients and micronutrients:
- Calcium (Ca): This is arguably the most important mineral for storage crops. Calcium is the "glue" (calcium pectate) that holds plant cell walls together. A squash with high cellular calcium density will have a much harder rind and firm flesh that resists rot.
- Boron (B): Boron works synergistically with calcium. Without adequate boron, the plant cannot properly transport calcium to the developing fruit.
- Potassium (K): Potassium regulates the opening and closing of stomata (pores) on the plant and is vital for water regulation and the transfer of sugars into the fruit, which dictates the final flavor of the stored squash.
The soil pH should be adjusted to a range of 6.0-6.8, which is the optimal "sweet spot" for nutrient availability for cucurbits.
Late-Season Water Management
As the end of the growing season approaches and the fruits reach their mature size, it is an advanced best practice to taper off watering. Withholding water in the final 2-3 weeks before harvest forces the plant to concentrate sugars in the fruit and begin hardening the rind naturally. Excess water late in the season can lead to watery flesh that rots quickly in storage and can even cause the fruits to split open in the field.
Part 3: The Art and Science of Harvesting
Harvesting winter squash and pumpkins at the exact right time is crucial for optimal flavor, texture, and storage life. Harvest too early, and the sugars will not have developed, leaving you with bland, watery flesh and a thin skin that shrivels. Harvest too late, and you risk exposing the crop to a hard frost, which causes cell damage and guarantees rapid spoilage. For more information on harvesting and storing various fruits, visit our Fruit Guides section.
Determining Absolute Maturity
Knowing when a squash is ready is a skill that blends observation with tactile feedback. Look for the following precise indicators of maturity:
- The Fingernail Test: This is the gold standard for testing readiness. Gently press your thumbnail into the skin of the squash (try to do this on the bottom or a less visible side). If the skin gives way easily and punctures, the squash is immature. If the skin is hard, unyielding, and resists your nail, the fruit is mature.
- Stem Corking: Look closely at the stem where it attaches to the fruit. On a mature squash, this stem will transition from fleshy and bright green to dry, woody, and brown (corked). It will look like a dry twig rather than a living vine.
- Ground Spot Coloration: The part of the squash resting on the ground will change color when mature. For pumpkins, this spot will turn a deep, rich orange. For green varieties like Kabocha or Buttercup, the ground spot will turn a creamy yellow or orange.
- Vine Dieback: While disease or pests can sometimes cause this prematurely, a natural yellowing, withering, and dying back of the vine foliage is a strong indicator that the plant has finished pumping energy into the fruit.
- Dullness of the Rind: Immature squash often have a glossy, shiny appearance. As they mature and the waxy cuticle thickens, the skin takes on a dull, matte finish.
Harvesting Protocols: Step-by-Step
When the signs indicate maturity, proceed with care. Treat your squash like fragile glass. Even a minor bruise can become ground zero for bacterial soft rot.
- Use the Right Tools: Never twist or tear the squash from the vine. This frequently breaks the stem off at the base (creating an open wound into the flesh). Instead, use a pair of sharp, sanitized bypass pruners or a harvesting knife.
- Leave the Stem Attached: Cut the vine, leaving a solid 2 to 3-inch stub of stem attached to the fruit. This stem stub acts as a natural cork, sealing the top of the squash from invading pathogens. If a stem breaks off completely (a "stemless" squash), do not attempt to store it long-term; process and eat it within a week or two.
- Never Carry by the Stem: It is highly tempting to use the stem as a handle, especially on large pumpkins. Do not do this. The weight of the fruit can easily cause the stem to snap off. Always carry the fruit from the bottom with both hands.
Navigating Frost
Winter squash are incredibly frost-sensitive. A light frost (30-32°F) will kill the vines but usually leaves the mature fruits unharmed if they are harvested the next day. However, a hard frost (below 28°F) can cause cellular damage to the rind, dramatically shortening storage life. If a hard frost is forecasted and your squash are almost (but not quite) mature, it is better to harvest them immediately rather than risk frost damage.
Part 4: The Curing Process
Curing is the transitional phase between harvesting and long-term storage. It is not merely "drying out" the squash; it is a biological process where the plant material actively responds to its environment to armor itself for the winter.
What is Curing, Biologically?
When exposed to specific temperatures and humidity, the squash undergoes suberization. The plant cells in the rind produce suberin, a waxy, waterproof polymer. This process heals and seals over superficial scratches, cuts, and insect bites. It also thickens the overall cuticle, locking moisture inside the fruit and locking fungi and bacteria out. For more information on the overarching concepts of crop preparation, visit our Crop & Planting Guides section.
Advanced Curing Protocols
To perfectly cure winter squash and pumpkins, you must replicate a late-summer environment.
- Temperature: The ideal temperature for curing is consistently warm, between 80°F and 85°F (27°C - 29°C).
- Humidity: Relative humidity should be kept relatively high, around 80% to 85%. This prevents the squash from losing too much internal moisture while the rind hardens.
- Ventilation: Good airflow is non-negotiable. Stagnant air allows fungal spores to settle and proliferate.
- Duration: The curing process typically takes 10 to 14 days.
Methods for Curing
Depending on your climate and resources, you can cure squash in several ways:
- Field Curing: If your late-summer/early-fall weather is reliably sunny, dry, and warm (above 75°F during the day, not dipping below 60°F at night), you can cut the squash from the vine and simply leave them sitting in the field for two weeks.
- Greenhouse/Hoop House Curing: This is often the ideal scenario. A well-ventilated greenhouse easily reaches the 80-85°F mark. Be sure to shade the squash from direct, scorching sunlight, which can cause sunburn.
- Indoor Curing: If the weather has turned cold and wet, you must cure indoors. A sunroom, a warm boiler room, or a space near a wood stove works well. You may need to use a small fan to ensure adequate air circulation.
The Exceptions to the Rule
Not all winter squash require curing. This is a critical distinction that trips up many beginners.
- Acorn Squash: Do not cure acorn squash. Exposing acorn squash to high heat after harvest will actually cause them to lose moisture rapidly, resulting in a stringy, poor-quality texture and a shortened shelf life. Move acorn squash directly to cool storage after harvesting.
- Delicata Squash: Similar to acorn squash, their thin skins do not benefit significantly from high-heat curing and they should be stored relatively soon after a brief drying period.
Part 5: Cleaning and Sanitizing Before Storage
 Once the 10-14 day curing period is complete, but before moving the fruits into your pantry or root cellar, it is an advanced best practice to sanitize the exterior of the rind.
The field is full of natural fungal spores and soil-borne bacteria. While the curing process hardened the rind against these, it is best to physically remove the pathogens before packing the squash tightly together in a confined space.
The Sanitization Wipe-Down
- Prepare a gentle sanitizing solution. You can use a mix of 1 part household bleach to 10 parts water, OR a solution of white vinegar and water, OR hydrogen peroxide.
- Dip a clean cloth or sponge into the solution and wring it out so it is damp, not dripping.
- Gently wipe down the entire exterior of the squash, paying special attention to the blossom end (the bottom) and the area around the stem.
- Wipe the stem itself, but be careful not to dislodge it.
- Allow the squash to air dry completely on a slatted rack before moving them to storage. Any residual moisture will invite rot.
Part 6: Long-Term Storage Strategies
After curing and cleaning, your winter squash and pumpkins are ready to enter dormancy in long-term storage. The conditions here are drastically different from the curing conditions. The goal now is to slow down the fruit's respiration rate and delay the natural decay process for as long as possible. For insights on managing pests and organic issues in storage spaces, visit our organic pest management section.
The Ideal Storage Environment
The exact parameters for maximum shelf life are highly specific:
- Temperature: The absolute ideal storage temperature is 50°F to 55°F (10°C - 13°C).
- Warning: Do not store squash in a refrigerator or any environment that drops below 50°F. Temperatures below this threshold cause chilling injury. Chilling injury compromises the cell walls, leading to sunken, pitted areas on the rind, loss of flavor, and rapid, catastrophic rot as soon as the squash is brought back to room temperature.
- Warning: Storing in temperatures above 60°F will cause the squash to respire too quickly, utilizing its stored sugars and eventually turning stringy, dry, and weightless.
- Humidity: The ideal relative humidity is between 50% and 70%. If the air is too dry, the squash will slowly dehydrate and shrivel. If the humidity is higher than 70%, condensation can form on the rind, providing a perfect breeding ground for mold and bacteria.
- Light: Store in complete darkness or very dim light. Exposure to light can trigger the seeds inside the squash to begin germinating, which ruins the flesh.
- Ventilation: Continuous, gentle air exchange prevents the buildup of humidity and stagnant air.
Storage Locations
Finding the perfect 50-55°F spot in a modern home can be challenging. Good options include:
- An unheated, insulated basement.
- A traditional root cellar.
- An attached garage (provided it does not freeze).
- A cool, dark closet on the north side of the house.
Storage Protocols and Arrangement
How you arrange the squash is just as important as the room's temperature.
- Single Layer Only: Place the fruits in a single layer on slatted wooden shelves, wire racks, or in shallow baskets. Never stack winter squash. Stacking creates pressure points that lead to bruising and prevents air from circulating around the entire fruit.
- No Touching: Arrange the squash so that they are not touching each other. If one squash begins to rot, keeping them separated prevents the pathogen from immediately jumping to its neighbor.
- The Ethylene Danger: Do not store winter squash in the same room as apples, pears, or ripening tomatoes. These fruits emit high levels of ethylene gas, a natural plant hormone that accelerates ripening and decay. Exposure to ethylene will cause your squash to rot prematurely.
Expected Shelf Life by Variety
Even under perfect conditions, genetics play a role in how long a squash will last. Plan your winter eating schedule by consuming the worst keepers first and saving the best for late winter:
- 1 to 2 Months: Acorn, Delicata, Sweet Dumpling, Spaghetti Squash.
- 2 to 3 Months: Pie pumpkins, Jack-o'-lantern pumpkins.
- 3 to 6 Months: Butternut, Buttercup, Kabocha, Cheese Pumpkins.
- 6+ Months: Hubbard, Sweet Meat, Blue Hokkaido, and some thick-skinned Butternut varieties.
Part 7: Troubleshooting Common Storage Problems
Even with the best preparation, organic matter wants to decompose. Regular monitoring is your best defense. Inspect your stored squash at least once a week. Use a flashlight and look for the following issues.
Rot, Mold, and Fungal Pathogens
The most common problems during storage are fungal and bacterial infections.
- Black Rot (Gummy Stem Blight): Appears as water-soaked spots that turn dark brown or black. It often starts near the stem.
- Fusarium Rot: Often shows up as a dry, spongy rot, sometimes with white or pinkish mold growing on the surface.
- Bacterial Soft Rot: This is the most catastrophic. The squash will suddenly turn to a foul-smelling, mushy liquid, often collapsing entirely.
Triage and Action
If you spot a squash with a small spot of mold or a soft spot beginning to form:
- Remove it immediately. Do not leave it in the storage area for even one more day, as it is actively shedding spores.
- If the spot is small (the size of a quarter) and the rest of the squash is firm, you can often cut away the bad portion (cutting a generous margin around the rot) and consume the rest of the squash immediately.
- If the squash is heavily molded, weeping liquid, or smells fermented, compost it immediately (or throw it away if you do not want to introduce those specific pathogens to your compost pile).
Pest Infestations
While less common indoors, mice and rodents love winter squash seeds. They will chew right through the tough rind to get to the nutrient-dense seeds inside. Ensure your storage area is rodent-proofed.
Part 8: Flavor Maturation and Culinary Considerations
One of the most fascinating aspects of winter squash storage is that the fruit is not dead; it is still a living, respiring organism. Over time, a complex biochemical process takes place inside the squash.
The Starch-to-Sugar Conversion
When first harvested, many winter squash (especially varieties like Kabocha, Hubbard, and some Butternuts) are incredibly high in starches. If you cook them immediately, they may taste bland, dry, and surprisingly starchy—almost like a potato.
During curing and the first month of storage, enzymes within the squash begin breaking down these complex starches into simple sugars (sucrose, glucose, and fructose). This means that a Butternut squash eaten in December will be significantly sweeter, richer, and more flavorful than that same Butternut squash eaten in September.
For the best culinary experience, allow your long-keeping varieties to rest in storage for at least 3 to 4 weeks before consuming them. This patience rewards the gardener with the deep, complex, sweet flavors that make winter squash a seasonal delicacy.
Part 9: Beyond Storage: Seed Saving and Crop Rotation
For the advanced practitioner looking to close the loop on their homesteading or gardening practice, the storage phase is intimately connected to next year's planting.
Seasonal Timing and Crop Rotation
Winter squash and pumpkins are heavy feeders and can harbor soil-borne pathogens and pests (like the dreaded squash bug or squash vine borer) that overwinter in the soil. Therefore, strict crop rotation is essential.
Never plant cucurbits in the same soil two years in a row. A three-year or four-year rotation is optimal. Rotate your winter squash with unrelated crops such as brassicas (cabbage, broccoli), legumes (beans, peas—which help fix nitrogen), or alliums (garlic, onions). This breaks the life cycle of pests and prevents the depletion of specific soil nutrients. For more information on holistic field management, visit our regenerative agriculture & no-till section.
The Basics of Seed Saving
If you have successfully stored a squash into late winter and its flavor and durability were exceptional, that is the perfect candidate for seed saving.
- Note on Genetics: Squash cross-pollinate incredibly easily. If you grew a Butternut (C. moschata) next to a Cheese pumpkin (C. moschata), the seeds inside will likely be a hybrid. However, species generally do not cross with other species (e.g., a Butternut will not cross with an Acorn squash).
- To save seeds, scoop them out when preparing the squash for a meal. Rinse them thoroughly in a colander to remove the stringy pulp.
- Spread the clean seeds on a screen or a piece of parchment paper in a warm, dry place (avoid direct sunlight).
- Let them dry completely for 1 to 2 weeks. They should snap cleanly in half when bent; if they bend without snapping, they are still too moist. Store in a cool, dark place in an airtight jar.
Conclusion and Further Resources
Mastering the curing and storage of winter squash and pumpkins elevates a gardener from a simple summer grower to a year-round provider. It requires careful attention to detail, a thorough understanding of the physiological mechanisms that control fruit development, and the discipline to maintain precise environmental conditions in your storage space.
By respecting the plant's biology—harvesting at the peak of maturity, facilitating the suberization of the rind through high-heat curing, and maintaining a strict, cool, dry environment for long-term dormancy—you can preserve the literal fruits of your labor long after the garden is buried under snow.
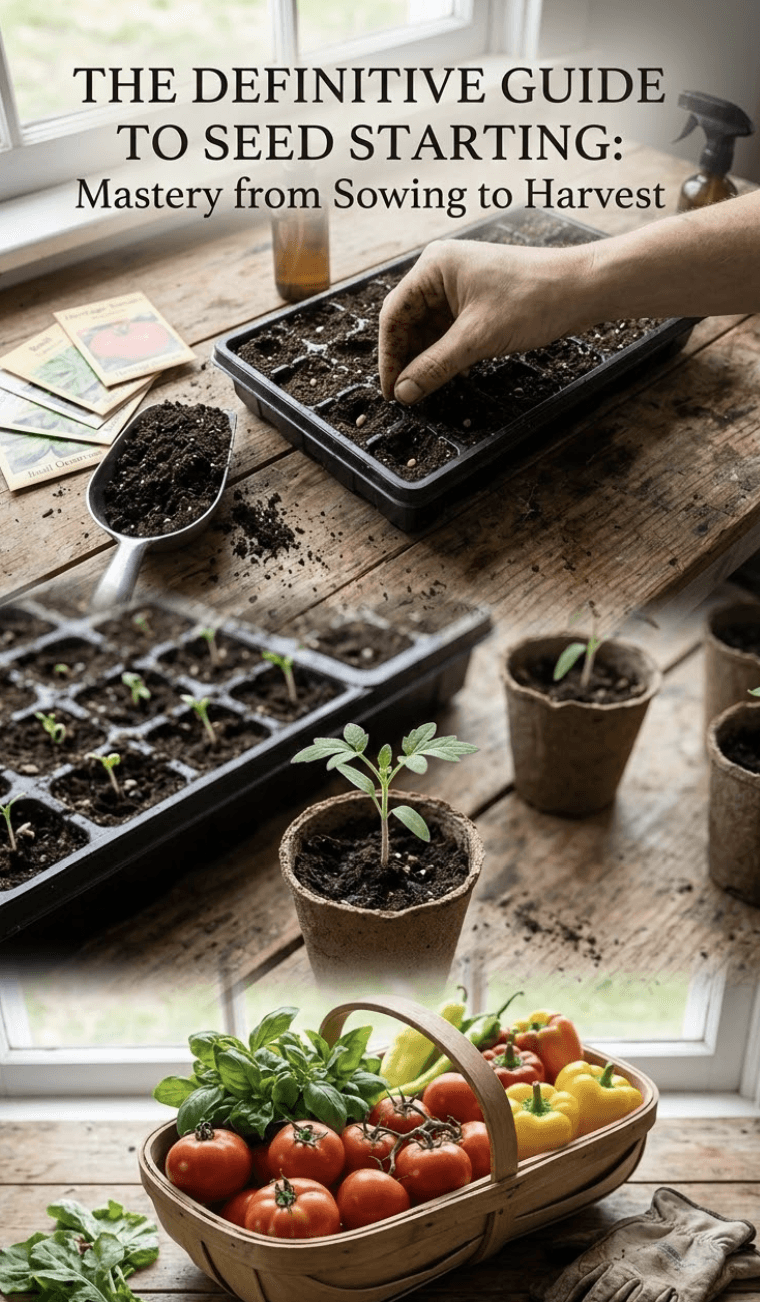
By integrating these best practices into your routine, you can enjoy a successful, highly productive, and enduring harvest. Remember to continually monitor your pantry, act swiftly if rot appears, and embrace the ever-deepening flavor profile that comes with patience. For more deep-dive information on advanced crop management, visit our seed starting and transplanting section, or explore our mastering heirloom tomatoes guide for summer greenhouse techniques.
Happy harvesting, curing, and eating!
Expert Insights & FAQs
Which winter squash varieties need to be cured?
Butternut, spaghetti, hubbard, kabocha, and pumpkins all benefit greatly from curing. Acorn squash is the notable exception—it should not be cured at high heat, as it degrades storage quality.
What is the ideal temperature and humidity for curing winter squash?
Cure squash at 80°F to 85°F with 80% relative humidity for 10 to 14 days in a well-ventilated garage, porch, or greenhouse.
How do I know when winter squash is ripe and ready to harvest?
Harvest when rinds turn full color and become so hard that a thumbnail cannot easily puncture them, and when the attaching vine stem turns brown and corky.
Why is leaving the stem attached to squash so important?
A missing or broken stem leaves an open wound at the blossom end that invites rot bacteria and fungal spores directly into the flesh.
Should I wash winter squash before curing?
Wipe off dry dirt with a soft brush or dry cloth. If muddy, wash gently with a mild chlorine solution (1 tbsp bleach per gallon water) to sanitize rinds before drying.
What temperature is best for long-term squash storage?
Store cured squash in a dark, cool pantry or basement maintained at 50°F to 55°F with 50-70% relative humidity.
How long will butternut squash last in storage if cured properly?
Properly cured butternut squash will easily last 4 to 6 months in ideal cool pantry conditions.
Can I stack winter squashes on top of each other in storage?
No. Store squashes in a single layer with space between individual fruits to allow air circulation and prevent contact rot.
Johnnie McCormick
Zone 7b/8a - North Central Alabama
Johnnie McCormick is a gardening hobbyist and the founder of My Garden Spot. Raised in north-central Alabama, his passion for gardening began in his youth. In 2008, he established a large market garden, teaching himself high-yield growing methods. In the years since, he has operated seasonal seedling sales for transplants, specializing in heirloom tomatoes, peppers, eggplants, decorative ground covers like Ajuga (Bugleweed), marigolds, nasturtiums, and fresh kitchen-window herb arrangements (basil, cilantro). Today, he gardens in the hills between Birmingham and Jasper, Alabama (Zone 7b/8a), sharing practical, community-focused gardening resources.
Verified Authoritative Citations & References
In alignment with our strict E-E-A-T research and verification guidelines, this guide cross-references data from the United States Department of Agriculture (USDA) and Cooperative Extension Service programs.
- Cornell Cooperative Extension: Home Vegetable Gardening Guide and vegetable variety recommendations. gardening.cals.cornell.edu
- Penn State Extension: Master Gardener Manual and companion planting matrices. extension.psu.edu
- Alabama Cooperative Extension System (ACES): Raised bed construction plans and regional seed planting calendars. aces.edu
- USDA NRCS: Cover crops and biological soil health guidelines. nrcs.usda.gov

Please log in to view comments.