Winter CSA Shares: Extending the Season for Year-Round Farm Income

How Do You Extend the Season with Winter CSA Shares for Year-Round Farm Income?
For most market gardeners and small-scale farmers, the arrival of the first hard frost signals an end to the season's revenue, ushering in a period of equipment repair, financial planning, and cash outflow. However, a growing number of producers are challenging this paradigm by implementing a winter Community Supported Agriculture (CSA) program. This strategic move transforms a seasonal operation into a year-round, cash-flowing enterprise, capturing a lucrative and underserved market. Executing a successful winter CSA is not a matter of luck; it is an exercise in precision agriculture, logistical discipline, and a deep understanding of plant biology under cold-stress conditions. It requires fighting against the constraints of the Persephone Period—the time of year when daylight hours are too short to support active plant growth—as well as managing freezing temperatures, humidity spikes, and pest pressure in protected environments.
This comprehensive guide moves beyond theoretical concepts to provide the exact formulas, infrastructure specifications, crop metrics, and administrative models necessary to build and operate a highly profitable winter CSA. We will deconstruct the science of winter growing, from calculating precise sowing dates based on adjusted Days to Maturity (DTM) to engineering multi-layered microclimates within unheated high tunnels. By balancing the production of high-value, frost-sweetened fresh greens with a robust inventory of nutrient-dense storage crops, you can offer members a diverse and compelling share box throughout the coldest months. This approach not only stabilizes your farm's income but also strengthens community relationships and solidifies your brand as a reliable, year-round source of local food.
What are the economic benefits of offering a winter CSA share?
Transitioning from a seasonal to a year-round business model offers profound financial advantages that stabilize and grow a farm operation. The primary benefit is the establishment of a consistent revenue stream during a period when income traditionally ceases.
- Year-Round Cash Flow: Most farms face a significant cash flow deficit from late fall to early spring. A winter CSA, with its upfront payments collected in the fall, injects capital into the business precisely when it's needed most. This income can cover fixed winter costs such as mortgages, insurance, key employee salaries, and loan payments, reducing the need for operating loans and the associated interest expenses.
- Premium Market Pricing: The principle of supply and demand works heavily in the winter grower's favor. With most local farms dormant, the supply of fresh, local produce plummets while consumer demand remains. This scarcity allows winter CSA producers to command a premium price for their goods, particularly for high-demand items like fresh spinach, salad greens, and frost-sweetened carrots. Exploring different pricing structures is essential, as detailed in our guide on how to price CSA shares for profitability.
- Increased Customer Lifetime Value (CLV): By engaging with members year-round, you build deeper relationships and foster greater loyalty. A customer who participates in both your summer and winter programs is far more likely to return the following year than one who has a six-month gap in service. This dramatically increases the CLV of each member and reduces annual marketing costs associated with acquiring new customers.
- Operational Efficiency and Labor Retention: A winter CSA allows you to retain skilled, year-round employees. This avoids the costly and time-consuming process of hiring and retraining a new crew each spring. Keeping a core team employed ensures that operational knowledge is preserved and that the farm runs more efficiently throughout the entire year.
- Market Differentiation: Offering a winter share positions your farm as a cornerstone of the local food system. You become known as a reliable, four-season producer, which enhances your brand reputation and gives you a significant competitive advantage over other farms and grocery stores.
What low-tech season extension structures are required for winter harvesting?
While heated greenhouses are an option, they come with substantial infrastructure and energy costs. For most small to mid-scale farms, a highly profitable winter CSA can be run using passive solar principles and unheated, multi-layered structures. The goal is not to heat the space, but to trap solar radiation, block wind, and protect crops from temperature extremes.
The High Tunnel: Your Primary Defense
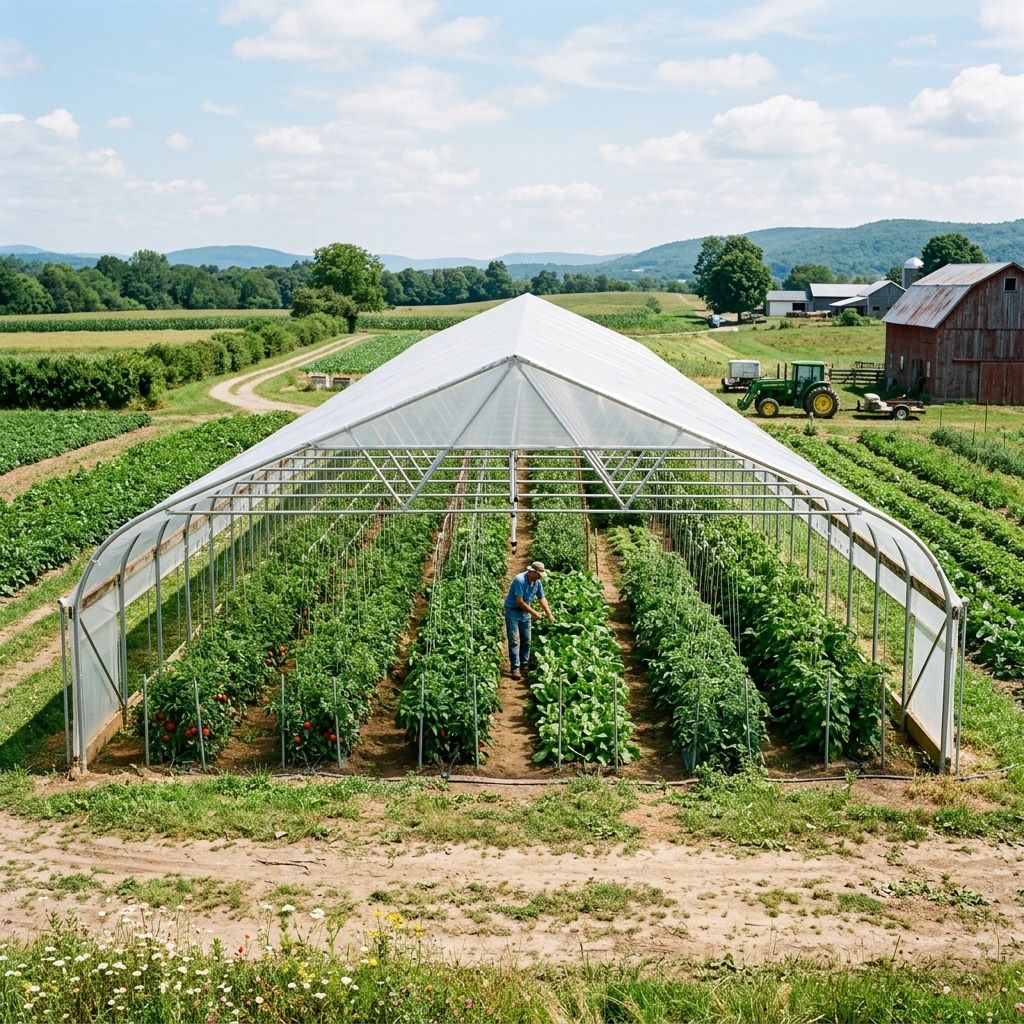
The high tunnel, or hoop house, is the foundational element of winter production. It creates a protected environment that buffers against wind, snow, and extreme cold.
- Structural Style: A Gothic arch style is strongly preferred over a Quonset (rounded) style in regions with significant snowfall. The pointed peak of the Gothic arch is much more effective at shedding snow, reducing the risk of structural collapse under a heavy, wet snow load.
- Orientation: For latitudes above 40°N, an East-West orientation is optimal for maximizing exposure to the low winter sun. The long south-facing side of the tunnel will capture the most solar energy throughout the day.
- Glazing: The standard is a double layer of 6-mil, UV-treated greenhouse plastic. A small inflation blower fan is used to pump air between the two layers, creating a pocket of dead air. This simple feature increases the R-value to approximately 1.4 and can reduce nighttime heat loss by 30-40% compared to a single layer.
- Snow Load Management: Even with a Gothic arch, active management is required. Keep a long-handled push broom (often called a "snow rake") to push snow off the plastic from the inside. In a forecasted blizzard, a portable propane torpedo heater can be run temporarily inside the tunnel; the heated air will warm the plastic just enough to cause the snow to slide off.
Internal Low Tunnels: The Microclimate Engine
Inside the high tunnel, a second layer of protection is created directly over the growing beds. This "low tunnel" or "quick hoop" system is what makes growing through the deep winter possible.
- Hoops: Use 9-gauge galvanized wire or 1/2-inch EMT conduit bent into hoops. For a standard 30-inch wide bed, a 76-inch length of wire creates a perfectly sized arch. Hoops should be spaced every 4-5 feet along the bed.
- Row Cover Fabric: The key is using spun-bond polypropylene fabric (e.g., Agribon or Reemay). The weight of the fabric determines the level of frost protection. A typical strategy involves a progression of weights:
- AG-19 (0.55 oz/sq yd): Provides 2-4°F of protection. Ideal for early fall and late spring.
- AG-30 (0.9 oz/sq yd): Provides 4-6°F of protection. The workhorse for early winter.
- AG-50 (1.5 oz/sq yd): Provides 6-8°F of protection. Essential for the coldest parts of winter (January-February).
This double-coverage system—high tunnel plus internal low tunnel—is a cornerstone of passive solar growing. For those looking to start smaller, many of these principles can be applied to DIY cold frames that extend the growing season on a budget.
How do crop selection and planting schedules differ for winter production?
Winter growing is fundamentally different from summer growing. In summer, you plant and harvest in a continuous cycle of active growth. In winter, your primary strategy shifts from growing to storing living crops in place. The entire success of your winter CSA depends on precise timing dictated by the sun.
Understanding the Persephone Period
The Persephone Period is the time of year when the number of daylight hours drops below 10. During this window, plant photosynthesis slows so dramatically that significant growth effectively ceases. Your high tunnel does not make crops grow during this time; it merely keeps them alive and protected until they can be harvested. Your goal is to use the fall growing season to bring your crops to near-maturity before the Persephone Period begins.
For example, at latitude 42°N (Boston, MA or Chicago, IL), this period typically runs from mid-November to early February. You can find the exact dates for your location using an online sunrise/sunset calendar.
The Winter DTM Formula
You cannot use the Days to Maturity (DTM) listed on a seed packet for winter crop planning. Those values are based on optimal summer conditions. To calculate your actual seeding dates for a winter harvest, you must use a formula that accounts for the diminishing light and cooler temperatures of fall.
Winter Sowing Date Formula:
Target Harvest Date - ((Catalog DTM x Fall Factor) + Low Light Factor) = Required Sowing Date
- Target Harvest Date: The date you want to begin harvesting the crop (e.g., November 15).
- Catalog DTM: The Days to Maturity listed on the seed packet.
- Fall Factor: A multiplier to account for slower growth. Typically 1.2 to 1.5, depending on how late in the season you are planting.
- Low Light Factor: A fixed number of days (e.g., 14 days) added to account for the impact of low sun angle and shorter days.
Example Calculation: 'Space' Spinach
- Target Harvest Date: November 15
- Catalog DTM: 39 days
- Fall Factor: 1.3
- Low Light Factor: 14 days
- Winter DTM = (39 days * 1.3) + 14 days = 50.7 + 14 = 64.7 (Round to 65 days)
- Required Sowing Date: November 15 - 65 days = September 11
Missing this sowing window by even one week can result in a crop that is only half the expected size, drastically reducing your yield per bed foot. Meticulous scheduling using tools like our Planting Calendar is non-negotiable.
The Winter Crop Arsenal
Not all crops are suited for winter production. The ideal candidates are cold-hardy, relatively compact, and can be harvested multiple times (cut-and-come-again).
| Crop Type | Recommended Varieties | Seeding Method | Bed Spacing (30" Bed) | Key Considerations |
|---|---|---|---|---|
| Spinach | Space, Kolibri, Auroch, Tyee | Direct Seed (Jang JP-5) | 5 rows, 2" in-row | Your most profitable winter green. Extremely cold hardy. Can be cut 2-4 times. |
| Lettuce Mix | Salanova (Green/Red Sweet Crisp) | Transplant (128-cell trays) | 3 rows, 6" in-row | Harvest as whole heads. Must be fully thawed before cutting or it turns to mush. |
| Mache | Vit, Verte de Cambrai | Direct Seed | 6 rows, 1.5" in-row | The ultimate insurance crop. Can survive single-digit temperatures unprotected. |
| Claytonia | (Miner's Lettuce) | Direct Seed | 5 rows, 2" in-row | Extremely vigorous in low light. Succulent texture is a CSA member favorite. |
| Kale | Vates Blue Curled Scotch, Red Russian | Transplant | 2 rows, 12" in-row | Frost improves its flavor, converting starches to sugars. Very durable. |
| Arugula | Astro, Esmee | Direct Seed | 7 rows, 1" in-row | Fast-growing but can be damaged by repeated hard freezes. Best for early winter boxes. |
Careful planning is everything. For a complete overview of scheduling multiple crops for continuous harvest, consult our ultimate guide to crop planning for market gardeners.
What temperature and ventilation management rules protect winter crops?
Managing the environment inside an unheated high tunnel is a delicate balancing act. The primary goal is not to keep it warm, but to mitigate extremes and control moisture. Your biggest enemies in the winter are not just the cold, but condensation and the fungal diseases it promotes.
The Daily Management Routine
Success in a winter tunnel requires daily attention. This routine is dictated by the weather, not the clock.
- Morning Venting: On any sunny day, regardless of the outside temperature, the inside of a high tunnel will heat up rapidly due to the greenhouse effect. Once the internal temperature rises above 45°F (7°C), you must begin to ventilate by rolling up the sides or opening the doors. This has two critical purposes:
- It prevents the space from overheating, which can stress the cool-weather crops.
- More importantly, it vents the warm, moist air that has accumulated overnight, preventing condensation from dripping onto plant leaves.
- Removing Internal Covers: Once the tunnel is vented and the air temperature is safely above freezing, the internal low tunnel row covers should be pulled back off the beds. This allows the plants to photosynthesize and the soil surface to dry out.
- Afternoon Close-Up: The timing of this step is crucial for trapping solar gain. The goal is to close everything up before the sun's energy begins to wane, typically between 2:30 PM and 3:30 PM. First, pull the row covers back over the beds. Then, roll down the high tunnel sides and close the doors. This traps the day's accumulated solar heat in the air and soil, which will then radiate back slowly overnight, protecting the crops.
Disease and Pest Management
This controlled environment creates unique challenges. Condensation is the primary vector for fungal diseases.
- Botrytis (Gray Mold): This fungus thrives in cool, damp, and stagnant conditions. It appears as a fuzzy gray mold, often on lettuce or spinach leaves that are touching the soil or each other. Aggressive ventilation is the only effective preventative measure.
- Downy Mildew: A significant threat to spinach, this disease appears as yellow spots on the upper leaf surface with purple-gray fuzz on the underside. It is favored by high humidity and cool temperatures. Choosing disease-resistant varieties is the first line of defense.
- Vole Control: The warm, protected, and food-rich environment under the row covers is a paradise for voles. They can tunnel down a bed of spinach and destroy an entire crop in a few nights. Do not use poison baits, which can harm predators and persist in the soil. The most effective control is placing standard wooden snap traps, baited with peanut butter, every 10-15 feet under the row covers along the edges of the bed. Check and reset them twice a week.
How does soil thermal mass help regulate root zone temperatures in winter?
While we focus heavily on managing air temperature, the true secret to crop survival in a winter tunnel lies in the ground. The soil itself acts as a massive, passive solar collector and radiator—a thermal battery.
The Physics of Soil as a Heat Sink
During a sunny winter day, solar radiation warms the soil surface. This heat is conducted downwards into the soil profile. Because soil has a high heat capacity (especially when it contains a moderate amount of water), it can store a significant amount of thermal energy. When night falls and the air temperature inside the tunnel plummets, the warmer soil begins to radiate this stored heat back upwards. This creates a slightly warmer microclimate right at the soil level, protecting the sensitive crowns and root systems of your plants from freezing solid.
This is why even on a morning when the air temperature in the tunnel is 25°F (-4°C), the soil temperature a few inches down might still be 38°F (3°C). This root zone protection is what allows the plants to survive and even thrive.
Maximizing Your Soil's Thermal Battery
You can take several steps to enhance the soil's ability to act as a thermal battery:
- Maintain Adequate Moisture: Water is a key component of thermal mass. Dry soil cannot hold heat effectively. The soil should be kept moist, but not saturated. Saturated soil can lead to root rot and will freeze more easily. A final deep watering in late fall before the ground freezes solid can charge the soil with the moisture it needs for the winter.
- Use Dark Compost and Mulches: Dark-colored surfaces absorb more solar radiation than light-colored ones. Applying a half-inch layer of dark, finished compost to the bed surface in the fall will significantly increase the amount of solar energy the soil absorbs. While heavy straw mulch can be beneficial for field crops, a light layer of dark compost is often better inside the tunnel for this purpose. For more on compost, see our article on the science of composting and the carbon-nitrogen balance.
- Bed Preparation: Deeply worked, well-aerated soil has a better structure for both holding moisture and allowing heat to penetrate. Preparing beds with a broadfork rather than a rototiller helps maintain soil structure and porosity, which is beneficial for thermal regulation.
By managing your soil not just for fertility but also for its thermal properties, you add another layer of resilience to your winter growing system.
What storage crops should be integrated to guarantee winter share diversity?
Fresh greens grown in the high tunnel are the high-value stars of a winter CSA box, but they cannot fill the box alone. A successful and satisfying winter share relies on a 50/50 split (by weight or value) between fresh greens and hardy storage crops. These crops are grown in the main field during the summer and fall, harvested in bulk before the ground freezes, and then carefully stored to be distributed throughout the winter.
This strategy provides several key benefits:
- Guaranteed Volume: On the darkest, coldest weeks of winter, fresh harvests may be light. Storage crops provide the necessary bulk and calories to ensure members feel they are receiving good value.
- Culinary Diversity: Storage crops provide the hearty, storable ingredients that people crave in winter, such as roots for roasting and squash for soups.
- Risk Mitigation: A poor fall harvest of carrots is buffered by a great harvest of spinach, and vice-versa. Diversifying your offerings between tunnel crops and field crops makes your overall plan more resilient.
Essential Storage Crops and Their Requirements
Proper post-harvest handling is critical for long-term storage. Each crop has specific needs for curing (a short period at higher temperatures to heal wounds) and long-term storage.
| Crop | Recommended Varieties | Curing Protocol | Ideal Storage Temp (°F) | Ideal Storage Humidity (%) | Key Notes |
|---|---|---|---|---|---|
| Carrots | Bolero, Napoli | None needed. | 32-34°F | 95-98% | Harvest as late as possible. Do not wash. Store in perforated bags or bins to allow airflow while maintaining humidity. |
| Potatoes | Yukon Gold, Kennebec | 10-14 days at 55-60°F in the dark. | 38-40°F | 90% | Curing heals harvest wounds. Store in complete darkness to prevent greening and solanine production. |
| Winter Squash | Waltham Butternut, Delicata, Kabocha | 7-10 days at 80-85°F. | 50-55°F | 50-70% | Curing is essential for long storage life. Do not store in a root cellar with carrots; it's too cold and moist. |
| Onions | Patterson, Cortland | 2-3 weeks in a warm, dry, ventilated area until necks are tight. | 32-34°F | 65-70% | Must be completely cured and dry. Any moisture will lead to rot in storage. |
| Garlic | Music (Hardneck), Inchelium Red (Softneck) | 2-4 weeks in a shady, well-ventilated area. | 32-34°F (for culinary) | 65-70% | Proper curing is non-negotiable for preventing mold and ensuring long-term storage. |
| Beets | Boro, Red Ace | None needed. | 32-34°F | 95-98% | Remove green tops, leaving about 1 inch of stem to prevent "bleeding". Store like carrots. |
Building an efficient storage system, often involving a walk-in cooler with precise temperature and humidity controls, is a significant but necessary investment for a serious winter CSA. A clear understanding of what comes in a CSA box month-by-month can help you plan your storage crop quantities.
How do you structure winter distribution logistics to prevent produce damage?
Harvesting and distributing produce in freezing temperatures presents a unique set of logistical challenges. Standard summer operating procedures will fail, leading to crop loss, equipment damage, and crew discomfort. A winter-specific workflow is essential.
Cold Weather Harvest Protocols
The single most important rule of winter harvesting is: Never touch or harvest a frozen plant.
When the water inside a plant's cells is frozen, the leaves and stems are rigid. If you brush against, cut, or handle the plant in this state, the ice crystals will shatter the cell walls. When the plant thaws, these damaged areas will turn into a black, necrotic mush. You must wait for the ambient temperature inside the tunnel to rise above freezing and for the plants to become fully pliable before you can begin your harvest. On a cold but sunny day, this harvest window may only be open from 11:00 AM to 2:00 PM.
Winterizing the Wash/Pack Station
Washing greens in near-freezing water is not only brutal for your crew's hands but can also shock the produce. An efficient and humane winter wash/pack station needs upgrades.
- Tempered Wash Water: Install a small, on-demand propane water heater to raise your wash water temperature to a manageable 45-50°F (7-10°C). This small investment dramatically improves crew morale and efficiency.
- Preventing Ice Formation: In a very cold wash shed, the surface of your dunk tanks can begin to freeze. Use an air bubbler system (a regenerative blower connected to PVC pipes with small holes) to keep the water gently agitated, preventing ice from forming.
- Heated Spin-Drying: Greens spinners must be located in a heated space (above 40°F). If the stainless steel basket of the spinner is at a freezing temperature, the wet greens will instantly freeze to its sides upon contact, shredding the leaves.
For a deep dive on setting up your processing space, refer to our guide on designing an efficient wash pack station for small farms.
The "Heated Cooler" and Distribution Model
In deep winter, your walk-in cooler's job is reversed: it must keep produce from freezing, not just keep it cool. This is easily achieved by placing a small, oil-filled radiator space heater inside the cooler. Plug the heater into a thermostatic controller (like an Inkbird) with the probe placed in the center of the room. Set the controller to turn the heater on if the temperature drops to 34°F and turn it off at 36°F. This creates a fail-safe environment for your valuable root crops.
Finally, adjust your distribution model for winter. Weekly pickups can be a burden for members during snowy or icy conditions. A bi-weekly (every-other-week) distribution is the superior model. It reduces travel for members, lessens the risk of weather-related cancellations, and gives the farmer more time for harvests. For a 12-week season, this means 6 total pickups, which is a more manageable commitment for everyone.
How do winter CSA pricing models reflect increased production and heating costs?
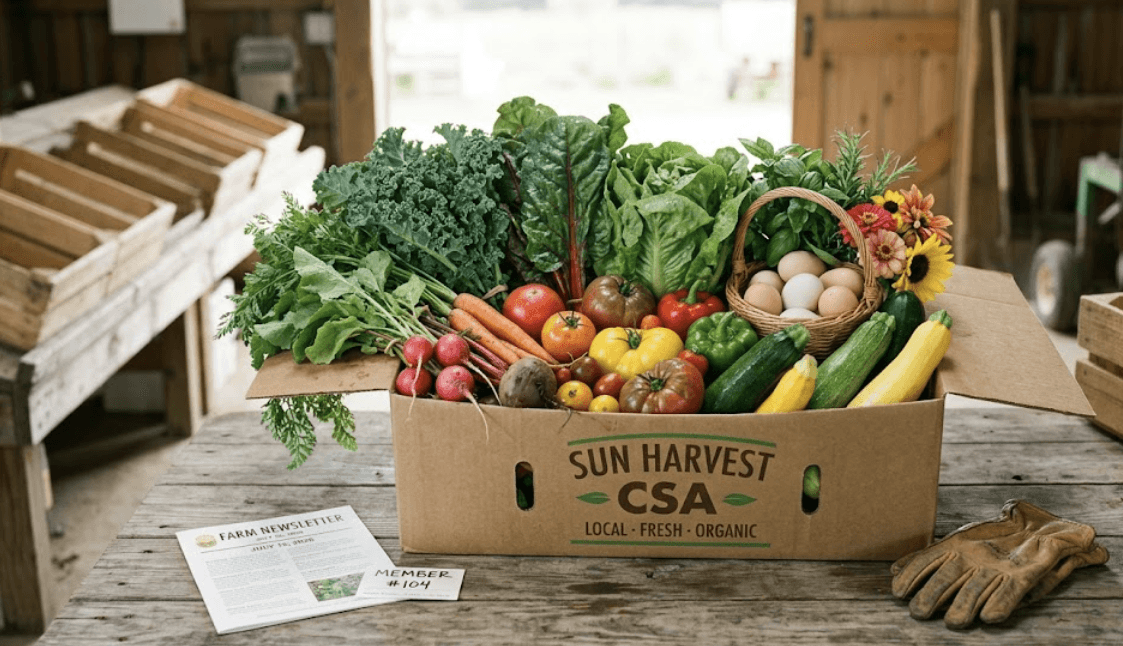
Pricing a winter CSA share requires a careful calculation of the true costs of production, which are significantly higher than in the summer. Farmers must account for infrastructure, increased labor, and higher risk, and price their shares accordingly. Do not make the mistake of pricing your winter share the same as your summer share.
Justifying the Premium Price Point
You are providing a premium product during a time of scarcity. Your pricing should reflect the following factors:
- Infrastructure Amortization: The cost of the high tunnel, inflation blower, and internal row covers must be paid for. A portion of this capital investment should be factored into the price of each share.
- Increased Labor: Winter growing is labor-intensive. The daily routine of venting tunnels and managing row covers requires consistent, skilled attention.
- Higher Risk: You face a greater risk of crop loss in the winter due to catastrophic weather events (tunnel collapse from snow) or pest pressure (an unchecked vole infestation).
- Reduced Yields: Even with protection, yields per square foot are generally lower in the winter than in the peak of summer, meaning each pound of produce costs more to grow.
Structuring the Offer and Price
As mentioned, a bi-weekly model is often best. A typical structure might look like this:
- Program: Bi-Weekly Winter CSA
- Duration: 12 weeks (e.g., mid-November to early February)
- Frequency: 6 total pickups (one every other week)
- Target Box Value: $50 - $60 per pickup
- Total Share Price: $300 - $360 (6 boxes x $50-$60)
To demonstrate value and justify the price, it's crucial to communicate the contents and retail value of a typical box to your members.
Anatomy of a Sample $55 Winter Box:
| Item | Quantity | Estimated Retail Value |
|---|---|---|
| Winter Spinach | 0.5 lbs | $8.00 |
| Salanova Lettuce Mix | 0.5 lbs | $7.00 |
| Frost-Sweetened Carrots | 2 lbs | $6.00 |
| Storage Potatoes | 3 lbs | $6.00 |
| Yellow Onions | 2 lbs | $4.00 |
| Butternut Squash | 1 large (3 lbs) | $6.00 |
| Winter Kale | 1 bunch | $4.00 |
| Watermelon Radishes | 1 lb | $4.00 |
| Hardneck Garlic | 2 heads | $5.00 |
| Fresh Parsley | 1 bunch | $3.00 |
| Total Estimated Value | $53.00 |
By clearly itemizing the contents, you show members that they are receiving fair, and often superior, value compared to what they might find at a specialty grocer. This transparency builds trust and is a key part of retaining members for your year-round programs, including those who are just learning what Community Supported Agriculture is for the first time.
Expert Insights & FAQs
What are the economic benefits of offering a winter CSA share?
A winter CSA transforms a farm's financial landscape by creating consistent cash flow during the traditional off-season, which is critical for covering overhead costs like salaries and loans. It allows for premium pricing due to lower competition and higher demand for local produce, while also increasing annual customer retention and loyalty.
What low-tech season extension structures are required for winter harvesting?
Successful winter harvesting in cold climates relies on a double-coverage system. This involves an unheated high tunnel (or greenhouse) as the primary structure, with low tunnels constructed over the beds inside. Each layer of protection effectively shifts the growing environment one full USDA hardiness zone warmer, creating a manageable microclimate.
How do crop selection and planting schedules differ for winter production?
Winter production hinges on the Persephone Period, when day length is under 10 hours and growth stops. Crops must be planted in late summer or early fall to reach 75-90% maturity before this period begins. Planting dates are calculated using a modified Days to Maturity (DTM) formula that accounts for slowing growth.
What temperature and ventilation management rules protect winter crops?
Winter crop protection focuses on trapping solar heat, managing humidity, and preventing extreme temperature swings. Key rules include ventilating the high tunnel when internal temperatures exceed 45-50°F to release moisture, and closing it by mid-afternoon to store daytime heat. This prevents condensation, which fuels fungal diseases like botrytis.
How does soil thermal mass help regulate root zone temperatures in winter?
Soil thermal mass refers to the soil's ability to absorb and store solar energy during the day and slowly release it overnight. This acts as a natural heat battery, protecting plant roots from freezing even when air temperatures in the high tunnel drop below 32°F. Deep, moist, and dark soil maximizes this effect.
What storage crops should be integrated to guarantee winter share diversity?
To ensure a full and diverse winter share, farms must integrate field-grown storage crops harvested in the fall. Key items include carrots, potatoes, winter squash, onions, garlic, and beets. These crops require specific curing and storage conditions (temperature and humidity) to maintain quality from November through March.
How do you structure winter distribution logistics to prevent produce damage?
Winter distribution requires modified procedures to prevent freezing. This includes never harvesting frozen greens, winterizing the wash station with a water heater, and using a "heated cooler" set to 34°F to protect stored crops. Adopting a bi-weekly pickup schedule reduces travel for members during inclement weather.
How do winter CSA pricing models reflect increased production and heating costs?
Winter CSA shares are priced higher than summer shares to cover the increased costs and risks of off-season production. This includes the amortization of infrastructure like high tunnels, higher labor costs for daily management, and the greater potential for crop loss due to extreme weather, justifying a premium price per box.
Johnnie McCormick
Zone 7b/8a - North Central Alabama
Johnnie McCormick is a gardening hobbyist and the founder of My Garden Spot. Raised in north-central Alabama, his passion for gardening began in his youth. In 2008, he established a large market garden, teaching himself high-yield growing methods. In the years since, he has operated seasonal seedling sales for transplants, specializing in heirloom tomatoes, peppers, eggplants, decorative ground covers like Ajuga (Bugleweed), marigolds, nasturtiums, and fresh kitchen-window herb arrangements (basil, cilantro). Today, he gardens in the hills between Birmingham and Jasper, Alabama (Zone 7b/8a), sharing practical, community-focused gardening resources.
Verified Authoritative Citations & References
In alignment with our strict E-E-A-T research and verification guidelines, this guide cross-references data from the United States Department of Agriculture (USDA) and Cooperative Extension Service programs.
- USDA Agricultural Marketing Service (AMS): Community Supported Agriculture (CSA) standards and local market surveys. ams.usda.gov
- Penn State Extension: Small Farm Economics, financial planning, and crop pricing research documents. extension.psu.edu
- Cornell Cooperative Extension: Market gardening business planning and local sales guidelines. smallfarms.cornell.edu
- Alabama Cooperative Extension System (ACES): Local food regulations, CSA legal permits, and farm safety standards. aces.edu

Please log in to view comments.